What Is the Average Cost of AC Repair in Three Points, AZ?

When your air conditioner breaks down in the scorching heat of Three Points, AZ, one of the first questions that likely comes to mind is: “How much will this AC repair cost me?” On average, homeowners in the area can expect to pay anywhere from $150 to $600 for standard AC repair services, although more extensive issues can reach over $1,000 depending on the problem and the type of unit. 

In a desert climate like that of Three Points, air conditioning isn’t just a comfort, it’s a necessity. Whether you’re dealing with poor airflow, warm air blowing from your vents, or unusual noises from your system, it’s crucial to act fast before minor problems turn into major (and more expensive) ones. 

This blog will guide you through the average AC repair costs in Three Points, the various factors that influence pricing, and the most common signs that your HVAC unit needs repair. We’ll also address some frequently asked questions and wrap things up with actionable advice on how Cummings Plumbing, your trusted local team, can help you restore comfort to your home quickly and affordably. 

Factors That Influence the Average Price of AC Repair in Three Points

Understanding what drives the cost of AC repair in Three Points, AZ is essential for homeowners and business owners alike. These factors are interconnected, and being informed about them can help you avoid surprise expenses and plan smarter. Let’s break it down in greater detail:

1. Type of Repair Needed

Not all AC issues are created equal. The nature of the repair directly affects your bottom line. For example:

  • Simple Repairs: These might include replacing fuses, relays, capacitors, or cleaning clogged drain lines. Expect to pay between $100 and $300.
  • Moderate Repairs: Thermostat replacement, fan motor issues, or refrigerant recharging generally range between $200 and $600.
  • Complex Repairs: Compressor failure, evaporator coil replacement, or fixing electrical problems can easily exceed $1,000.

Knowing what kind of issue you’re facing is key. Diagnostic tests are typically required upfront, which brings us to the next factor.

2. Diagnostic and Service Fees

Most HVAC technicians charge a diagnostic fee, typically $70 to $120, to inspect your system and determine the issue. Some companies waive this fee if you agree to move forward with the repair. Always confirm this policy beforehand to avoid hidden charges.

This fee covers labor for the inspection and use of specialized tools and meters. Companies that use advanced diagnostic tech like thermal imaging or refrigerant leak detectors may charge slightly more but often save you time and prevent misdiagnosis.

3. Age and Efficiency of the HVAC System

Older systems (typically 10–15 years and up) tend to require more frequent repairs due to wear and tear. Not only are they harder to fix due to outdated parts, but they also lack the energy efficiency of newer models. As a result:

  • Parts May Be Obsolete: If your system uses R-22 refrigerant (phased out in the U.S.), replacing or recharging it can be costly.
  • More Frequent Breakdowns: Older units may have multiple failing components, increasing labor and time.
  • Cost-Benefit Ratio: At a certain point, repairs become less cost-effective than upgrading to a new system.

4. System Type and Brand

The brand and system configuration of your AC play a major role in determining costs. Here’s how:

  • Central AC vs. Ductless Mini-Split: Central air systems are more common but tend to involve more ductwork-related issues, while mini-splits have fewer moving parts but often require specialized service.
  • Heat Pumps: These systems double as heaters and coolers, so repairs may involve additional components.
  • Brand-Specific Parts: Some brands (like Lennox, Trane, or Carrier) may require proprietary components or brand-certified technicians, which can increase costs by 10-20%.

When searching for AC repair service, it helps to choose professionals familiar with your system’s make and model to avoid delays and ensure accuracy.

5. Time of Year and Seasonal Demand

Arizona summers are brutal, and Three Points is no exception. Demand for air conditioning repair service peaks during the hottest months, typically from May through September. During this time:

  • Wait Times May Be Longer: Technicians may be booked days in advance.
  • Premium Pricing: Due to high demand, prices may temporarily increase, especially for emergency or same-day service.
  • Prevention Pays: Scheduling maintenance or repairs in spring or fall (the off-season) can save you 10-30%.

Booking seasonal tune-ups also helps catch small issues before they become costly emergencies.

6. Emergency vs. Scheduled Repairs

Not all repairs happen at convenient times. If your unit breaks down on a Friday night or during a heatwave, you may need emergency HVAC unit repair. Emergency services typically cost more because of:

  • After-Hours or Weekend Surcharges: These can add $100-$300 to the final bill.
  • Immediate Technician Dispatch: The cost reflects quicker response and prioritization.
  • Limited Parts Availability: If parts aren’t on hand, special-ordering or same-day delivery fees may apply.

To reduce emergency repair risk, invest in preventative maintenance and have your system serviced regularly.

7. Accessibility and Installation Complexity

If your AC unit is located in a hard-to-reach place (e.g., attic or rooftop), repair labor may be more expensive. Technicians may need special ladders, harnesses, or safety equipment, increasing labor time and cost. Complex installations, like split systems with multiple zones, also require more expertise and time to troubleshoot.

8. Ongoing Maintenance and Warranty Coverage

If your system is under a manufacturer’s warranty, many part replacement costs might be covered, reducing your out-of-pocket expense. However:

  • Labor Is Often Not Covered: You may still have to pay for the technician’s time.
  • Improper Maintenance Can Void Warranty: Skipping routine service visits may lead to denied claims.

It’s worth investing in a maintenance plan with a local company offering HVAC repair, as these plans typically include free diagnostics, priority service, and discounted repairs.

Frequently Asked Questions About AC Repair

1. How long does AC repair usually take?

Most repairs take between 1–3 hours. Complex issues like compressor replacement may require a full day.

2. Is it better to repair or replace my AC?

If your system is over 10–15 years old and the repair exceeds $1,000, replacement might be more cost-effective.

3. How often should I schedule maintenance?

Twice a year; once in the spring and once in the fall, is ideal for peak performance and longevity.

AC Repair Experts You Can Count On In Three Points, AZ!

Whether you’re facing a small glitch or a major system failure, getting timely air conditioning repair service is crucial in the Arizona heat. With the average cost of AC repair in Three Points ranging from $150 to $600, knowing what to expect helps you make smart, budget-friendly choices.

That’s where Cummings Plumbing comes in. As trusted HVAC specialists in the Three Points area, we’re committed to offering honest, affordable, and efficient AC repair solutions. Our licensed professionals handle everything from diagnostics and minor fixes to complete HVAC unit repair with same-day service available in most cases.

Schedule a visit with Cummings Plumbing today and get your home back to cool, comfortable, and worry-free.

What is the Average Cost of AC Repair in Vail, AZ?

The average cost of AC repair in Vail, AZ typically ranges between $150 and $1,200, depending on the type of repair needed. Minor fixes like thermostat replacements can be on the lower end, while major repairs such as compressor replacements or refrigerant leaks can be more expensive. The best way to determine the cost of a specific repair is to schedule an inspection with a professional HVAC technician.

Costs can also vary depending on whether you need a single-part replacement or a more comprehensive system repair. Some homeowners may find that investing in routine maintenance can help avoid expensive breakdowns, ensuring their AC system runs efficiently for years. Additionally, obtaining multiple quotes from reputable companies like Cummings Plumbing can provide a better understanding of your repair needs.

Factors That Affect AC Repair Costs

Several factors influence how much you will pay for AC repair services:

  • Type of Repair: Simple fixes like capacitor or thermostat replacements cost less than major component repairs.
  • Labor Costs: The complexity of the job and technician experience impact service charges.
  • Parts Replacement: Higher-end or specialized parts increase costs.
  • Seasonal Demand: Peak summer months often lead to higher service prices due to increased demand.
  • Warranty Coverage: If your AC unit is under warranty, some repair costs may be covered.
  • Unit Age and Condition: Older units tend to require more expensive repairs due to parts availability and overall wear and tear.
  • Emergency Repairs: After-hours or urgent repair services often come with additional fees.
  • Accessibility of the Unit: If the AC unit is difficult to access, such as being installed on a roof or in a tight attic space, labor costs may increase.
  • Type of Refrigerant Used: Some older units use outdated refrigerants like R-22, which are more expensive and harder to source compared to modern refrigerants like R-410A.

At Cummings Plumbing, our experienced technicians provide transparent pricing and high-quality service to keep your cooling system running efficiently. We also provide maintenance plans to help prevent expensive repairs and extend the lifespan of your AC system. Homeowners can also benefit from energy-efficient upgrades that may lower long-term repair costs.

Common AC Repairs and Their Costs

Here are some common AC repairs and their estimated costs in Vail, AZ:

  1. Thermostat Replacement: $150 – $400
    • If your thermostat is malfunctioning, your AC unit may not regulate temperature properly.
    • Smart thermostats can improve efficiency but may cost more upfront.
  2. Capacitor Replacement: $200 – $350
    • The capacitor helps start and run the compressor and fan. If it fails, your AC won’t function correctly.
    • A bad capacitor can sometimes cause intermittent cooling issues before failing.
  3. Refrigerant Recharge: $300 – $600
    • A low refrigerant level can result in warm air blowing from your vents.
    • If there’s a leak, it must be repaired before recharging, which can increase costs.
  4. Evaporator Coil Repair/Replacement: $600 – $1,200
    • This component helps absorb heat from indoor air and needs to be in optimal condition.
    • Dirty coils can reduce efficiency and may need to be cleaned regularly to prevent issues.
  5. Compressor Repair/Replacement: $1,000 – $2,500
    • The compressor is the heart of your AC system. A major failure may necessitate a full replacement.
    • In some cases, it may be more cost-effective to replace the entire unit if the compressor is failing.
  6. Blower Motor Repair: $300 – $900
    • A faulty blower motor can result in weak or no airflow from your vents.
    • If the motor overheats frequently, it may be an indication of further electrical issues.
  7. Ductwork Repair: $500 – $2,000
    • Leaks or blockages in your duct system can decrease efficiency and increase energy bills.
    • Poorly sealed ducts can lead to inconsistent temperatures in different rooms.

Choosing Cummings Plumbing ensures expert diagnostics and repairs, preventing further costly issues. Our technicians assess each situation to provide the most cost-effective and reliable solutions. Regular servicing can also help homeowners prevent these common issues before they escalate into expensive repairs.

Signs Your AC Needs Repair

If you notice any of the following issues, it’s time to schedule a repair:

  • Weak or warm airflow
  • Unusual noises like banging, buzzing, or hissing
  • Frequent cycling on and off
  • Higher energy bills without increased usage
  • Bad odors coming from the vents
  • Water leaks around the unit
  • Frozen evaporator coils
  • The thermostat not responding correctly
  • Poor indoor air quality due to dirty or clogged filters

Ignoring these warning signs can lead to more expensive breakdowns. Regular maintenance and timely repairs help avoid major system failures. Cummings Plumbing offers prompt diagnostics and repairs to prevent breakdowns and high utility bills. Our certified technicians can quickly identify the root cause of your AC problems and recommend the best course of action. Homeowners can also schedule seasonal checkups to detect issues before they become costly problems.

How to Save on AC Repair Costs

While AC repair is essential, here are some ways to reduce your expenses:

  • Schedule Regular Maintenance: Preventative maintenance can catch minor issues before they turn into costly repairs.
  • Replace Air Filters Regularly: Clogged filters make your AC work harder, leading to breakdowns.
  • Check for Warranty Coverage: Manufacturer or extended warranties can cover part replacements.
  • Address Issues Early: Delaying repairs can result in more expensive fixes later.
  • Consider an Energy-Efficient Upgrade: Sometimes, upgrading to a newer, energy-efficient system can save you more in the long run.
  • Seal Air Leaks in Your Home: Ensuring that your home is properly insulated can reduce the strain on your AC unit and lower energy bills.
  • Use a Programmable Thermostat: Setting schedules to reduce cooling when not needed can prolong the life of your AC system.

For affordable repairs, trust Cummings Plumbing for honest pricing and professional service. We also offer maintenance plans that include seasonal checkups to keep your AC running efficiently.

The Final Verdict on AC Repair in Vail, AZ

Understanding the average cost of AC repair in Vail, AZ helps you plan for potential expenses. From minor fixes to major component replacements, prices can vary based on multiple factors. Regular maintenance and timely repairs can help extend your AC unit’s lifespan and reduce costs over time.

When you need fast, reliable, and affordable AC repair in Vail, AZ, trust Cummings Plumbing. Our expert technicians are dedicated to keeping your home cool and comfortable. Contact us today to schedule a service appointment!

Frequently Asked Questions About AC Repair in Vail, AZ

1. Why does my AC keep turning on and off frequently?

Frequent cycling, also known as short cycling, is often caused by an oversized AC unit, low refrigerant levels, or a malfunctioning thermostat. A professional inspection can determine the root cause and recommend a fix.

2. Can a dirty air filter cause AC issues?

Yes, a clogged or dirty air filter can restrict airflow, making your AC work harder and increasing energy consumption. It can also cause freezing on the evaporator coils, reducing cooling efficiency. Replacing your filter regularly helps maintain optimal performance.

3. How can I tell if my AC compressor is failing?

Signs of a failing compressor include weak airflow, warm air from vents, loud noises, and higher energy bills. If you suspect compressor issues, it’s crucial to schedule a professional inspection with Cummings Plumbing before the damage worsens.

Understanding Mini Split Error Codes and What They Mean

In today’s world, where comfort and efficiency are paramount, mini split systems have become a popular choice for heating and cooling. These systems are known for their versatility, energy efficiency, and ability to provide zone-specific temperature control.

However, like any other complex system, mini splits can sometimes encounter issues, and when they do, they communicate through error codes. Error codes are more than just a series of letters and numbers; they are your system’s way of telling you something is wrong.

By recognizing these codes and understanding what they mean, you can take the necessary steps to troubleshoot and fix minor issues yourself or know when it’s time to call in a professional. In this article, we’ll help you understand mini split error codes and what they mean, as well as how you can address them to keep your system running smoothly. Let’s jump straight in!

The Basics of Mini Split Systems

Before diving into error codes, it’s essential to understand the fundamentals of mini split systems. Mini split systems have two components, one on the inside and the other outdoors. These units are connected by refrigerant lines and work together to provide heating or cooling to specific zones within a building.

However, the advanced technology that makes these systems so efficient also means they rely heavily on electronic components and sensors to operate correctly. Understanding the basic operation of mini split systems and the role of each component sets the stage for grasping why and how error codes appear.

These codes are not random; they are precise signals pointing to specific system problems. By learning to interpret these codes, you can keep your mini split running smoothly and avoid unnecessary downtime or expensive repairs.

What Do The Common Mini Split Error Codes Indicate? 

Now that we have a grasp of how mini split systems function, let’s explore the most common error codes you might encounter. These codes are designed to help diagnose issues quickly, whether it’s something you can fix yourself or a problem that requires professional attention.

E1 – High Pressure Error

The E1 code is among mini split systems’ most frequently seen error codes. It typically indicates that there is high pressure within the system, which dirty coils can cause blocked airflow or overcharged refrigerant.

Solution: Take a careful look at the coils in both units, removing any dirt you might come across. If everything seems fine but the error persists, it might be necessary to have a professional check the high-pressure switch and refrigerant levels.

E3 – Low Pressure 

This could result from clogged filters, undercharged refrigerant, or refrigerant leaks. The effects of low pressure affect the effectiveness of the unit, leading to diminished performance and an eventual complete shutdown.

Solution: Inspect the air filters, which can affect the airflow when they are dirty or clogged. Also, see if anything is blocking the coils. If these steps don’t resolve the issue, a technician should check the refrigerant charge and inspect the system for potential leaks.

F1 – Indoor Ambient Sensor Malfunction

The F1 error code points to a malfunction in the indoor ambient sensor. When it fails, the system may not be able to regulate the temperature accurately, leading to discomfort and inefficiency.

Solution: First, check the sensor to ensure it’s not obstructed or dirty. Cleaning the sensor might resolve the issue. If the error persists, recalibrating or replacing the sensor might be necessary. Given the importance of this component, it’s often best to have a professional handle any sensor-related issues.

H1 – Defrost Mode Issue

The H1 code indicates that the mini split system is in defrost mode. This mode is crucial for maintaining the system’s efficiency, particularly in colder climates where ice can build up on the outdoor unit.

Solution: If the system gets stuck in this mode, it could be due to a malfunctioning control sensor or heat exchange. The technician will likely inspect the control sensor or heat exchanger and determine if they need repair or replacement.

H5 – Intelligent Power Module (IPM) Protection

The H5 error code signals that the system’s Intelligent Power Module (IPM) has detected an issue, typically related to voltage or temperature irregularities. This part of the unit helps project the compressor from damage.

Solution: This error often requires immediate professional intervention. A technician will need to assess the voltage supply and temperature conditions to ensure the compressor is not at risk of damage. This might involve stabilizing the electrical supply or addressing overheating issues.

Troubleshooting Mini Split Error Codes

Understanding what each error code means is only the first step. In this section, we’ll walk through some general troubleshooting steps you can take before deciding whether to call in a professional.

General Troubleshooting Steps

When you encounter an error code on your mini split system, it’s essential to start with some basic checks:

  1. Check the Power Supply: To check if the power supply is faulty, turn the entire unit off, unplug it for a few minutes, and then turn it back on. If the code persists, the issue is not the power supply.
  2. Inspect Wiring Connections: Loose or damaged wiring between the indoor and outdoor units can trigger various error codes. If you find any loose wires, reconnect them carefully. However, if the wiring appears damaged, it’s best to contact a professional.
  3. Clean Air Filters and Coils: Dirty air filters or coils are common culprits behind many error codes, such as E1 and E3. A regular cleaning schedule helps keep the system performing without interruptions.
  4. Check the Sensors: Sensors are crucial for the system’s operation, and their issues can lead to error codes like F1 or F2. Make sure the sensors are clean and properly aligned. If you suspect a sensor is faulty, it might need to be replaced, which could require professional help.
  5. Reset the System: Resetting the system is often a quick way to resolve any type of mini split error code. If it doesn’t, the issue is serious and will require expert intervention.

These steps are simple enough for most homeowners to handle and can often resolve minor issues without the need for professional assistance.

A+ Rated Heating & Cooling Service in Tucson!

If you want to have a mini split system that works flawlessly, you’ll need to invest time in understanding mini split error codes and what they mean. Being proactive can save you time and money and help you deal with the discomfort of a malfunctioning system, whether it’s high pressure due to dirty coils, low pressure from a refrigerant leak, or a sensor malfunction.

Regular preventative maintenance, including cleaning, inspecting components, and scheduling professional check-ups, is the best way to keep your mini split system running smoothly. Not only does this help in avoiding error codes, but it also enhances energy efficiency and extends the life of your system.

If you’re experiencing persistent issues or need expert assistance, don’t wait—reach out to us at Cummings Plumbing Heating & Cooling. We have an expert team of highly-trained professionals and a pedigree of satisfied clients ranging back more than 35 years.

How To Prepare Your AC System For Spring In Tucson

TL;DR: Prepare your AC system for spring in Tucson by cleaning the outdoor unit, replacing air filters, and scheduling a professional HVAC check. Ensure optimal performance and efficiency to beat the heat. Simple DIY tips complement professional maintenance for a worry-free summer.

Warm temperatures in the desert are headed our way and steadily climbing, which means it’s time to think about your Spring Maintenance and Repairs for your HVAC System to ensure your home stays cool and comfortable throughout spring and summer. . Preparing your AC for the spring isn’t just about ensuring comfort during the scorching summer months; it’s about optimizing system efficiency, reducing energy costs, and preventing mid-summer breakdowns.

In this guide, we’ll walk you through the essential steps to get your cooling system ready for the heat, blending DIY advice with tips on when to call in the professionals. Whether you’re a seasoned Tucsonan or new to the area, these insights will help you stay cool and comfortable, all while safeguarding your investment in your home’s HVAC system.

Why Spring Maintenance is Crucial for Your AC System in Tucson

In Tucson, where the sun’s warmth rapidly intensifies as spring progresses, preparing your air conditioning system for the season is crucial, not just for ensuring indoor comfort but also for maintaining system efficiency and reliability. The dormant months can leave your AC less than ready to tackle the desert heat, with accumulated dust and debris potentially straining its operation. This not only hikes up energy bills due to reduced efficiency but also increases the risk of system failure just when you need cooling the most. Spring maintenance serves as a preemptive strike, identifying issues such as refrigerant leaks or electrical malfunctions early on to avoid unexpected breakdowns during the peak summer months.

Moreover, the role of your AC system extends beyond merely cooling your space; it significantly influences the indoor air quality. Dust, allergens, and other particulates that have settled in your system over the cooler months can compromise the air you breathe as soon as you switch the AC on. Addressing these issues through thorough spring cleaning not only ensures the air in your home remains healthy but also extends the lifespan of your AC system. In a city like Tucson, where the transition from mild spring to scorching summer can occur swiftly, taking proactive steps to ensure your AC is in top shape is essential for maintaining comfort, health, and overall system longevity.

DIY Maintenance Tips to Prepare Your AC System for Spring

While professional servicing is essential for comprehensive maintenance, there are several DIY tasks that Tucson homeowners can undertake to ensure their AC system remains in optimal condition. Performing these tasks regularly can help maintain your system’s efficiency, prolong its lifespan, and even prevent costly repairs down the line. Here’s a list of manageable maintenance tasks that you can do yourself:

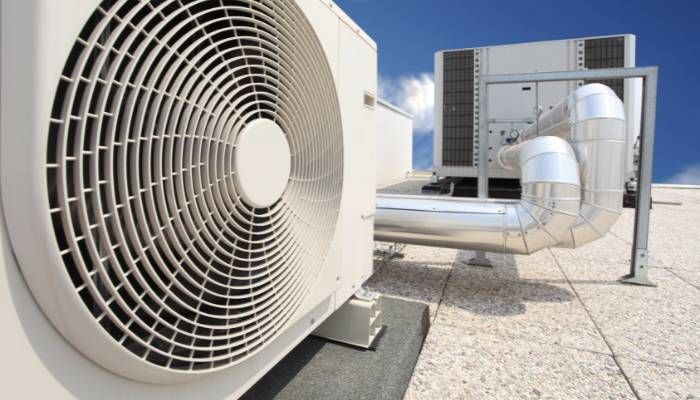
Keep the Area Around the Outdoor Unit Clear: Ensure that the outdoor component of your AC system is free from debris, such as leaves, branches, and dirt. Maintain at least a 2-foot clearance around the unit to facilitate proper airflow and prevent overheating. This simple task can significantly impact the efficiency and longevity of your system.

Clean the AC Unit’s Fins: The fins on the outdoor unit can become clogged with dust and debris, reducing airflow and impairing the system’s ability to cool your home. Gently brush off the debris with a soft brush, and use a garden hose to rinse the fins from the inside out. Be careful not to use a pressure washer, as high pressure can damage the fins.

Check and Secure Electrical Connections: Loose electrical connections can cause your system to run inefficiently or even pose a safety hazard. Ensure that all electrical connections are tight and secure. If you’re not comfortable working with electricity, this is a task best left to professionals.

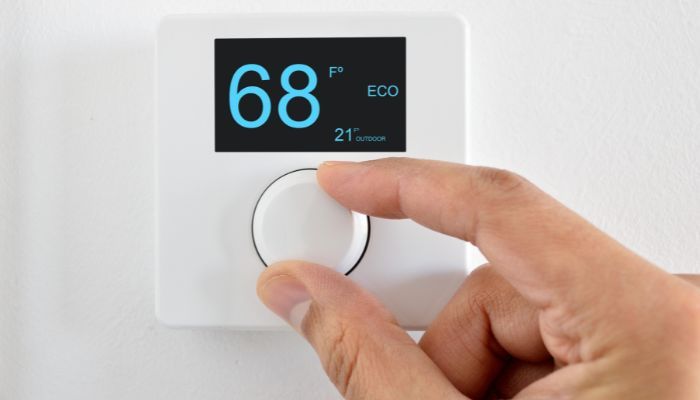
Monitor Thermostat Performance: Regularly check your thermostat to ensure it’s working correctly. If you notice discrepancies between the set temperature and the actual temperature in your home, it may be time to replace the batteries or consider upgrading to a more efficient model.

Listen for Unusual Noises: Pay attention to the sounds your AC system makes. Banging, rattling, or hissing sounds can indicate a problem, such as loose parts, a refrigerant leak, or a malfunctioning compressor. Identifying these issues early can prevent more significant problems later.

Inspect and Clean Air Vents: Ensure that all air vents in your home are open and free from obstruction. Use a vacuum to remove dust and debris from the vents to improve air flow and enhance your system’s efficiency. This not only helps your AC but also improves indoor air quality.

By incorporating these DIY maintenance tasks into your routine, you can contribute significantly to the health and efficiency of your AC system. Remember, though, that these tasks complement, rather than replace, professional maintenance. Together, they ensure that your system is ready to keep you cool through the hot Tucson spring and summer.

The Importance of Professional HVAC Maintenance

As spring approaches in Tucson, with its promise of rising temperatures, the importance of having your air conditioning system professionally serviced cannot be overstated. While DIY maintenance tasks are beneficial, a professional HVAC technician brings a level of expertise and thoroughness that goes beyond what most homeowners can achieve on their own. Here’s why hiring a professional HVAC company for spring maintenance is crucial for your system’s efficiency, longevity, and reliability.

Comprehensive System Inspection and Service: Professional technicians perform a detailed inspection of your entire system, including areas not typically accessible to homeowners. They check for issues like refrigerant leaks, efficient thermostat operation, electrical system integrity, and proper airflow. This comprehensive approach ensures that every component of your AC system is optimized for peak performance.

Expert Identification and Resolution of Potential Issues: HVAC professionals have the training and experience to identify subtle signs of wear and tear or impending failure that the untrained eye might miss. Early detection and repair of such issues can prevent costly breakdowns during the hottest parts of the year, ensuring your comfort and safety.

Enhanced Efficiency and Energy Savings: A well-maintained AC system operates more efficiently, which translates into energy savings and reduced utility bills. Professional maintenance includes tuning up the system to ensure it runs as efficiently as possible. Technicians also provide advice on any upgrades or adjustments that could further improve efficiency and save money in the long run.

Prolonged System Lifespan: Regular professional maintenance extends the life of your AC system by preventing excessive wear and tear on its components. This not only saves you money on premature replacement costs but also ensures that your system remains reliable for years to come.

Safety: HVAC systems involve complex electrical components and potentially hazardous materials like refrigerants. Professional technicians are trained to handle these elements safely, reducing the risk of injury or property damage that could occur with DIY attempts.

Warranty Compliance: Many AC systems come with warranties that require regular professional maintenance to remain valid. By hiring a professional HVAC company for spring maintenance, you help ensure that your system’s warranty stays intact, providing added protection for your investment.

In summary, while performing basic maintenance tasks yourself is beneficial, the expertise and comprehensive service offered by professional HVAC technicians are indispensable. Their ability to thoroughly inspect, maintain, and repair your system ensures that your AC runs smoothly, efficiently, and safely throughout the scorching Tucson spring and summer. Investing in professional spring maintenance is an investment in your comfort, peace of mind, and the long-term health of your air conditioning system.

Preparing for the Heat: Upgrades and Replacements

Preparing for the heat, especially in regions where summer temperatures soar, necessitates strategic upgrades and replacements within your home to ensure comfort, efficiency, and safety. One critical area of focus should be your cooling system. Aging air conditioners or inefficient fans not only struggle to keep up with the demands of a hot day but also consume excessive energy, leading to inflated electricity bills.

Considering an upgrade to a more energy-efficient air conditioning system, or investing in smart fans that automatically adjust speeds based on the room temperature, can make a significant difference. Additionally, replacing old, leaky windows with double-glazed or tinted glass options can help keep the heat out and the cool air in, further enhancing your home’s ability to maintain a comfortable temperature without over-relying on artificial cooling.

Professional HVAC Services Near Your

In conclusion, preparing your AC system for spring in Tucson is an essential step towards ensuring a comfortable, efficient, and hassle-free summer. By engaging in regular maintenance, cleaning, and timely upgrades or repairs, homeowners can significantly enhance the performance and longevity of their cooling systems. With Tucson’s unique climate challenges, taking proactive measures not only safeguards against unexpected breakdowns but also optimizes energy use, ultimately leading to lower utility bills and a reduced environmental footprint. A little preparation goes a long way in ensuring that your home remains a cool sanctuary throughout the scorching months ahead.

As you embark on preparing your AC system for the spring in Tucson, there’s no better partner for your maintenance and upgrade needs than Cummings Plumbing, Heating, Cooling, and Electrical. With years of experience navigating the unique challenges of the Tucson climate, Cummings offers a comprehensive range of services tailored to ensure your cooling system operates at peak efficiency when you need it most.

From routine maintenance checks and professional cleanings to the latest in energy-efficient upgrades and repairs, their team of certified professionals is dedicated to providing top-notch service and expert advice. Trust Cummings to keep your home comfortable, your energy bills low, and your AC system running smoothly throughout the spring and beyond!

Frequently Asked Questions About HVAC Services

How often should I change the air filters in my AC system?

In the Tucson area, given the high dust levels and usage patterns, it’s recommended to check your air filters monthly and replace them at least every 60-90 days. During periods of high use or if you have pets, more frequent changes may be necessary to ensure optimal air quality and system efficiency.

Is it really necessary to have a professional HVAC service check my AC system?

Yes, professional servicing is crucial for maintaining the efficiency, safety, and longevity of your AC system. A professional can detect issues that aren’t visible to the untrained eye, such as refrigerant leaks or electrical issues, and can ensure your system is prepared to handle the Tucson heat. It’s recommended to schedule this service annually, ideally in the spring.

Can I perform any part of the AC system maintenance myself?

Yes, there are several maintenance tasks you can do yourself, such as cleaning or replacing the air filters, clearing debris from around the outdoor unit, and making sure all your vents are open and unobstructed. However, for more technical aspects like refrigerant levels, electrical components, and ductwork inspection, you should rely on a professional.

Why is it important to check the insulation on refrigerant lines?

Insulation on refrigerant lines helps maintain the efficiency of the heat transfer between your indoor and outdoor units. Over time, insulation can degrade due to weather or pest activity, leading to energy loss and reduced cooling efficiency. Checking and replacing damaged insulation is a simple step that can have a significant impact on your AC system’s performance.

How To Know If Your HVAC Is Leaking Carbon Monoxide

TL;DR: Carbon monoxide (CO) is a dangerous gas released by faulty heating systems, posing serious health risks. Symptoms include headaches, nausea, confusion, and even death. Signs of leaks include a yellow pilot light, soot, lack of chimney updraft, stale air, and condensation on windows. Protect yourself with carbon monoxide detectors, regular HVAC maintenance, and professional inspections. Considerations before repairs include pre-season check-ups, optimizing thermostat settings, tightening electrical connections, lubricating parts, cleaning filters and coils, checking refrigerant levels, inspecting gas connections, and hiring professional help when needed. Cummings Plumbing in Tucson offers HVAC repair and installation services with experienced technicians.


Carbon monoxide (CO) is a gas that doesn’t have odor, color, or taste. But if humans or animals come across it in high concentrations, it can have toxic effects on them. That means it is essential to ensure you are not releasing any into the air through your heating system, a topic we’ll discuss in today’s article. 

Carbon monoxide from a heating unit, such as a furnace, is released due to deficient ignition of carbon-containing fuels. Some home furnaces can release CO in the air, both outside your residence and inside. This is less likely to happen with some of the newer and modern HVAC systems, but it’s still wise to know the signs that you have high levels of CO inside your home. 

Average carbon monoxide levels in indoor and home settings vary from 0.5 to 5 parts ppm and may reach 30 ppm or higher. If the levels are on the higher end of the scale, you could be dealing with carbon monoxide leaks. But how to know if your HVAC is leaking carbon monoxide? Stick around for the rest of this article to learn more!

Understanding the Risks of Carbon Monoxide Leaks

Even if you don’t know exactly how to tell whether you have a carbon monoxide leak in your home, you might get some hints from the symptoms you experience. Upon exposure to this gas, you may get migraines, shakiness, sickness, and confusion, while exposure to the gas in high concentrations can be lethal. 

Extensive exposure to low levels of carbon monoxide can also lead to serious health issues. For this reason, frequent maintenance and careful observation are vital to avoid leaks and guarantee the safety of your HVAC system, especially if you use a gas furnace or burner regularly.

Signs of Potential Carbon Monoxide Leaks

Carbon monoxide may be hard to notice, but it’s not impossible to tell whether it is present in the air in your home. Any home can be affected by a carbon monoxide leak since HVAC systems and other devices can release it. You can protect your household by learning the signs of carbon monoxide leaks and how to recognize them. 

  • Yellow or Flickering Pilot Light: A flickering pilot light with a yellow hue on your gas furnace could indicate carbon monoxide production. A properly functioning furnace should have a blue flame, so any divergence from this could be a concerning sign of potential gas leaks.
  • Soot or Rust: Seeing soot or rust around the furnace or vents may indicate a carbon monoxide leak. This could be a hint of incomplete combustion and the discharge of carbon monoxide into your living space.
  • Lack of an Updraft in Your Chimney: If your chimney does not produce an updraft during the operation of the furnace, it could signal a blockage or improper ventilation. This may lead to carbon monoxide accumulation and leakage.
  • Stale or Stuffy Air: Does the air condition in your home seem dry and heavy? This may be due to improper ventilation caused by a carbon monoxide leak. This can occur together with a lack of fresh air and a feeling of discomfort.
  • Excessive Condensation on Windows: Abnormally high condensation levels on windows could indicate foul air in your home. These may be caused by a carbon monoxide leak, hinting at a malfunction in the HVAC system.

Taking Action to Address Potential Leaks

Carbon monoxide’s unscented, flavorless, and uncolored characteristics may cause unexpected leaks from faulty heating systems. Every year, over 400 people get poisoned and pass away from unexpected carbon monoxide poisoning in America. 

Thus, taking immediate action to eliminate potential carbon monoxide leaks is essential. Let’s explore the most effective ways to protect yourself and your family members from this silent threat.

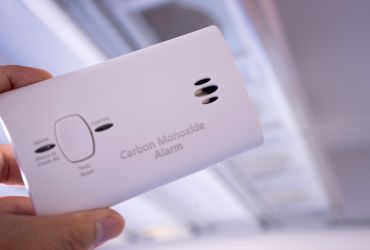
  • Place Carbon Monoxide Detectors: If you fear there are carbon monoxide leaks in your property, place carbon monoxide detectors.. These appliances can signal the presence of carbon monoxide, allowing you to take prompt action to freshen the area and turn off the HVAC system if mandatory.
  • Schedule Regular HVAC Maintenance: Orderly upkeep of your HVAC system is essential for preventing carbon monoxide leaks. Professional HVAC technicians can inspect the system, clean the components, and ensure that all vents and pipes are clear of gas interferences.
  • Check Vents and Flues: Frequently inspect your HVAC system’s vents and pipes to ensure they are free from obstructions or dirt accumulation. Blockages can cause improper ventilation and potential carbon monoxide residue.
  • Seek Professional Assistance: If you notice any potential signs that signal a future developing carbon monoxide leak, it is very important to seek professional assistance as soon as possible. HVAC professionals can perform a detailed inspection of your system to detect and fix any issues.

Considerations Before Scheduling a HVAC System Repair 

Organizing professional repair for your HVAC system is crucial to ensure it operates effectively and to prevent potential issues. Regular maintenance can make your system more durable, improve energy efficiency, and help avoid expensive repairs. Here is what you need to consider before scheduling an appointment with a professional service:

  • Annual Pre-Season Check-Ups: Plan to have your cooling system checked in the spring and the heating system in the fall to ensure peak performance before the peak seasons when you will use the system more regularly.
  • Check Thermoregulator Condition: Ensure the thermoregulator’s settings are optimized for comfort and energy savings.
  • Tighten Electrical Connections: Regularly tighten all electrical connections and calculate voltage levels and motor currents to avoid dangerous operation and reduce the risk of major component failure.
  • Lubricate Operating Parts: Correctly lubricate all operating parts to reduce motor resistance and minimize electricity usage.
  • Examine and Clean or Replace Air Filters: Regularly go through, clean, or replace air filters in your central air conditioner, furnace, and/or heat pump to maintain efficient operation and avoid equipment deterioration.
  • Clean Evaporator and Condenser Coils: Ensure that the evaporator and condenser air conditioning coils are clean to maintain the system’s cooling efficiency and reduce energy costs.
  • Check Refrigerant Levels: Verify and adjust the refrigerant level to optimize system efficiency and lifespan.
  • Clean and Adjust Blower Components: Regularly maintain the cleanliness and modify blower components to secure accurate system airflow and enhance comfort levels.
  • Inspect Gas Connections and Pressure: Examine all gas connections, pressure, burner ignition, and heat intercharger for safety and efficiency.

Hire Professional HVAC Help in Tucson, Arizona

That’s the basic information on how to know if your HVAC is leaking carbon monoxide. Remember that all indications of a carbon monoxide leak should be taken seriously, meaning immediate freshening up of your indoor areas and contacting local HVAC specialists who can check and fix your HVAC system. 

At Cummings Plumbing, we specialize in repairing your home systems to offer the most worry-free experience. We also provide installation services performed by the most experienced and skillful technicians. As a company that has been on the market since the 1980s, you can rest assured that we can help with any HVAC problems quickly and efficiently. 

So, don’t hesitate to call us today and get your in-house free estimate!


FAQ

How can I tell if my HVAC system is leaking carbon monoxide?

Look out for signs such as a yellow or flickering pilot light, soot or rust around the furnace or vents, lack of an updraft in your chimney during furnace operation, stale or stuffy air, and excessive condensation on windows. If you notice any of these signs, contact Cummings Plumbing for a professional inspection.

What should I do if I suspect a carbon monoxide leak in my home?

If you suspect a carbon monoxide leak, immediately ventilate the area by opening windows and doors, evacuate the premises, and call Cummings Plumbing for assistance. They specialize in HVAC repair and can quickly address any issues to ensure your safety.

How often should I schedule maintenance for my HVAC system to prevent carbon monoxide leaks?

It’s recommended to schedule annual maintenance for your HVAC system, ideally before the start of each peak season. Cummings Plumbing offers regular maintenance services to keep your system running efficiently and to detect any potential carbon monoxide leaks early on.

Why should I choose Cummings Plumbing for HVAC repair and maintenance?

Cummings Plumbing has been serving the Tucson area since the 1980s, providing reliable HVAC repair and installation services. Their experienced technicians specialize in identifying and fixing issues with heating systems, including carbon monoxide leaks, to ensure the safety and comfort of your home. Contact them today for a free estimate and peace of mind.

When To Replace Your Thermostat: How to Know When’s Time

Your home temperature is a key player in your comfort. And the most common way to tell the temperature in your home and know if you should do anything to change it is by using a home thermostat. 

The best thermostats last around 35 years before you need to replace them. But, these devices are prone to breaking even before that. So is there a way to know that the thermostat in your home is about to stop working?

Yes! This article will elaborate on common signs that you need a new thermostat, how to tell if it’s broken, and how it works. Plus, we’ll offer some exciting solutions. 

How Long Do AC Thermostats Last?

Every thermostat’s lifespan can vary, depending on the type, model, and mode of making. If you are wondering, “How long do AC thermostats last? then you should know that the older mechanical thermostats usually last up to 35 years, but the modern ones have a shorter lifespan of 10 years. However, that’s not a rule that’s set in stone. 

Like most gadgets in your home, the thermostat will eventually become outdated. The old ones are bound to be replaced with programmable smart thermostats with many features like app connecting, monitoring, customization, and much more. 

But if you don’t want to change your thermostat, then there are things you could do to make it last longer. You should also regularly clean it and inspect it for malfunctions. Sometimes you will  need to reset your thermostat – set it from 7 to 10 degrees for 8 hours of the day. This decreases heating bills, giving the thermostat time to reset while at work. 

When to Replace Home Thermostat: Key Indicators

One clear clue that you need a thermostat replaced is when you notice malfunctions. This is noticeable if your home seems hotter or colder than usual. Obvious signs are also if the device won’t turn on or off and it shows suspicious measurements. 

Below we give you some less-obvious signs you need so you know when to replace home thermostat

Unresponsive Thermostat 

Some thermostats run on batteries. And batteries don’t last forever – they, too, need replacing once in a while. Before deciding that your thermostat is broken, check if the battery is dead. Try to replace the old batteries with new ones; if this doesn’t change anything, the problem lies elsewhere. In most cases, it’s an issue with the wiring. 

Your AC and Heater Won’t Start 

If the thermostat’s wiring becomes loose, it can break connections with your home heating and cooling appliances. This means that the thermostat isn’t controlling the air conditioner or the heater. 

Other reasons why your AC or heaters aren’t working include defects in the system which can cause misread temperature settings. This problem usually can’t be fixed by changing the settings.

Each Room Has a Different Temperature 

Most people program their thermostats to different temperature settings for each room. A faulty thermostat can mess up the HVAC system’s controls by switching them on and off. This means that the room with the HVAC system will get the most temperate air. Because of this problem, the other rooms in the house will barely get any cool or hot air. 

Incorrect Temperature Readings 

A thermostat that reads incorrect temperatures won’t be heating or cooling your home. If you compare another new thermostat with your current one, and they show different temperatures, then it’s time to replace it. 

Note that your thermostat could show faulty readings due to sunlight and draft proximity. If that’s not the case, try to see if there’s dust buildup. After you clean up your thermostat, see if the readings change. 

Once you clean your thermostat and notice it continues to malfunction, you should consider buying a new one.  

You Can’t Save Your Settings

If you have to reprogram your temperature settings every day, there’s a chance you might need a new one. With a smart thermostat, you can customize programmable features and connect directly to your homely HVAC system. This way, you control temperatures and the heating and cooling process in each room. 

Most smart thermostats allow you to sync up your AC and heaters to run simultaneously for periods. But, if your device forgets or completely ignores your setting, then it might be buggy. 

Simply put, you’ll know your thermostat is faulty if it doesn’t save the settings you’ve chosen. The causes for tweaks with the settings are usually minor, like dying batteries. Other causes can include thermostat memory defects. This is solved by putting the device into factory reset. If the factory reset does not help, then a new thermostat would be a good idea. 

No Display 

The digital thermostat has a display that’s always there, but now it’s blank. Since most thermostats are digital nowadays, the displays are known to continue working even if there’s something wrong. 

The interface needs to project the temperature, the time, and other useful information. A blank thermostat is there to capture your attention to investigate. The usual culprits for this are some intervention with the HVAC system, flooding or heavy rain, etc. 

The Benefits of a New Thermostat 

A thermostat comes with many benefits, but they have a lifespan. Buying a new thermostat is probably the best thing to do if you’re having trouble with your old one and can’t seem to fix it. 

A new thermostat will work as a cool indicator of your current room temperature, meaning you won’t have to check twice. If you have a new thermostat, here are some benefits you can reap:

  • Consistent, comfortable room temperature;
  • No malfunctions leaving you with one extremely hot and one cold room;
  • It allows you to set your required temperature and sticks to it;
  • Some devices are smart, so you might have high-tech features like humidity and air quality checks;
  • You’ll feel more at home with your preferred temperature all the time;
  • It saves the bills;
  • A new thermostat is cost-efficient, which means it preserves a lot of wasted electricity.

The thermostat usually works with the HVAC system in your home. This is when you have a few other thermostats regulating other rooms in your area. These other thermostats have different preferred temperatures. So you’ll need a functional thermostat to work with an HVAC system. 

Do You Need an Electrician to Install a Thermostat?

If you’re directly asking do you need an electrician to install a thermostat, the answer is yes! 

Thermostats are not the easiest to adjust and should not be tampered with if you are not a licensed professional. No matter how many lightbulbs you change, you won’t be able to install a thermostat that easily without help. 

In some states, you could be breaking the law if you try to install a thermostat yourself. Every thermostat needs to be installed by a licensed, professional electrician so they can verify that no harm can be done to you or your property. So, if you are not a professional, it’s best to leave this to someone that can guarantee a job well done. 

For all that live in Tucson, Arizona, and feel the need for a proper thermostat, call Cummings Plumbing, Heating &Cooling. Whether you need an AC repair or a thermostat installation, you can turn to our team for help. We have a long experience behind us to guarantee that we can fix everything in no time!

Call us today and get a free estimate! 

Replacing a Thermostat: Sooner is Better

We hope you got some perspective on how to recognize when to replace thermostat devices with new ones. With cold winters and scorching summers, it’s better to take care of your thermostat sooner than later.

Changing your thermostat is necessary. Without it, you lose control of the ambient and get into a situation where some areas are colder or hotter than others. Not only that, but it can also mess with your other electronics and create even greater problems. 

Make sure to look out for the signs that will tell you when to change thermostat devices. Once you notice them, act immediately and give yourself peace of mind for years to come. 

FAQ

How do you know if your home thermostat is going bad?

The number one sign that your thermostat has gone bad is if it reads incorrect temperatures and doesn’t save changes. Other indicators include not displaying the right temperature, not saving the changes you make, etc.

How do I test my home thermostat?

The best way to see if your thermostat works is by turning up the heat. For additional confirmation, you can do it with a partner who can watch the furnace while you’re turning up the heat on the thermostat. If a sound doesn’t follow this, then you might have something wrong with the thermostat. 

What happens if you don’t replace the thermostat?

If you don’t replace your thermostat in time, you could get stuck with inappropriate temperatures in your home, high energy bills, or worse – electrical problems that may lead to other disasters.

Improving AC Efficiency: The Best Ways to Do It

The air conditioner is our best friend during hot summer days and long winter nights when the temperatures rapidly change. It provides a pleasant atmosphere to help us survive high heat and extreme cold, but if not maintained adequately, it can be the reason our energy bills go through the rough.

According to some statistics, US homes are facing an increase in energy costs, and the AC has an immense contribution to these costs. Homeowners are always looking for ways to reduce costs and, at the same time, improve the performance of the AC.

There are many ways to improve AC efficiency and, in this article, we will discuss several. Some of these steps include easy adjustments you can do yourself, while others would require consulting a professional. We’ll give you tips on where to look for issues and what to do to reduce your energy bills.

How to Improve AC Efficiency?

Depending on the AC unit installation, you’ll need to look for ways how to improve air conditioner efficiency. Owners who enclose AC units because of their appearance should be careful not to enclose them fully. This will present a problem for the AC performance and the cleaning and maintenance of the unit. Blockages should also be prevented around vents to ensure proper air circulation.

Outdoor units can improve their performance by shading them during the summer. Installing the unit in a shaded place will not require it to work as hard as when exposed to the sun. If this is impossible, find another way to shade it and protect it from the sun. This also means protecting the outside unit from extreme cold. Find a suitable spot that will keep the unit from overheating or be exposed to ice and wind.

Other simple ways you can help improve efficiency and performance are buying a whole-house fan to draw in clean air from the outside and remove hot, stale air from your home. Add ceiling fans to move the cold air throughout your home, or cover your windows to prevent the heat from entering the house.

Dirty filters play a significant role in the AC’s performance, which is a reason to replace them regularly. In addition to lowering the air quality in your house, dirty filters may also restrict airflow, making your AC’s job more challenging. It is a simple and inexpensive method of avoiding issues with air conditioner performance.

How to Increase Home AC Efficiency?

There are many ways to boost the work of your AC. Investing in an energy-efficient central air conditioner, along with ongoing repairs, tune-ups, and upkeep, ensures performance boosts and reduction of costs. We’ve compiled a list of several strategies on how to increase home AC efficiency.

Keep Your Outdoor Units and Vents Clean

AC’s performance can significantly decrease due to clogs or debris found near the outdoor condenser. Check for possible blockages around the unit that may be causing reduced performance. Clear away any winter leaf piles, and trim tall grass, bushes, or plants that may have sprung near the structure.

Regular cleaning and maintenance of the air conditioning system is recommended. This includes keeping the outdoor unit and vents unblocked and clean of dust and other debris to allow normal performance of the AC.

Improve the Attic and Walls’ Insulation

Insulation is an important component of every house to keep the heat inside, and it also keeps the cool air from escaping and prevents the summer heat from entering the house.

Lack of insulation in the walls and attic will cause the energy bills to increase, costing you lots of money. It also means that the air conditioning system will work harder than necessary to maintain the temperature in your home.

Clean the Drain Line

Air conditioning systems have drain lines that are usually located near the indoor cooling coil and are used to drain the moisture created from the indoor air. The drain line can clog up and create a blockage which can cause further damage.

Pay special attention during the days when the AC works 24/7, and a lot of moisture is created. Use a cup of chlorine bleach and a gallon of water to clean the drain line. This will ensure the drain line is clean and prevent any water-related damage.

Use Blinds And Curtains to Cover Your Windows

The heat from the sun can enter through the windows causing the temperature inside to rise rapidly. Establish a routine of drawing the curtains or closing the blinds as a way to block the heat from entering your home. This way, you’ll prevent your AC from working harder and increase its performance.

The Best Ways How to Improve Air Conditioner Efficiency

There are many ways how to increase AC efficiency, and one is to replace an old unit with a newer, more efficient model. However, before you go and spend your money on a new AC system, let’s look at how to improve AC efficiency of your current, fully functioning unit.

Fix All Possible Leaks

Leaky air systems can seriously reduce the AC’s performance and make it work harder than it should. Air easily leaks out through the attic, doors, and windows, costing you a lot of money. The AC will run longer than necessary to compensate for the lost air.

The right thing to do is check for leaks on doors, window frames, and the attic. If you notice any cracks, fix them to help the air conditioning system perform better and save you money.

Handle and Replace the Thermostat

Knowing how to handle the “brain” of the AC system will help you maintain a constant temperature in the space. New programmable thermostats will help adjust the temperature throughout the day to fit your busy schedule.

Another point to remember is to place it away from devices that produce heat, such as lamps, or even expose it to direct sunlight. It will misread the temperature making the AC work harder to decrease the temperature, hence increasing the cost.

If you notice that the thermostat keeps switching on and off repeatedly, it may be time to replace it with a new one. A malfunctioning thermostat will create high energy bills.

Maintaining the Temperature

Most people believe that keeping the same temperature level when they leave the house could lower their expenses because the system won’t have to work as hard to cool the home down again. This isn’t the case, though.

Turning up the thermostat during summer when you go out is the least expensive method to utilize your air conditioning. Air conditioning systems operate more effectively over extended periods at full speed. As a result, turning down the heat when you arrive home will save you more money than turning the air conditioner on and off while you are gone.

Check the AC Filter Regularly

The filters must be checked regularly and replaced if needed. Soiled filters reduce air quality and airflow, making the AC system work harder. Not addressing the issue with the filters may lead to more expensive repairs, so look at this as an affordable way of increasing AC efficiency.

Avoid Using Heat-Producing Devices

Avoid using heat-producing devices such as ovens and hair dryers on very hot days. This equipment generates heat, which the AC must dissipate in your home.

Running these devices in the middle of the day can put more strain on the AC when the temperature is high. Plan and operate these devices at night when it is cooler so the AC won’t have to work as much.

Plan Routine Maintenance to Increase Performance And Efficiency

While there are many things you can do to maintain your house energy-efficient, regular AC maintenance and repair performed by a professional like Cummings Plumbing is recommended. You won’t have to worry about cleaning the system and ensuring it functions properly. Additionally, they can aid in problem detection before they develop into larger ones, extending the life of the AC.

FAQ

Is it cheaper to leave the AC on all day?

Since ACs consume more energy when running continuously, operating the AC at full capacity when at home is more cost-effective than running it at a reduced capacity throughout the day. Your monthly utility costs will increase in direct proportion to the amount of power you utilize.

How can I reduce my AC bill?

Using a thermostat, you precisely control the temperature in your home. You can slightly change the temperature without affecting your enjoyment but with the possibility of using less energy. Programmable thermostats can be set to chill your area when you’re at home and increase the temperature when you’re gone, a straightforward adjustment that will ultimately save you a significant amount of energy.

What is the best AC temp to save money?

The optimal temperature of 78F allows you to be comfortable and reduce insanely high energy bills. Nevertheless, depending on the weather, you may need to change that setting. Your energy bill will increase if the inside and outside temperatures differ significantly.

Cleaning the AC: How Should You Go About It?

There are two answers to how to clean AC unit – learn how to do it on your own or let a professional take care of it.

As with any electrical device, cleaning and maintenance are essential. And cleaning your AC is, in particular, necessary in locations with hot weather, which may indicate overuse of the home’s cooling system.

Maintaining your AC is a critical part of air conditioning maintenance, helping you save money, maintain efficiency and increase the life of your system.

Read this article to learn how to take care of your AC adequately.

Why Is Cleaning the AC a Good Idea?

Regularly cleaning your AC has many financial and health benefits. Cool air is just one of the benefits while making sure the air is safe for you and your entire family is a crucial element.

This is why cleaning the AC is important:

  • Improved Air Conditioner Efficiency: Clogged and dirty air filters interfere with normal airflow and disable the air conditioner from operating more efficiently, which is why regular AC maintenance can help it work better.
  • Lowering the Power Bill: Maintaining your AC by keeping it clean can reduce your monthly utility bills by up to 30%. Dirty coils mean the device is working more to cool or heat the air, as there is a dirtier surface spot for hot air to flow through.
  • Extends the AC Life Span: Air conditioners are expensive, and you don’t want to change them if you are not obligated. On-time maintenance by a certified HydroKleen technician keeps the unit running efficiently.
  • It helps you breathe cleaner and safer air in your home: After an extended usage period, the AC becomes full of mold, bacteria, pet dander, etc. Proper cleaning of the unit will remove these contaminants in an environmentally friendly manner.

The importance of cleaning your air conditioner properly offers numerous benefits. The above-listed advantages are some of the main reasons you should clean and maintain your AC.

How to Clean AC Unit?

If you wonder how to clean AU unit, filters and coils are the two key components to pay attention to. Filters are used to remove dirt from the air, but when they’re blocked, your AC has to work extra hard and consume more energy, which increases your expenses without doing any good.

Therefore, you need to ensure the coils are clean and free of dust and debris because they assist in moving the hot and cold air.

To thoroughly clean your air conditioner, you will require a few materials from your house. Before you begin, gather the necessary supplies: a screwdriver, cloth, soft brush, and spray bottle.

Make Sure the Power Is Off

Before working on an electrical device, it’s a good practice to unplug the cable and switch off the electricity for extra protection.

Remove Any Excess Rubble

After unplugging your AC, take off the front panel and filter. Use a vacuum to remove as much dirt as possible. Next, clean your filter with hot water and soap before drying it outside. It is advised to reinstall your AC unit when it has completely dried out.

Clean the External Cover

Use the water hose’s spray to remove dirt particles from the external component. The coil cleaner should be sprayed on the outdoor unit. Wait for the cleaner to foam and bond with the dirt on the coils for 10 to 15 minutes. Use the hose to wash the coil cleaner.

Clean the Evaporator Coil

How to clear air conditioner coils? First, turn off the air conditioner on the thermostat before doing anything. Combine warm water with a little detergent in a spray bottle or garden sprayer. Pour the mixture onto the evaporator coils, then wait a few minutes for it to absorb and remove any particles or dirt. Use a gentle brush or towel to remove any substance that has come free, then reapply as necessary.

Should You Clean or Change the Filter?

It all depends on the type of filter you have. When disposable filters get dirty or clogged, they should be thrown. Most of these filters are not very expensive, including cardboard framing. Have extra of each available so you can swap them out as needed.

Permanent filters are more expensive initially, but you may save money over time because you can clean them rather than replace them. Permanent air filters typically have fiberglass frameworks instead of cardboard ones.

How to Clean AC Filters?

You can find various types of air filters, many of which are disposable and cannot be washed. However, due to the rapid changes in technology and the efficiencies that come with them, air filters that can be cleaned are frequently used. If you have used disposable filters before, it’s time to upgrade.

Now let’s walk you through the steps of cleaning your AC filter:

  1. Turn off the power and locate the filter: To begin the process, switch off your HVAC unit to stop unfiltered air from circling through your household. See where the vent is, and open the unit using a screwdriver. Some systems have numerous vents, so make sure to clean all of them. Take out the filter and examine if there is any damage. Change filters if necessary. Otherwise, keep vacuuming.
  2. Vacuum the air filter: It is recommended to take the filter out to keep the dust out of the home. Use a vacuum cleaner to remove dirt from the filter. Filter the brush and gently loosen any build-up deposits.
  3. Clean the filter with vinegar and water: To clean the filter more thoroughly, fill a sink with a 50/50 mix of water and vinegar. Soak the filter for about an hour. If you don’t have vinegar, dish soap can be used as a substitute. Finally, remove the filter and let it dry. Do not rinse it with water since it can negate the disinfecting effect of using vinegar.
  4. Reinstall The Filter: Once the filter has been cleaned and dried, put it back in place. Most filters have arrows that indicate which way they point, and this arrow should point in the direction of the airflow.

How to Clean Outside AC Unit?

One element that is frequently disregarded is the outside AC unit, and it affects the efficiency just as much as the indoor AC.

Follow our tips on how to clean outside AC unit:

  1. Turn off your AC: Make safety a priority by turning off the AC before cleaning it. Locate the power shut-off box close to the outside air conditioning unit and switch it off.
  2. Prepare for cleaning: The way to prepare for cleaning entails keeping the near area surrounding the outside AC clear. Trim the bushes back to a fair distance and remove any leaves and trash accumulated on or close to the unit.
  3. Get rid of dirt: AC that is blocked with particles might lose a lot of energy. Ensure to shut off the electricity at the breaker box before removing dirt from your outdoor air conditioning unit. Using a screwdriver or hammer, loosen the cage’s bolts so you may take it off the apparatus.
  4. Clean or replace: If your air filter is reusable, a strong spray from the garden hose will quickly wash it. If not, change it as needed to stop future accumulation.

Alternatively, you can reach us at Cummings Plumbing if you’d rather leave it to professionals.

Wrap-Up: How to Clean the Air Conditioning Unit?

Although these cleaning tips can help you maintain your AC, keep in mind that some maintenance tasks are best left to licensed HVAC specialists. They have all the equipment and cleaning techniques for central air conditioning units.

For example, an expensive engine failure could be caused by a slow refrigerant leakage in your air conditioner. You might not be equipped as a homeowner to monitor the refrigerant levels or guarantee optimum airflow. Therefore, even if you can perform rudimentary AC maintenance, you should still have a qualified expert check the system occasionally.

Our group of qualified Tucson plumbers, sewer, and HVAC specialists at Cummings Plumbing can identify the source of your HVAC issues. We offer reasonably priced options adapted to your particular needs and aim to resolve the issue as fast as possible.

FAQ

How often does an AC unit need to be cleaned?

Each month or two, wash or change the filter in your AC throughout the cold period. It may need frequent cleaning if the air conditioner is used more often, is exposed to dirty circumstances, or you have furry pets in the house.

How do I know if my AC unit needs cleaning?

When the air conditioner is operating and you can detect mold on the exterior vents, it’s time to start cleaning. When the AC is not cooling the room as it is expected, the AC usually requires cleaning. Finally, look for any strong smell or unusual noise, as the AC can worsen if not resolved on time.

Is it OK to spray water on your air conditioner?

Yes, you can spray water on your AC to clean it. Your air conditioner’s condenser will operate more effectively if sprayed with water. The reality is that your condenser has to be spritzed frequently to continue working effectively.

How long should AC dry after cleaning?

It is recommended to wait around 30 to 60 minutes before using the AC after washing the coils.