How Does a Water Softener Work?

Have you noticed that your soap doesn’t lather well, or your clothes come out of the laundry feeling stiff and scratchy? If yes, you might be dealing with hard water, a common issue in many households, especially in Arizona. The US has a problem with hard water, but our state ranks at the top of the water hardness scale.

We say that water is “hard” when it has high levels of magnesium and calcium. These minerals can clog pipes, make your appliances less efficient, and leave behind white residue on dishes and shower doors. So, how does a water softener work to tackle these problems? It’s a device that turns your water “soft” by removing the excess minerals.

This process keeps your appliances in top shape and makes daily chores easier. Let’s see how to use a water-softening system to improve water quality.

Hard Water: What Is It And Why It’s An Issue?

Hard water is just regular water that contains a higher concentration of minerals, mainly calcium and magnesium. These minerals do not negatively impact your health but can damage your plumbing and appliances. When water with these minerals heats up, it leads to the development of limescale.

This residue can clog your pipes and reduce the efficiency of appliances like your dishwasher, washing machine, and water heater. When you see a white, chalky film on your faucets or shower heads, that’s the scale from hard water. It can also make your soap less effective, leaving your skin dry and your clothes feeling hard after washing.

Hard water is a common issue across the US, but it’s one that you can manage with the right approach, such as installing a water softener system in your home. This device exchanges the minerals in hard water with sodium, which makes the water softer and helps your plumbing and appliances last longer.

Problems Caused by Hard Water

While hard water isn’t bad for your health, it causes issues you don’t want to ignore. The most frequent ones you’ll face in your day-to-day life include:

  • Scale buildup in pipes and appliances: This buildup makes your appliances work harder, increasing your energy bills, but it can also cause them to break down faster.
  • Soap and detergents aren’t as effective: They don’t lather well, meaning you use more products to achieve less cleanliness. That affects washing your clothes and dishes, often leaving them looking dull and grimy.
  • Skin and hair issues: The excess minerals in hard water strip away natural oils, leaving your skin and hair dry and dull.

How Water Softeners Solve Hard Water Issues

Typically, soft water contains 0–75 parts per million (PPM) of calcium carbonate. This low level of minerals is what you’re aiming for when you’re trying to combat the effects of hard water. So, how does a water softener achieve this? The magic happens through ion exchange. This system replaces the minerals that make water hard with either sodium or potassium.

Parts of A Water Softener

Now, let’s break down the different components of a water softener to give you a clearer picture of how each part contributes to solving your problems with hard water. 

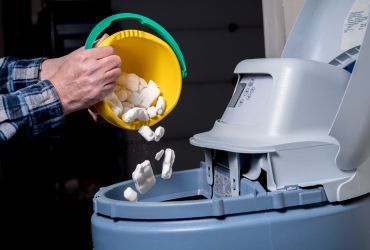
  • Resin tank: The tank contains resin beads charged with sodium or potassium ions. When hard water flows through this tank, the resin beads grab the calcium and magnesium ions. They exchange them with sodium or potassium ions, which softens the water.
  • Mineral tank: After the water is softened, it moves to this tank for storage until you need to use it.
  • Control valve: This part manages the water flow through the water softener, ensuring that the system regenerates based on water usage. That keeps the unit running efficiently without manual intervention.
  • Brine tank: This is the regeneration station for the resin beads. It holds a highly concentrated salt (or potassium) water solution, which recharges the resin beads during the regeneration cycle.
  • Bypass valve: A handy feature that allows water to bypass the water softener altogether. That can be particularly useful during maintenance or when softened water isn’t necessary, like when you’re watering the lawn.
  • Flow meter: A feature that measures the amount of water used. This measurement helps the control valve determine when the regeneration process needs to start. Without this component, the system would either regenerate too often, wasting water and salt, or not often enough, leading to ineffective water softening.

Types of Water Softeners

When considering a water softener for your home, know that your household might need a particular water-softening system. There are a few different types, each best suited for specific needs and water conditions.

  • Salt-based ion exchange softeners: These systems are the go-to for seriously hard water. A salt-based system might be your best bet if you’re dealing with scale buildup on your appliances or stiff, dingy laundry. However, keep in mind that these require a bit of upkeep, including regular salt refills.
  • Salt-free water conditioners: These don’t exactly soften water in the traditional sense by removing hard minerals. Instead, they prevent minerals from forming scale buildup. This type is ideal if you want to avoid the added sodium in your water or if you don’t have extremely hard water in your home. They’re also a fantastic choice if you’re aiming for a more environmentally friendly option since they don’t produce wastewater or require electricity.
  • Dual-tank water softeners: They have a continuous supply of softened water, which is why they are perfect for large families or households that use a lot of water. While using one tank, the other regenerates, ensuring you’re never without treated water. They’re convenient if you have a fluctuating schedule or don’t want to time your water use around a softener’s regeneration cycle. However, they take up more space and might be overkill for smaller households or those with modest water needs.

Professional Installation vs. DIY

If you want to install a water softener in your home, you might consider rolling up your sleeves and doing it yourself. That’s a good move if you’re handy and know a little about basic plumbing. If the installation looks straightforward and you have the time to research the proper steps, DIY could save you some cash.

However, a professional installation comes with benefits you shouldn’t overlook. Pros know exactly how to handle different types of water softeners and can spot potential issues before they become big problems. They ensure everything is up to code, even things you might not be fully aware of if you’re not in the trade. 

If something goes wrong during the installation, you’re not left scrambling to fix it – you’ve got an expert on speed dial. So, while DIY might seem appealing, consider whether it’s worth the potential headaches and risks before you decide.

Get A Water Softener In Tucson, AZ

Dealing with hard water is a common issue across the US, which is why water softeners are so popular. If anyone asks you, “How does a water softener work,” tell them that this device turns hard minerals into something your plumbing system can handle without side effects like buildup and inefficiency.

If you’re noticing signs of hard water in your home and want a water softener installed in your Tucson home, call Cummings Plumbing. We have six generations worth of experience in the industry and can help you choose, install, and maintain a water-softening system. To get the best quality water in Tucson, get in touch today and get your free estimate!

The Hidden Dangers of Leaky Faucets: More Than Just a Drip

Having a faucet leak is not just an inconvenience, it can cause serious problems for homeowners. It’s easy to dismiss a leaky faucet as just another benign household annoyance, but the reality is that a steady trickle can cascade into a torrent of problems that extend far beyond the boundaries of your kitchen or bathroom sink.

Hidden beneath the surface of this seemingly small issue are dangers that pose significant threats to our environment, our health, and even our finances. The implications of neglected drips are anything but minor. In this blog, we will explore the risks associated with leaky faucets.

From the startling environmental impact of wasted water to the silent creep of structural damage, and from the subtle swell in utility bills to the potential for mold and mildew proliferation, it’s time to talk about the real cost of that “just a drip” and why it deserves your attention – and prompt action. After all, understanding the hidden dangers is the first step toward safeguarding your home, your health, and the planet.

The Environmental Impact Of A Leaky Faucet

One of the biggest impacts a leaky faucet can have is on the environment. Each drip from a faucet may seem insignificant, but when you add up those drops over days, weeks, and months, the volume of wasted water can be staggering. A single faucet leaking at the rate of one drip per second can waste upwards of 3,000 gallons of water in a year—that’s the equivalent of over 180 showers! Not only will it cost you, it will cost the environment by wasting water.

By simply fixing a leaky faucet, homeowners can take a meaningful step toward water conservation and help to alleviate the silent strain that household leaks impose on the environment.

Financial Implications Of A Dripping Faucet

At first glance, a leaky faucet might not seem like it could make a dent in your bank account. It’s just a few drops, right? Unfortunately, those drops add up, and so does the expense. A small drip can become a financial sinkhole quickly.

As the wasted water accumulates, so does your water bill. Leaky faucets force your water meter to keep running, driving up your costs, even when you’re not actively using water. This is not just a drip in the bucket; it’s a continuous flow of money trickling straight out of your household budget. In areas with higher water rates, the financial sting is even sharper, turning what could have been a small repair bill into a constant financial drain.

The immediate cost of a leaky faucet is clear on your water bill, but the potential for long-term damage can lead to even more significant expenses. A constant flow of water can wear away at fixtures, leading to rust and degradation. If the leak is not confined to the sink area, it can seep into countertops and cabinetry, leading to costly repairs or replacements. In severe cases, a persistent leak can lead to water damage in floors and walls, not to mention the possible growth of mold, which can be a health hazard and expensive to remediate.

The cost of fixing a leak is often minuscule in comparison to high utility bills or having to restore your property from water damage. This is why addressing a leaky faucet as soon as it’s noticed is not just a matter of conservation but also a sound economic decision.

Health And Safety Concerns

The incessant drip of a leaky faucet does more than just waste water; it creates an ideal environment for mold and mildew to grow and quickly spread, posing significant health risks to the inhabitants of the home. The constant presence of moisture from a leak facilitates the growth of these fungi, which can lead to respiratory issues, allergies, and other health concerns, particularly for those with weakened immune systems or asthma.

Mold is not always conspicuous; it can flourish out of sight, under sinks, behind walls, or around cabinetry, making it a silent hazard that can go undetected until symptoms or musty odors emerge. The health implications of this are severe enough that what begins as a simple plumbing issue can quickly transform into a matter of protecting your family’s health.

Beyond the biological threats, there’s the matter of structural safety. Water from a leaky faucet can seep into the crevices and cracks of a home, compromising wooden structures like beams and flooring over time. This can lead to softening or rotting of the material, which not only undermines the integrity of the home but can also become a hidden peril.

Floors can weaken, and the stability of counters and fixtures can be jeopardized, all of which pose significant injury risks. The safety of your home environment depends on a proactive approach to leaky faucets, preventing potential accidents and maintaining a healthy, secure living space.

The Underlying Problems Indicated By A Leaky Faucet

While a leaky faucet may present itself as a simple mechanical annoyance, it often signals deeper, more systemic plumbing issues that can quickly escalate if not addressed. It’s like the tip of the iceberg; what you see on the surface often belies a more complex problem lurking beneath. Corrosion within pipes, faulty valves, or high water pressure are just a few underlying issues that can manifest as a leak.

Ignoring these warning signs can lead to more severe plumbing catastrophes, including burst pipes or significant water damage. A leaky faucet, then, can serve as an early detection tool, hinting at the health of your entire plumbing system and providing an opportunity to address problems before they spiral out of control.

Furthermore, the persistent drip of a leaky faucet can also be a red flag for potential water quality issues. As components in faucets wear down, they may release unwanted materials into your water supply, posing a risk to health and well-being. Metals from corroded pipes, for example, can leach into the water you drink and use daily.

Therefore, a leak isn’t just a physical malfunction; it can be symptomatic of chemical degradation within your plumbing system. By viewing a leaky faucet as a harbinger for both mechanical and water quality issues, homeowners can shift from a reactive stance to a preventative one, ensuring that their water supply remains safe and their plumbing infrastructure sound.

The Importance Of Prevention And Early Detection

The best way to mitigate the risks associated with leaky faucets is through vigilant prevention and early detection. Regular maintenance checks around your home can be the key to catching a leak before it evolves into a more significant issue.

Homeowners should become familiar with the signs of a failing faucet, such as rust, mineral deposits, or irregular water pressure. Taking the time to inspect faucets, under-sink pipes, and surrounding areas for moisture or small drips can save considerable trouble down the line.

Additionally, knowing how to turn off the water supply can prevent a minor leak from causing major damage if it suddenly worsens. By creating a routine of thorough inspections, you can ensure the longevity of your plumbing fixtures and nip potential problems in the bud. Moreover, installing water leak detection devices can provide real-time alerts to any moisture issues, allowing you to act swiftly and address leaks before they cause damage or become a health concern.

Professional Plumber For Faucet Repair Services Near You

While you may think a small drip is minor, it’s always best for your wallet and the environment to quickly repair your plumbing system to keep it working for years to come. If you’re dealing with a leaky faucet in Tucson, Cummings Plumbing is here to help!

With a team of experienced technicians, we promise swift, reliable, and cost-effective solutions to any leak, big or small. We use the latest tools and techniques to not only fix the immediate problem but also diagnose and rectify any underlying issues that could cause future problems.

Frequently Asked Questions About Leaking Faucets

What are the most common causes of a leaky faucet?

Leaky faucets are commonly caused by worn-out washers, deteriorating valve seats, o-ring issues, corroded valve parts, or if it’s an old fixture. In some cases, improper faucet installation or high water pressure can also lead to leaks.

How can I prevent my faucets from leaking?

Regular maintenance, such as cleaning, inspecting for signs of wear, and replacing components like washers and seals before they fail, can prevent leaks. Also, installing water pressure regulators can protect against the high pressure that can cause wear and tear on your plumbing fixtures.

How much does it cost to get a leaking faucet repaired?

The cost of repairing a leaky faucet can vary widely depending on several factors, including the type of faucet, the nature of the issue, and whether there are underlying problems that also need to be addressed. Simple repairs like replacing a washer or o-ring may be on the lower end of the cost spectrum, while more complex issues requiring the replacement of significant parts, or the entire faucet, will be more.

Everything You Need to Know about Hydro Jetting

Many homeowners know house ownership is a never-ending saga of exciting interior and exterior changes, upgrades, and fix-ups. House owners try to make their place feel like a home by adding a personal touch in every little nook and cranny or constantly updating items.

Regarding updates, there are some aspects of the house we don’t notice daily, so we omit the task of regularly upgrading them. These include the heating and cooling systems, sewage lines, and plumbing, all requiring regular inspection and professional help. Homeowners are often hesitant about calling a professional service because they are unsure what services they need or want to reduce the costs and take the DIY route.

In this article, we introduce you to hydro jetting – a professional technique that keeps your sewage lines spotless and ready to use. We will discuss the benefits of hydro jetting, when it’s time to call for professional help, and hydro jet drain cleaning cost.

What Is Hydro Jetting?

Hydro jetting drain cleaning is a technique that plumbers use to clean out slow-moving or clogged sewage lines. It uses water under high pressure to remove heavy build-up collected in sewage pipes and break up clogs. The sewage lines can be blocked by specific minerals and disposed of materials, such as food residues and wipes.

Hydro jetting is a highly effective plumbing technique that removes dirt to keep your pipeline working properly. Neglected pipes can lead to clogged drains, plumbing or sewer system blockages, and potentially a contaminated water supply.

Often, when homeowners notice a clogged drain or suspect a blocked pipe, they first reach out for unclogging chemicals, drain liquids, or DIY baking soda solutions that help unclog a drain. Although this might prove effective, it’s not a long-term solution, as it requires constant repetition and a visit from the plumber eventually.

Besides being of sanitary help, hydro jet drain cleaning can help extend the life of house pipelines, preventing expensive pipe changes and professional fix-ups. Aside from breaking the clogs, this method completely removes the clog particles all the way to the main sewage line. This is extremely important because you can be sure that no particles are left to cause further damage like creating cracks in your pipes.

It is advised to hire a team of professional plumbers to perform a hydro jet drain cleaning once a year to keep the pipes and sewage line in top form. Although very helpful, you should be aware that hydro jetting might not work on all types of pipes because of the high water pressure. Checking for cracks or damaged pipes before scheduling professional hydro jetting is recommended. 

Hydro Jet Drain Cleaning: The Process Explained

Once you have contacted a plumbing service and scheduled a hydro jet drain cleaning, professional plumbers will come to your house to begin the procedure. The process requires monitoring the pipeline system before taking action. 

The plumbers will inspect the pipes, determine whether they can handle the pressure of hydro jetting, locate any major blockages and assess where it’s best to insert a high-pressure hose. If the pipes are not fit for hydro jetting drain cleaning, they will use a less intensive method called snaking the pipes or provide advice for updating and replacing them.

If the pipes are fit for hydro jetting, plumbers will insert hoses in the access points and activate a hydro jetting machine. Usually, the pressure is adjusted to fit your plumbing system the best. All removed debris and clogs move down and are safely flushed in the sewers.

Benefits Of Hydro Jet Drain Cleaning

Aside from keeping the pipes clean, hydro jetting can also help prevent costly pipe and faucet repairs and replacements. Being a cutting-edge method in the plumbing industry, it offers many benefits regarding the upkeep of your house and maintaining it in perfect shape. Following is a list of additional benefits of hydro jetting drain cleaning and hydro jetting sewer line.

  • Versatile Method: This technique is used for a variety of problems when it comes to fixing residential plumbing issues. Since this method is safe to use on all types of pipes, it can effectively fix plumbing issues, remove clogs, and dissolve build-ups.
  • Eco-friendly technique: Hydro jetting is very easy on the environment as it uses only water. Without any harsh chemicals or enzymes, it minimizes the risk of hazardous chemicals leaking into groundwater or the soil.
  • Safety: As a non-invasive method it safely operates around all infrastructure already installed. Since it doesn’t incorporate any chemicals in the process, it’s safe for plumbing professionals, residents, and neighbors.
  • Thorough & Effective: Thanks to the high water pressure, the hydro jetting drain cleaning can remove any type of blockage. Covering the entire surface of the pipe, hydro jetting leaves no residue behind.
  • Lasting Effect: Although hydro jetting is a significant investment compared to unclogging drain liquids and solutions, this method ensures lasting clean pipes. Keeping the pipes spotless makes it harder for grime and debris to build up, ultimately keeping your piping system working without issues.

What Can You Remove With Hydro Jetting

This procedure has a major significance in keeping your pipes and drains clean, and maintaining a properly working and effective sewer system. The main goal of hydro jetting is to remove debris and clogs from various materials from the pipes.

It can also help remove any enzyme residue created by water, cleaning products, or produce. Besides clogs formed from wipes and toilet paper, it can also remove hair clogs, usually found in the shower drain. In addition to the occasional food deposit, it effectively removes grease and fat residues.

On a deeper level, hydro jetting effectively removes silt found in pipes, sand from underground water, and, in some cases, even tree roots that have found their way into the plumbing system.

Hydro Jet Drain Cleaning Cost

Hydro jet drain cleaning is a procedure that has to be done by a professional. A team of professional plumbers arrive at your house and assess the situation before planning the best way to clean your pipes and estimating a hydro jet drain cleaning cost. They can also assess drains and faucets, giving useful advice about replacing pipes, faucets, or other elements in the house.

When choosing the right plumbing service, check if your chosen company is reliable and experienced in hydro jetting drain cleaning. Ensuring the plumbing professionals are familiar with the process and have the right tools is essential to prevent pipe damage and costly pipe repairs.

The price for this process can drastically vary due to different factors. Depending on the complexity of the sewer system, the size, and the type of clogs, the price can range from $300 to $600. If there is a tough case of clogs and sewerage complexity, the cost can go up to $1000.

If you’re wondering if there is an effective hydro jet drain cleaning near me, don’t fret! Professionals like Cummings Plumbing offer a variety of plumbing services, including drain cleaning, leak detections, and burst pipe repairs and replacements.

Final Remarks on Hydro Jet Cleaning

It is important to remember that hydro jetting drain cleaning and hydro jetting sewer line is not a DIY household task. Professional help is available and can provide useful advice about your pipelines and a great cleaning experience. In case you’re unsure what type of services you need, Cummings Plumbing can provide in-depth information and advice on the right course of action.

Hydro jetting drain cleaning can help maintain clean and long-lasting pipes and sewage lines, cleaning them from various debris and residue that can potentially damage the pipes. It’s an effective procedure with lasting results that needs to be done once a year, ideally, or once every couple of years to keep your sewer system in perfect condition.

Depending on the clogs and complexity of the sewer system, this process might seem like a large investment, but it’s definitely worth it. Hydro jetting is a beneficial method that can help solve a number of plumbing issues and save you a lot of money in the long run.

FAQ

How long does hydro jetting last?

Depending on the severity of the clogging, the hydro jetting process can last from a few minutes to several hours. However, once the pipes are clean, they will stay clog-free for several years if you are careful about what goes down the drain.

Is hydro jetting better than snaking?

Snaking is used on older pipes where hydro jetting poses a threat of damaging a pipe. Snaking works efficiently only on shallow clogs and will not solve the problem as efficiently as hydro jetting because residue might remain in the pipes.

How do you prepare for hydro jetting?

When expert help is called, they will examine the pipes, decide whether they can withstand hydro jetting, find any significant blockages, and decide where to place a high-pressure hose.

How often should you hydro jet your pipes?

According to professionals, hydro jetting once every few years is enough to keep the pipes working effectively and debris-free.


Sewer Cleanout

Every household should maintain a functional plumbing system, and the most often neglected element is the sewer cleanout. Although unseen, this concealed entry point is crucial in maintaining the efficient operation of your drains and pipes. You can decide on your plumbing system with confidence if you know how sewer line cleanout work. 

Sewer line cleanouts provide experienced plumbers with access to your main sewer line so they may check, clean, and remove any potential blockages. Maintaining your sewage cleanout regularly will help keep roots from clogging it and blocking the effective flow of wastewater away from your property.

In this post, we’ll explain what is a sewer cleanout, its importance, and why they deserve your attention.

What Is a Sewer Cleanout?

A sewer cleanout line, sometimes called a drain cleanout, functions as a customized door that gives you easy access to your home’s main sewer line. This line is the large pipe that connects to the city’s sewer system and transports wastewater away from your home.

A sewer cleanout serves a simple yet critical purpose. Over time, your sewer line may get clogged due to accumulated trash, dirt, roots, and other components. This prevents wastewater from flowing freely, which causes backups and unpleasant odors and might even damage your plumbing system.

Being equipped with a cleanout makes it much easier for plumbers and sewer specialists to handle blockages or backups without digging up your entire plumbing system. Although the cleanout should only be used by skilled specialists, it’s still a good idea to know its location in case of an emergency. 

If you know where your cleanout is, you can help the specialists who come to fix any sewer by giving them the information they need.

How to Find Sewer Cleanout?

In any emergency, it is very important to know where your sewer line is located. Depending on where you live, weather conditions, and your house type, its location may be different. However, there are two places where your sewer line can be located: outside or indoors. Here are some hints to help you find it quickly.

Indoor Sewer Cleanout

In many homes, the sewer cleanout is located in the basement, usually close to the foundation wall or floor. Look for a white or black-capped pipe peeking out of the ground or a cleanout access point on the wall.

The cleanout may occasionally be found in utility rooms, garages, or even bathrooms. Search for an access panel or capped pipe in these areas.

Outdoor Sewer Cleanout

Outside sewer line cleanout are often found near the outer walls of the house, around where the main sewer line exits the building. Look for a small, capped pipe that sticks out from the ground and is typically constructed of PVC or metal.

Oftentimes, your sewer line may be located in your yard, probably with a metal or plastic lid to cover it. Inspect the ground for access points in a circular or square form. The last place to check will be in your house layout. In most cases, the cleanout is put in a straight path from the kitchen or bathrooms of your home to the city sewer line.

If for any reason you can not locate your sewer line cleanout, the best will be to call a professional plumber who will locate the cleanout for you.

What Are Sewer Line Cleanouts Used For?

A plumbing system has to have well-maintained and efficient sewer line cleanouts to work properly. Let’s go through the main reasons why they are used.

Clearing Blockages

One of the main goals of sewer line cleanouts is to remove blockages from the sewer system. The flow of wastewater can be slowed over time by the accumulation of garbage, oil, tree roots, and other pollutants. Professional plumbers can access the sewage line through the cleanout in case of a blockage and use specialized equipment to clear such obstacles with high-pressure water jets or mechanical snakes. 

Cleanouts are essential in restoring the necessary wastewater flow by removing blockages and avoiding potential harm to the plumbing system.

Inspections and Maintenance

Plumbers can use video cameras inserted through the cleanout to visually inspect the sewer system’s state. By doing so, they can inspect for any leaks or cracks that might cause damage to your sewer cleanout. This is why doing regular check-ups is important so any issues can be detected early and fixed before any damage occurs. 

Hydro Jetting and Cleaning

Hydro jetting is used to clean the inside of the sewage system thoroughly, remove any buildup waste, and ensure optimal flow. Through the cleanout, plumbers can install hydro jetting equipment directly into the sewer system, enabling effective and efficient cleaning.

Now you can understand why doing regular maintenance is important and needed. This will help you to prevent any plumbing issues that might happen, have a smooth wastewater flow and maintain your plumbing system in great condition.  

Repairing a Sewer Cleanout

When it comes to repairing your sewer cleanout, it is advisable to seek a professional plumber. While minor maintenance fixes can be done by some homeowners, not everyone is skilled or know how to repair drainage, blocked pipe, or any major issue that might occur to your cleanout. 

Repairing cleanouts definitely requires specialized knowledge and equipment. Here are some of the reasons why you should call a professional plumber:

  1. Assessment

A qualified plumber can do a full evaluation of your system. They will examine the cleanout, pinpoint the problem, and choose the best course of action for fixing it. Common problems like blocked or damaged pipes and leaks require certain knowledge, skills, and tools.

  1. Repair Methods

The plumber will use the best repair technique based on the particular problem. They can change a broken pipe or, for major issues like blockages, can use specialized tools, like hydro jetting or mechanical snakes, to clear the cleanout. 

  1. Professional Expertise

Professional plumbers have the essential training, know-how, and equipment to execute cleanout repairs successfully. They ensure that repairs are carried out in accordance with industry standards because they are aware of local plumbing laws and safety rules. 

Without the necessary knowledge, attempting to fix a sewer line cleanout might result in further damage or insufficient repairs, which can cause ongoing problems.

  1. Long-Term Solutions

In addition to fixing the immediate issue, plumbers also take precautions against potential problems in the future. To guarantee the cleanout performs at its best, they might apply sealing compounds, reinforce the cleanout using sturdy materials, or suggest ongoing maintenance.

Making DIY repairs might result in extra costs, more time-consuming, and possible plumbing system damage. Keep in mind that sewer cleanout line repairs are best left to experts. They are equipped with the knowledge, abilities, and tools required to handle difficult plumbing projects and guarantee that repairs are made correctly.

Final Words on Sewer Cleanouts

Now that we understand the basics of sewer cleanout and how to find sewer cleanout, it is important to keep clear access and conduct inspections so you can have a proper wastewater flow. While homeowners can maintain cleanouts, it’s recommended to leave any repairs to professionals, as their knowledge guarantees practical solutions and lasting effects. 

Being aware of the importance of clean sewer line cleanouts, you can keep your plumbing system in great condition and prevent major issues. You can rest easy knowing that your sewage cleanout will be repaired correctly, minimizing inconveniences and offering long-lasting solutions for your plumbing system by leaving the task in the hands of experts.

FAQ

What does a sewer cleanout look like in the house?

A sewage cleanout in a home often appears as a short, capped pipe that sticks out of the ground or is mounted on a wall, and it can be either white or black. Utility rooms and the basement close to the foundation are common places to find it. Professionals may easily reach the cleanout to examine and remove blockages in the main sewer line.

How long does it take to clear a clogged sewer line?

The extent of the blockage and the particular circumstances can affect how long it takes to unclog a sewer line. Professional plumbers can usually clear a clogged sewer line in a matter of hours. However, complicated clogs or major fixes might take more time, and the procedure can extend if new problems are found as it is being cleared.

Do all drains lead to the sewer?

Not every drain empties into a sewer. There are a few exceptions to the rule that most drains in a home, like those in sinks, showers, and toilets, link to the sewer system. For instance, rainwater drains go to separate systems that directly discharge water into rivers or lakes to manage excess water and prevent flooding.

How often should you clear main sewer line?

Depends on how old your plumbing system is and the state of your pipes. To avoid buildup, clogs, and other issues, homeowners are advised to have the main sewer line professionally cleaned every one to two years. However, if you notice any issues, it is best to consult with a plumber and seek professional advice. 


Sewer Smell in Bathroom: What Causes It & How to Get Rid of It

We know that bathrooms are the source of some unfortunate odors, but a sewer smell in bathroom is clearly out of place. It’s that faint sewage smell that makes you wrinkle your nose. Understanding the reasons behind sewer odors is a step towards learning how to eliminate them. 

There can be many sources of the awful sewer smell – from improper plumbing venting to damaged pipes and blocked sewer lines. Using fragrance cleaners will temporarily mask the smell and still be there the next time you walk in the bathroom. 

Fortunately, there is a solution to this irritating problem. You can use many simple and inexpensive DIY methods to correct the sewage smell. If this is not for you, you can always hire a professional to eliminate sewage odors. Read to learn how to get back that clean-smelling bathroom.

What Causes Sewer Smell in Bathroom?

The sewer smell in your bathroom can stem from various sources. Identifying what causes sewer smell in bathroom is crucial to eliminate the odor effectively. Here are some of the most frequent causes of that horrid odor: 

  • Poor plumbing venting: When plumbing vents are not installed correctly, or there is a blockage, the sewer smell in bathroom sink can be persistent.
  • Dry P-trap: The U-shaped pipe beneath your sink or shower drain holds water to prevent sewer gasses from entering your home. If the P-trap dries out due to infrequent use or a leak, it can allow the odor to permeate your bathroom. 
  • Damaged or cracked pipes: Cracks or damage in the pipes can cause sewer gasses to escape into your bathroom. Aging pipes, shifts in the foundation, or external factors can contribute to pipe damage. 
  • Blocked sewer line: A clogged or blocked sewer line can cause sewage backup, resulting in a foul smell in your bathroom. Tree roots, debris, or grease buildup are considered common causes of blockages in sewer lines. 
  • Sewer gas leaks: If you ever experienced a sewer smell in bathroom at night and got woken up from the foul smell in your home, you probably have a sewer gas leak. Leaks in the sewer lines or plumbing fixtures can release sewer gasses, creating an unpleasant smell. Such leaks happen due to deteriorated seals, loose connections, or damaged plumbing components. 

How to Get Rid of Sewer Smell in Bathroom?

We already identified the most common causes that allow sewer gasses to escape into your bathroom, creating an unpleasant smell. Dealing with that odor yourself can be unpleasant, but here are some tips on how to get rid of sewer smell in bathroom. Try the following steps to get back that fresh and odor-free bathroom. 

Ensure Proper Ventilation

Proper ventilation is the key to odorless bathrooms. Open the bathroom windows and use exhaust fans to promote airflow and eliminate odors. Always check that the bathroom vent fan is in good working order. If the odor keeps persisting, move on to the next steps.

Clean Your Sink and Toilet Thoroughly 

If you already had this problem in the past and got your pipes repaired or changed, and your bathroom still has that sewer smell, you might want to clean your previously affected areas. There are plenty of bacteria in the bathroom, and the smell may persist because of improper cleaning. 

Refill the Water Trap in Your Sink

Locate the u-shaped P-trap under your sink or shower drain. These “U” shaped pipes trap water under your sink to prevent sewer gasses and unpleasant odors from entering your home. Check for any debris or buildup in the pipes and remove it. 

Rinse it thoroughly and check for any damages or rust. If the P-trap is damaged in any way, you need to change it, or the odor will come back no matter how much you clean it. Securely reattach the trap if it isn’t damaged and ensure there are no leaks. 

Inspect and Repair Damaged Pipes

Examine your plumbing system for visible damage or leaks. If you find any cracked or damaged pipes, consider replacing them. Sometimes the problem occurs inside the pipes where you can’t see or reach. 

If you checked every visible pipe and didn’t find a problem, there is a great possibility that some of the other pipes are damaged. If that’s the case, seeking assistance from a professional plumber  is recommended.

Clear Blockages in the Sewer Line

If you notice water getting stuck in your sink or dark water coming back from the sewer, you may be facing a blockage in the sewer line. Examine the system for suspected blockages in the sewer line. 

You can use certain chemicals to break down the gunk buildup in your sewer line. If those don’t work, use a plunger or plumbing snake to dislodge them. Be careful when using a plumbing snake to avoid damaging the pipes.

Use Natural Remedies and DIY Solutions

Create a mixture of baking soda and vinegar, and pour it down the drains. Let it sit and start to work before flushing it with hot water, which should do the trick. Another trick you can use is to place coffee grounds or activated charcoal in a bowl in the bathroom to absorb the odors. Lemon or citrus-based cleaners can also temporarily mask the smell. 

Professional Solutions for Removing Sewer Smell in Bathroom 

If you tried everything yourself and nothing worked, you need to call a professional to estimate how to fix a sewer gas smell in bathroom. Here’s why hiring a professional is recommended:

  • They have extensive knowledge and experience in dealing with all sewer-related issues. 
  • They will check every pipe in your home until they find the problem in your sewer system, even those you can’t see or reach.
  • They are equipped with advanced and modern tools and equipment to pinpoint the exact source of the odor, whether hidden or in plain sight. 
  • They conduct comprehensive plumbing inspections to assess the condition of your drains, pipes, and sewer lines. This helps identify hidden issues contributing to the sewer smell. 
  • They use specialized sewer gas smell in bathroom removal techniques to eliminate sewer smells effectively. 
  • They use professional-grade cleaning agents and equipment that are specifically designed to neutralize odors. 

Long-Term Solutions and Prevention 

By hiring professionals, you can expect a temporary fix and long-term solutions. For persistent sewer smell in your bathroom, consider reaching out to Cummings Plumbing. Our reliable and experienced team can eliminate sewer smells and ensure a healthy and odor-free plumbing system. 

Visit our website to learn more and schedule an appointment for a free estimate. Take action today and enjoy a fresh, clean, and inviting bathroom space. Trust the experts to help you reclaim the comfort and hygiene you deserve.


Final Remarks on Dealing with Sewer Smell

When dealing with a sewer smell in bathroom you need to look for the main problem in your sewer system and think of the most effective elimination methods. Understanding the common causes of this problem is crucial in resolving it. If you tried to remove the smell and eliminate the probable causes of your problem, but it didn’t work, it might be time to get the assistance of professional plumbers.

Professional plumbers have the expertise, advanced techniques, and specialized equipment to provide targeted solutions. By addressing the root cause of the sewer smell, professionals offer temporary relief and lasting solutions. They can restore a fresh and pleasant bathroom environment, providing peace of mind and comfort for you and your family.

Frequently Asked Questions

Will the sewer smell go away on its own? 

In some cases, a minor sewer smell may dissipate on its own if the underlying cause is temporary, such as a dry P-trap. However, persistent sewer smells are unlikely to go away without addressing the root cause.


Can sewer gas come up through the toilet? 

Yes, sewer gas can come up through the toilet if there is a problem with the plumbing system. Issues such as a damaged wax ring seal or a faulty vent pipe can allow sewer gasses to enter your bathroom through the toilet.


Is there a tool to detect sewer gas?

Yes, plumbers use various tools to detect sewer gas. One common tool is a smoke test, where non-toxic smoke is introduced into the plumbing system to identify any leaks or pathways through which sewer gas may escape.


Can a plumber get rid of sewer smell? 

Yes, a plumber can help get rid of sewer smell by identifying and resolving the underlying causes. They have the expertise, tools, and techniques to effectively eliminate sewer smells and restore a fresh environment in your bathroom. For any concerns regarding sewer smell in your bathroom, it’s recommended to consult a professional plumber. They can provide personalized advice and solutions based on your specific situation.


Water Heater Leaks: Identifying & Stopping Leaks from the Top

Help! Water heater leaking from top! Now, this is a phrase we hear often enough. Water heaters are usually built to last, but some aspects of the equipment, the surroundings, or maintenance can cause them to malfunction.

Can you imagine going about your day without a water heater in your home? No, we didn’t think so. Water heaters are essential in our day-to-day lives, and we immediately feel the lack thereof. 

The tank that holds hot water for us can start to malfunction without any apparent reason (at least to the untrained eye). Like any other appliance, water heaters can encounter issues, and one of the most common problems is leaks. 

In this article, we’ll discuss leaks originating from the top of the water heater, explore the potential causes, and provide guidance on identifying and stopping such leaks. Homeowners can understand how to approach a leaking water heater from top by learning about these issues.

Identifying the Leak: A Step-By-Step How-To

When it comes to hot water heater leaking from top, homeowners should really focus on looking for signs of moisture and water accumulation in and around the unit. 

Here are a few indicators that can help you identify a leaking water heater:

  • Visible water around the base: Check the area around the bottom of the water heater for any puddles or standing water. This could be a clear sign of a leak.
  • Dampness or water stains: Look for damp spots, water stains, or discoloration on the walls, floor, or nearby pipes. These could indicate water seepage from the water heater.
  • Corrosion or rust: Inspect the water heater for signs of corrosion or rust on the tank or pipes. Corrosion weakens the structure and can lead to leaks over time.
  • Dripping or leaking connections: Examine the connections and valves near the top of the water heater. If you notice any dripping or steady leaks, it could indicate a problem.
  • Lessened hot water supply: A sudden decrease in the hot or lukewarm water supply when you typically expect it to be hot may suggest a leak within the water heater.
  • Unusual sounds: Listen for hissing or bubbling sounds coming from the water heater. These noises could be caused by water escaping from the tank.

If you notice any of these signs, it’s essential to take prompt action to prevent further damage. Contacting a professional plumber to inspect and repair the leaking water heater is advisable.

Common Reasons for Hot Water Leaking from Top

There are several reasons why is your hot water heater leaking from the top, like corrosion, valve issues, and so on. Addressing these common causes through proper maintenance, regular inspections, and timely repairs can help prevent leaks and extend the water heater’s lifespan. 

  • Aging and deterioration: Over time, the materials used in water heaters can degrade, leading to weakened components, such as valves, fittings, and tanks. This deterioration can result in leaks.
  • Corrosion: Corrosion is a significant factor in water heater leaks. The presence of minerals and sediments in the water can cause corrosion in the tank and pipes, leading to small holes or cracks.
  • High water pressure: Excessively high water pressure can strain the water heater, causing stress on the connections, fittings, and valves. This pressure can lead to leaks at various points in the system.
  • Loose or damaged connections: If the connections between the pipes, valves, and the water heater become loose or damaged, they can leak. The constant pressure and movement can cause these connections to weaken over time.
  • Temperature and pressure relief valve (TPR valve) issues: The TPR valve releases excess pressure and temperature from the water heater. If this valve malfunctions or becomes faulty, it can cause leaks or drips.
  • Sediment buildup: Sediments, such as minerals and debris, can accumulate at the bottom of the water heater tank over time. This buildup can create a barrier between the water and the heating element, leading to overheating and potential leaks.
  • Improper installation or maintenance: Incorrect installation practices or inadequate care can contribute to leaks. Poorly sealed connections, improper insulation, or failed maintenance can all lead to water heater leaks over time.

How to Fix Water Heater Leaking from Top: Solutions for Every Problem

Fixing a water heater leaking from the top depends on the problem causing the leak. Here are some common issues and solutions to the most frequent reasons for leaky water hearts. 

Loose or Damaged Connections

  • Tighten any loose connections using a wrench or pliers.
  • If a connection is damaged, replace the faulty part with a new one.

Faulty Temperature and Pressure Relief Valve (TPR valve)

  • Turn off the power supply to the water heater;
  • Close the cold water supply valve;
  • Drain some water from the tank to relieve pressure;
  • Replace the TPR valve with a new one (remember to follow the manufacturer’s instructions).

Sediment Buildup

  • Turn off the power supply to the water heater;
  • Close the cold water supply valve;
  • Drain the water heater to remove sediment;
  • Flush the tank by opening the drain valve and letting water flow through until it runs clear;
  • Close the drain valve, refill the tank, and restore power.

Corroded or Damaged Tank

  • If the tank is corroded or damaged, you should call in the professionals.
  • Contact a licensed plumber to assess the situation and determine the appropriate course of action.

Looking for the ultimate solution to your leaky water heater? Look no further than Cummings Plumbing! Our expert plumbers have the knowledge and experience to diagnose and fix any water heater issue. 

Our leak detection and repair services will keep leaks from dampening your day – contact us for a free in-house estimate today!

Preventing Hot Water Heater Leaking from the Top

Preventing hot water heater leaks from the top requires proactive measures. Regular maintenance is crucial to identify and address potential issues.

Here are some steps of precaution you can take to make sure mishaps stay out of your way.

  • Monitor water pressure and temperature; 
  • Inspect and tighten connections from time to time; 
  • Remember to flush the tank every year (to remove sediment buildup); 
  • Test the temperature and pressure relief valve; 
  • Consider installing an expansion tank to reduce possible fluctuations in pressure.

Besides the preventive measures we mentioned above, one of the common causes of water heater leaks from the top is a loose or damaged cold water inlet valve. To make sure that doesn’t happen, you should check the valve regularly and tighten it if it’s loose. 

On the other hand, if the valve is corroded or cracked, don’t think twice before replacing it. Another possible cause of water heater leaks from the top is a faulty temperature and pressure relief valve. A valve of that type is designed to release excess pressure and prevent the water heater from exploding. To prevent such an unfortunate scenario, test the valve every six months and replace it if it is leaking or not working properly. 

In addition, it won’t hurt to make sure that the discharge pipe is not blocked or kinked.

Concluding Remarks on Water Heater Leaks

Whether you can tell there’s something wrong with your water heater or aren’t aware of any issues but still feel something is off, paying close attention to certain aspects of your water heater can help.

If your water heater leaks from top, the sides, or the bottom, it calls for immediate attention.

Commonly, homeowners are worried about water heater leaks coming from the top of the appliance, and rightfully so. A bad water heater poses a great danger to the surroundings and the people using the water.

Luckily, if you know what to look for, you can pinpoint and solve any issues. 

FAQs

How long will a water heater last after it starts leaking?

In the case of water leaking from top of water heater, it does not necessarily mean that the unit is at the end of its life. The location and cause of the leak will determine if it can be repaired or not. If the leak is minor and can be fixed, the water heater may last for a few more years.

Can I take a shower if my water heater is leaking?

If the leak is minor and does not affect the water pressure or temperature, you can probably take a shower before fixing it. However, if the leak is large or coming from the tank itself, you should turn off the water and power supply to the water heater and call a plumber as soon as possible.

How do I know if my pressure relief valve is bad?

If you hear a hissing or whistling sound from the valve, that’s a clear sign of a bad pressure relief valve. Also, look for visible leaks or drips from the valve.  In addition, if you notice the system underperforms in any way or isn’t as efficient as before, that is a call for inspection. Lastly, if the system temperature or pressure inexplicably rises, that’s a tell-tale sign of a faulty pressure relief valve. 

Installing a Tankless Water Heater in Your Home: The Ultimate Guide

Installing a tankless water heater in your home comes with its set of perks, such as energy efficiency, unlimited hot water supply, and space-saving options. If you’re considering making the switch, it’s essential to understand the installation process. 

The tankless water heater installation process requires careful planning and professional expertise. The main reason for this is to ensure the right sizing, placement, and connection to the elements in the existing plumbing and electrical systems in your home. 

If you aren’t sure how to install a tankless water heater, we are here to help! We’ll elaborate on the basic steps of installing a tankless water heater on your own and hopefully help you navigate the whole process safely and easily.

The Benefits of Tankless Water Heaters

Besides being a self-sufficient investment, tankless water heaters offer several benefits, especially in a head-to-head comparison to classic tank-based water heaters. If you’re wondering about the tankless water heater installation cost, would you be surprised to know it ranges from $2,000 to $4,500?

Below you will find five of the most useful benefits of tankless water heaters:

  • Energy efficiency: Tankless water heaters will only heat water when needed, which eradicates the usual heat loss in regular water heater tanks. This energy-efficient alternative is great for saving quite a few bucks on utility bills.
  • Unlimited hot water: If you’ve decided to install tankless water heater, you have ensured y have hot water whenever you need it; no more cuts on showers ‘cause you ran out of hot water. These water hearts work by heating water instantaneously, which translates to a continuous supply of hot water for more appliances than one. 
  • Space-saving design: Installing tankless water heater is a great space-saver, especially in confined spaces. The design of these water heaters allows for the unit to be wall mounted in tight spots (closets, utility rooms, etc.), which frees up space for other uses. 
  • Longer lifespan: On average, tankless water heaters last longer than standard tank-based water heaters in most households. With regular and proper maintenance, tankless water heaters can last 20+ years, compared to traditional water heater tanks that may need replacement after 10-15 years.
  • Minimized tank leaks: Tankless water heaters eliminate the risk of tank leaks or ruptures that subsequently lead to structural damages caused by leaking water. Since there’s no stored water, the potential for leaks and subsequent property damage is minimized.

The benefits we listed make water heater tankless installation a no-brainer. Homeowners looking to maximize their energy efficiency, have hot water on demand, and optimize their space, will love having a tankless water heater in their homes. 

Not to forget, enjoying some peace of mind knowing that potential water damage risks are out of the way makes installing a tankless water heater a greater necessity.

Tankless Water Heater Installation: Step-by-Step

If you’re wondering how to install tankless water heater, know that the process requires focus and preparedness. For those without any technical skills, installing a tankless water heater might be a tad complex.

If you’d rather not risk it, let professionals handle the installation, and stay on the safe side.

  1. Remove the Existing Water Heater

Make sure you know the size of the main gas pipe before starting anything. Connect a big pipe to the gas meter, as this heater consumes more gas than big furnaces typically found in households. If you don’t know for sure, simply contact your gas provider and get the info you need.

Next, turn off the valves, and the water and power supply to the existing heater. Proceed by draining and removing the heater before you discard it properly.

  1. Secure New Gas and Water Lines For the Heater

To link the new supply line on your new water heater, it’s best that you use a black pipe. 

Copper pipes are great for connecting existing water lines. Next up, adjust the lines to fit tour new water heater. If the system has an anti-siphon check valve, you can keep an expansion tank at the cold water inlet of the unit.

Proceed by securing the pipes to the wall using bell hangers. And lastly, flux the end of the piping. Wrap up the step by attaching the piping to the connectors, and fuse it all together (use a hand-held torch). Don’t forget to heat up the copper pipe before you solder it. 

  1. Place the Heater on a Platform

When we said that installing tankless water heater takes preparation, we meant this: have 2 pieces of lumber (4-inch each) to fashion out a platform. Find a well-ventilated area in the room to place the platform you made. 

Put the new water heater on the platform and ensure nothing around it can damage it.

  1. Install the Water Heater

Inspect if the water heater has drain and purge valves (use the instruction manual to make sure), and connect the heater with the sediment trap and shut-off valve. Next, connect the gas supply line to the shut-off valve.

Make sure the valves are securely fixed on the water supply line on the heater, and then look for any leaks (do it by turning on the water supply). If there is no leakage, repeat the same process for the gas lines. Once you set up everything, switch off the gas until the unit is all ready for use.

  1. Fix the New Vent

When it comes to fixing the new vent, first find the vent shaft and encircle it with silicone sealants (these are best because they can handle the heat). Next up, add a connector and tighten it with a hose clamp. 

Lastly, place the retaining ring on the tube and fold over the taps for added security.

  1. Switch on the Tankless Water Heater

Run some hot water from the faucet to make sure there is no air inside the plumbing and the unit. In a couple of minutes, turn off the water and plug in your new water heater.

Insulate the main pipe that supplies the hot water from the heater before you switch on the gas. 

The Ups and Downs of Installing a Tankless Water Heater Yourself

Installing a water heater yourself can save money, but it isn’t without a few drawbacks. 

When it comes to the pros of DIY tankless water heater installation, they include the following:

  • Budget-friendly 
  • It’s a flexible and convenient alternative to a professional installation
  • It’s a great learning experience.

But do you really want to risk damaging the unit before even using it? Installing a tankless water heater by yourself is super risky, especially if you haven’t done anything like it so far.

The cons of DIY tankless water heater installation include:

  • Potential safety hazards
  • Costly improper installation
  • Leaks or damages
  • Voiding warranties and more.

Installing Tankless Water Heater: DIY or Professional?

Calling a professional ensures proper installation, adherence to building codes, safety, warranty protection, and expert advice. It may involve additional costs, but the peace of mind and avoiding potential issues make professional installation a worthwhile investment.

If you’ve decided to hire our professionals at Cummings Plumbing, rest assured you’ve reached the best solution! With our experienced technicians, installing tankless water heater is done in no time. 

Being in the business for 36 years helped us become the leaders in heating and cooling services, specializing in reliable, seamless installations. 

Don’t risk DIY mishaps or subpar installations – trust Cummings Plumbing for professional tankless water heater installation that exceeds your expectations. Reach out to us today for a free estimate.

Final Words on Water Heater Tankless Installation

Hands down, installing a tankless water heater comes with a number of perks, such as energy efficiency and unlimited hot water supply. But, if you decide to make the switch from a standard water heater to a tankless one, make sure you do it with the help of a professional.

DIY installation may provide cost savings and personal satisfaction but comes with potential risks and challenges. To ensure a safe and proper installation, it is often best to rely on the expertise of professional plumbers who can navigate complex connections and provide warranty protection.

Let yourself enjoy some peace of mind while professionals handle your investment. 

FAQs

Is it hard to replace a water heater with a tankless water heater?

It’s not necessarily hard as it is challenging due to complex electrical and plumbing work.

How long does it take to install a tankless water heater?

Depending on who’s installing, the process can last several hours.

What is involved in changing to a tankless water heater?

There are a few reasons why homeowners decide to switch from standard water heaters to tankless ones. What motivates people to make the switch is energy efficiency, reduced risk of water damage, and longer lifespan of the unit.

How much value does a tankless water heater add to your home?

Tankless water heaters can significantly increase the value of homes. According to real estate agents, tankless water heaters can increase the asking price by 4%.


Cleaning the Drain — DIY Style

There’s nothing more disgusting than having the water level in the shower up to your ankles. But it happens, no matter how often and meticulously you clean your plumbings.

Drain clogging is one of the most common plumbing issues in homes, and it not only prevents the water from going down the drains but also causes unpleasant smells in your home. Plus, clogged drains can become the breeding ground for dangerous bacteria.

Unless you want to live in a smelly home and swim in the shower, you have to act in time!

Preparing a homemade drain cleaner is your best solution for an on-demand cleaning of the plumbing drainage system. In this article, we provide you with 6 highly effective DIY drain cleaners and instructions on how to prepare each.

How Often Should You Clean the Drains?

Many things end up in your drainage system every day, from hair to soap to food particles. If not cleaned, these things accumulate in the drains over time, causing clogged drains. The best way to prevent it is by regular DIY drain cleaning.

So, how often should you clean the drains?

It depends on the system’s needs. If the drain pipes are small and clog often, once or twice a month is enough. On the other hand, if they are larger and don’t clog, you can clean them at least once a year.

Besides these occasions, you should clean the drains whenever you notice:

  • An unpleasant smell coming out near the kitchen sink or the bathroom
  • Water going down the drain very slowly
  • Water coming back from the drains
  • Your plumbing gurgles as the water goes down the drains
  • Frequent toilet clogs or overflows

Why regularly cleaning drains is important?

Cleaning your drainage system regularly helps keep it clean and increases its efficiency. It prevents drain clogs and pipe blockages and reduces the risk of water backups. It also removes the unpleasant odor in your home.

Additionally, it saves you money by preventing major plumbing problems, which may cost you a lot in the long run.

Why Use DIY Drain Cleaners?

Most people rely on store-bought drain cleaners when cleaning the drains. They believe synthetic products guarantee 100% pipe cleaning success or higher efficacy than any drain cleaner homemade.

However, they don’t take into account the fact that store-bought cleaners contain additional chemicals which may damage the pipes and cause plumbing problems like pipe erosion and weak pipes.

So, why should you use homemade pipe cleaners?

  • They are made of natural ingredients. As such, they are safe to use and don’t pose a toxic risk to you and your family.
  • They are eco-friendly. Made of natural ingredients, homemade drain cleaners break down quickly. They go down the system as soon as you flush out the water, eventually leaving it.
  • They protect the pipes. You can effectively clean your drainage system without damaging your pipes, causing a pipe replacement that could’ve been avoided.
  • They are free. Preparing a drain cleaner yourself costs you nothing because you use kitchen supplies you already have at home.

Unlike homemade pipe cleaners, synthetic ones are made of harsh chemicals such as sulfuric acid and sodium hydroxide. These chemicals are too potent and can damage your pipes. They may corrode your pipes, eventually eating them away and disbalance the good bacteria in the septic system.

What’s even worse, they are toxic and don’t flush out easily like the homemade ones but stay in the pipes for an extended period. As such, they pose a health risk to your and your family.

And there’s always the risk of being unable to unclog and thoroughly the drainage system.

Homemade Drain Cleaner: How-To Guide

There are various types of drain cleaners you can prepare. Some are made of only one ingredient, while others are made of three. They differ in their potency and effect on the drainage system.

So, how do you know what is the best homemade drain cleaner?

There’s no right answer to this question, as it all depends on your plumbing issue or current plumbing needs.

We know you may need help to make the right choice. That’s why we’ve compiled a list of 6 highly effective DIY pipe cleaners.

#1. Boiling water

Boiling water is the simplest and most underrated pipe cleaner of them all. It successfully cleans your drains and helps reduce oil, grease, and fat accumulation in your pipes. It’s a great ASAP choice for pipe blockage.

However, you shouldn’t use it frequently as it may soften and even melt the PVC joints causing you more trouble than good.

Preparation method

  • Boil 4 cups of water or as much as your kettle holds.
  • Slowly pour it down the drain with one or two pauses between pourings.

#2. Baking soda + white vinegar

The baking soda and white vinegar cleaner are preferred among those who chose the DIY clean drain approach. This powerful solution effectively wipes away grease, hair, food particles, and other items in your drainage system.

You can use baking soda or soda bicarbonate, whichever you have at home, as both have the same cleaning effect.

Preparation method

  • Add ½ cup baking soda to ½ cup white vinegar
  • Steer with a spoon until the soda dissolves and the solution is well mixed.
  • Pour the solution down the drains and wait for 5-10 minutes (up to an hour for stubborn clogs).
  • Flush the drain with hot (not boiling) water

#3. Baking soda + lemon juice

If you want your home to smell nice, combine lemon juice with baking soda instead of white vinegar. The lemon scent is refreshing and pleasant, so you can use this combo when cleaning the drains in your kitchen.

Preparation method

  • Pour ½ cup baking soda down the drain
  • Pour ½ cup lemon juice
  • Wait for an hour
  • Flush the drain with hot (not boiling) water.

#4. Baking Soda + Salt

Baking soda works miracles on your drains when combined with salt. Salt’s abrasive properties explode when combined with baking soda, creating a potent cleaner.

Preparation method

  • Mix ½ cup baking soda with ½ cup salt
  • Pour the solution down the drain
  • Wait for half an hour, or let it sit overnight if the clog is tough
  • Pour boiling water into the drain to flush the cleaner

#5. Baking Soda + Salt + Cream of Tartar

If you’re dealing with stubborn pipe clogs, such as those caused by hair and soap scum, you need a highly potent solution. Baking soda, salt, and cream of tartar is the winning combo for fighting the hard-to-clean clogs.

What makes this solution ultra-powerful is that it has a double cleaning function. The baking soda and salt take care of the clog, whereas the cream of tartar cleans the metals.

Preparation method

  • Add ½ cup baking soda, ½ cup salt, and 2 tbsps of cream of tartar in a jar
  • Shake the jar to create a homogenous solution
  • Pour the solution into the drain
  • Pour boiling water.
  • Wait for at least one hour
  • Run tap water to rinse any solution remainings

#6. Salt + Borax + Vinegar

The so-called Borax solution is a powerful drain cleaner. It combines highly abrasive ingredients that work miracles in removing clogs in the drains. And it’s easy to prepare.

Preparation method

  • Pour ¼ cup salt and a ¼ cup Borax into the drain, then ½ cup vinegar
  • Flush with boiling water.
  • Wait for one hour, and then rinse the solution remainings with hot tap water.

Concluding Remarks on Drain Cleaning

Regular DIY drain cleaning is crucial for maintaining a clean and efficient plumbing system, as it prevents unpleasant odors, slow water drainage, and major plumbing issues.

A great way to clean the drainage system in your home on demand is by using a DIY drain cleaner. These solutions are natural, easy to prepare, and safe to use.

However, if they don’t help or if you’re facing a serious plumbing problem, it’s best to call a plumber. Experienced plumbers have the expertise and equipment to handle complex plumbing issues effectively. They ensure safety and offer a long-lasting solution to your plumbing issues, preventing further damage.

FAQ

How long do you let baking soda and vinegar sit in the drain?

In most cases, you should let the baking soda and vinegar solution sit in the drain for 5-10 minutes. However, if the clog is hard to remove, you can let it sit in the drain for up to an hour.

What dissolves hair in a drain?

The baking soda and vinegar solution is the winning homemade cleaner for dissolving hair in a drain.

Do plumbers use hydrogen peroxide?

Most plumbers use hydrochloric and sulfuric acid for effective drain cleaning. Hydrogen peroxide may be used in preparing homemade drain cleaners, but it’s not recommended due to its toxicity.

Will Coca-Cola unclog a drain?

Coca-cola may help remove small clogs. However, it’s not recommended for cleaning drains because, as a sugary soda, it leaves a sugar syrup film on surfaces.

Low Water Pressure: Why Does It Happen & What to Do About It

Low water pressure in one or more faucets in your home can mean trouble. Not only does it affect your livelihood by not being able to use running water as intended, but low water pressure may also indicate a host of underlying problems. 

If the sudden low water pressure in the house is left untreated, everyday activities like taking a shower or doing laundry get disrupted, hindering your normal functioning. In most cases, the problem will not go away on its own, and you need to look into the issue right away. 

It helps to understand the potential causes of low water pressure in your house. These can range from severe rust buildup in the pipes to defective pressure regulator to malfunctioning water meter valves. The cause of the problem can also be external, such as a low water table in your town’s municipal system or something else.

Keep reading to find out how to solve low water pressure in the house and where to go to for help.

Low Water Pressure in House: Underlying Causes

Water regulating systems and plumbing fixtures are fine-tuned systems with many components that need to be in good repair and often inspected for that reason. First, you need to establish whether your water supply comes from a single source, which helps narrow down the problem. 

If you are relying on a ground well, another area you must consider is the water pump inside the well. Otherwise, several components on your premises can cause low water pressure.

Main Valve 

Over time valves can get eroded or damaged. A faulty valve can open or shut on its own. If your house has low water pressure, try opening up the valve. If this is the problem, water pressure will pick up almost immediately, but you will still need to replace the main valve as the problem will only persist. 

Water Pressure Regulator

The water pressure regulator is the key component for regulating how much water enters your house from the main water supply. Too much pressure means potential problems; too little, and you’ll get a trickle of water in your faucets. 

The regulator controls the pressure level within a safe zone before water from the main enters the plumbing in your premises, including appliances requiring water. A faulty regulator can cause either sudden low water pressure in the house or high water pressure. 

This is one of the first things you need to check with an adequate pressure gauge, and the reading should ideally be between 55 and under 80 psi. The average life span of a good pressure regulator is around 15 years, so it is wise to write down the date of the last repair job near the part. 

Old Water Pipes

If the plumbing in your house is copper or galvanized steel and has been running some mileage, there is a high likelihood of corrosion buildup inside the pipes. If the buildup is severe, the water flow is slowed down and may be further compounded by leaky or malfunctioning valves and regulators. 

Old plumbing needs to be replaced sooner than later as this impacts the water quality. Left unchecked, corroded pipes will start to leak, if they already aren’t, and cause flooding and other damage. You can definitely not fix this yourself, so calling a professional should be the first order of business. 

Clogging 

Mineral deposits, dirt and rust, can reduce water flow or completely clog your faucets. If you get a trickle of water and the problem is not with the water main or with the valves, you need to flush or unclog your fixtures.

If your water local supply has a hard pH value of 8 or above, you will likely see the holes on your shower head or faucets clogged.

There are various solutions against gunk and mineral buildup. If your showerhead permits a trickle of water, you can unscrew the head and place it in a plastic container filled with vinegar or a store-bought solution.

Another way to do the job yourself is to unscrew the aerator part at the top of the spout. Often, you will find sand and even pebbles that reduce water flow. 

External Factors for Low Water Pressure in House

If your home is in an area that is prone to flooding or droughts, low water pressure in house can be attributed to either. Flood areas suffer from clogged drainage, and debris can enter the city’s plumbing, which can reflect on your water supply. Likewise, low water tables due to drought will impact how much water you are getting from your tap. 

Whether your supply comes from the municipal system or your own ground well, a lack of rainwater over the years will impact underground aquifers. In the event, call your municipal water works or a water/plumbing professional to consult on how you can improve the water pressure in your home.

Another important thing that needs to be checked is a change in local government regulation. As a response to lower water tables or increased water usage, your municipality may be pressured to regulate, that is, decrease the water output going into households. If this is the case, the municipality will inform its residents, so make sure to check whether this has been the case for your town. 

How to Fix Low Water Pressure in House: Step-by-Step Instructions

As a resident, you can try to investigate the problem yourself. You can take a few steps to find out how to fix low water pressure. However, be advised to perform these tests carefully and only if you have the technical skills for the task, such as fixing a pressure gauge. 

  • Call your neighbors to see if the water pressure is low on their premises too. If this is the case, the problem should be investigated by your municipal water works for burst pipes, clogs, leaks or other problems. 
  • Check all water fixtures in your home. If the issue persists in one fixture, say a shower head, but the remaining faucets are working fine, the problem may be located in that specific part. 
  • Turn on the cold water tap first on multiple fixtures and try to see if there is a difference between them. Then stop the cold tap and turn on the hot water. If the hot tap has low pressure, there may be a fault with the boiler. 
  • Check the water main valve, as rust buildup can cause the valve to turn, or it could be that someone tightened the valve. You can turn the valve wide up to see if the low water pressure in your house improves.  
  • Check for water pressure yourself. If you can perform this bit, you can connect a water pressure gauge to the fixture on the nearest valve. If the reading is below 45 psi, there is a problem with the pressure-reducing valve, or it has been tightened a bit too much. 
  • Are there two sources of water supply in your home? Primary and secondary? Do you have a water well and your own pressure tank? If so, make sure you check both if you know which water fixtures or appliances are connected to what system.

Sudden Low Water Pressure in House: A Sign to Call the Experts

Opinions on normal water pressure (psi) for residential homes vary between experts. Some claim 30 psi is enough, while others claim 45 is the minimum threshold that your water fixtures and appliances, like the dishwasher and laundry machine, require to operate normally. 

The high limit for water pressure is between 65 and 80 psi. Municipal waterworks have a code determining the maximums, which is usually 80 psi. If the water pressure in your home is too high, it can cause leakage, burst pipes, and disrupt or break your appliances.

Tampering with the plumbing can cause a more severe disruption in your water supply, resulting in higher costs and potential damage to your flooring, furniture and appliances. If you are wondering why is the water pressure low in my house, you’ll get the best advice from experts in your area. 

Installing a Water Pressure Booster

If you are impacted by persistent low water pressure that’s outside your control, a professional may advise you to install a water pump. These pumps are installed on the main line before its entry point into the building. If the problem concerns a larger home or commercial premises, you will find a fitting solution in a water pump booster which can get water to higher verticals. 

How to Fix Low Water Pressure in House: Conclusion

As a resident of a house with sudden low water pressure, there are steps that you can take to investigate the problem on your own. However, calling a professional will give you the best insight as to what causes the problem and how to fix low water pressure in the house. This problem cannot be left untreated as it may uncover serious damages in your plumbing, pressure regulator, valves or all of the above. 

Calling Cummings Plumbing in Tucson is your safest move to determine the problem and get  the best solution. 

FAQ

Can a water heater cause low water pressure?

Water heaters can suffer from various problems over time, including hard water mineralization and sediment buildup. Both clog vents and pipes, resulting in loss of output. Other reasons are a tightened valve, an electric issue, inadequate pipe width or too many bends before the water reaches the fixture. 

Why is my water pressure low when I have two faucets?

We can point out several potential issues causing low pressure when water is running from two faucets: shut-off valves, main water valve, aerator screens, water heater, rusty plumbing, etc. 

How much does it cost to replace a house water pressure regulator?

The cost of labor for replacing a pressure-reducing valve can range between $300 and $500. Professional plumbers charge more for providing service on weekends, holidays or late at night. Hard-to-access valves incur bigger costs. A good valve is between $50 and $100. 

Installing a New Bidet: Complete Guide

Installing a New Bidet: Complete Guide

Installing a bidet shouldn’t necessarily require a big plumbing job. Performing a basic bidet installation on an existing toilet seat can be done without too much hassle. But installing a stand-alone bidet requires some handyman skills.

If you are considering buying one for your home, you’ll naturally want to know how to install bidet. We’ll provide a step-by-step guide for two kinds of bidets: stand-alone and toilet seats. Read on to find out the preparations you need to undertake before you start working on a bidet hookup for your bathroom. 

Installing a Bidet: Why It’s a Good Idea

Bidets are not a typical bathroom fixture in the US. So why get one?

A stand-alone bidet is a perfect lavatory where you can refresh your feet during hot summer days—if taking another shower isn’t an option at that point in the day. Likewise, sprayer add-ons to your toilet fixture are a cost-effective way to keep your toilet bowl clean regularly if you prefer not to use chemical solutions.

Last but not least, a bidet installation makes lots of commercial and environmental sense as it can save the household between $180 and $350 dollars per year. Nature will be happy, too, because the average household uses 85 rolls of TP per year, or 800 rolls per individual—the equivalent of 14 trees in the lifespan of an average American. 

How to Install a Bidet: Step-by-Step

Installing an external bidet is easy, and you can do it completely on your own. However, pay attention to the part about bidet hookup on a wall frame, as this requires specific skills. On the other hand, stand-alone bidets are best done by a professional plumber, as these require unique fixes.

If you want to get informed about the process, we’ll walk you through both kinds of bidet installation.

Toilet Seat Bidet Installation

Before you purchase a bidet that you’re installing yourself, you need to know if it comes combined with a toilet seat or if it’s just the bidet on its own. If you are buying a bidet only, it needs to match the form of the toilet seat. Elongated toilet bowls require 2 inches of space, and round bowls require 3 inches of surface. Most bidets will find a standard two-piece toilet bowl with a tank.

1. Removing the Toilet Seat

The first thing to do is turn off the water coming into the tank. Turn the valve from its current flow position, then flush and listen closely to make sure no water is filling the tank. 

Remove the existing toilet seat by twisting a pair of plastic/metal nuts or fasteners off of the screws on the back of the bowl. The areas where the seat covers the ceramic part should be wiped clean as it accumulates dust and gunk over time. 

2. Detaching the Water Supply Hose

Locate the water supply hose and unscrew it. You need to replace this part with a T-connection or a T-valve that is going to add an extra connection going into the bidet. The bidet should come with a “How to install a bidet” booklet and required parts. The T-valve is one of the standard parts in the package. 

3. Mounting Plate

If the bidet is the same shape and size as the toilet seat, the mounting plate and the bidet won’t prevent the toilet seat from laying flat on the ceramic rim. Perform some checks to make sure the seat closes as it should with the bidet on. 

Locate the mounting plate in the box and lay it flat on the bowl by fastening it with the included screws and bolts. Make sure these are tight but not breaking-point tight. If you can’t tighten the nuts/fasteners with your hand, you can use a pair of Channellock pliers. 

4. T-valve Connection

Next, connect a braided hose between the bidet and the T-valve. Make sure the hose is properly connected on both ends and that the other end of the T-valve is connected to the main water source going into the tank. 

5. Final Checks

If the bidet has an electric heater, don’t plug it in the socket just yet. Turn on the water main first to make sure the tank is getting filled and there is water in the bidet. If both check out, your bidet was installed properly. 

You need to find out from the manual whether the bidet has a sensor to prevent spraying when no one is using it. If your bidet is without a sensor, turn the knob or press the button and keep an eye on the nozzle.

Stand-Alone Bidet Installation

If you decide to install this kind of bidet yourself, have ready the following:

  • Two water hoses/connectors
  • Two 3/8-in shut-off valves
  • Tube of silicone sealant 
  • Channellock pliers
  • Adjustable crescent wrench 
  • Drill (preferably cordless) and bits

Setting up the rough plumbing when you install a bidet requires installing a trap against sewer gasses and a vacuum breaker. These are crucial components that prevent bad smells from seeping back into your bathroom and contamination from brown water going into the water supply. 

1. Where to Place the Bidet 

You should place your bidet at least one foot from the toilet bowl and between 15–18 inches from the wall. Use a measuring tape to measure out the positioning and make marks with a pencil or tape.

Read your bidet’s footprint, i.e., dimensions, when determining its position. For reference, bidet sizes can vary in width between 14-in and 18-in. The height is usually at the same level as a standard toilet bowl. 

2. Install Plumbing 

You need to install the two 3/8-in shut-off valves according to the manufacturer’s instructions. The valves are usually placed in a horizontal line and are between 5-in and 7-in from the floor. Between the valves goes the drain outlet, which is usually 1 ½-in in diameter. 

Set the drain and faucet and use rubber washers to prevent the connection point from developing mineral sediment and/or oxidation. Practice caution when tightening the parts on the fixture because overdoing it can cause damage to both parts. 

3. Wall Frame/Floor-mount Installation

Wall-mounted bidets require installing a frame behind the drywall and tiles. This frame can be purchased separately if it doesn’t come in the same package as the bidet. 

Floor-mounted models require drilling a couple of holes in the bathroom tiles. You need to drill a hole as per the size of the bolt, then fix the bidet in position. 

In both cases, prior to fixing the bidet hookup, you need to apply silicone sealant on the bottom of the ceramic arch. 

4. Connect Hot/Cold Water and an Outpipe

The final step is to connect the braided hoses for hot and cold water to the shut-off valve and the drain pipe. If you are fixing a wall-mounted bidet, the drain line needs to connect in the wall to the 1 ½-in pipe. In floor-mount models, the drain pipe gets connected with the one into the floor, just like mounting a toilet bowl.

5. Perform Final Checks

Turn on the hot/cold valves and press the button that sets the water flowing. Try the cold water first, then the hot, then mixed to make sure everything is working alright. 

Install Bidet: DIY or Professional Installation

Should you install a bidet yourself or call a professional? If you have some technical skills and understand how basic plumbing around the toilet works, then you can go ahead and do it. Of course, installing a bidet with your own hands will save you money, however, you can’t always be sure that you’ll do it right.

If you’re asking yourself questions about how to install a bidet the right way, then maybe it’s better to leave it to the professionals. Cummings Plumbing in Tucson, AZ, has the pros for the job! We can help you with any plumbing or heating problem, including setting up your new bidet. 

You just need to give us a call for the perfect, clean bidet installation

Final Say on Bidet Installation

If you’ve made the decision to buy a bidet for your home, you’ll be on your way to paying off the investment by saving hundreds of dollars on toilet paper each year. 

It doesn’t take a lot of contemplating to realize that toilet seat and sprayer bidets are easier to install. However, installing a stand-alone fixture requires more work. In both cases, if you want to do it right and save yourself even more money on repairs, call an expert plumber. 

Frequently Asked Questions

What plumbing is required for a bidet?

Installing a wall-mounted or floor-mounted bidet requires connecting hot and cold water to the fixture. You need to have two connections made in the wall, plus an outpipe for a wall-mounted unit. 

How much does it cost to get a bidet installed?

The price for the job will vary depending on what kind of bidet you are installing. Be prepared to pay between $200 and $240 on average. 

Does bidet affect water bill?

The bill will be higher, but only by a little bit, as a bidet is not the same as a shower. Nevertheless, you are going to save a lot more on toilet paper than the marginal added cost of the water bill.