Author: Cummings Plumbing

GFCI Outlets Explained: Why They’re Essential for Safety

TLDR: Electricity makes life more convenient but poses risks like shocks and fires. Ground Fault Circuit Interrupter (GFCI) outlets are essential for safety. They prevent shocks, fires, and work well in wet areas. Compliance with codes and their versatility in applications make them crucial. GFCI outlets monitor and cut off power during imbalances. Testing them monthly is advisable, and older homes may need retrofitting. GFCI outlets are silent protectors ensuring electrical safety.


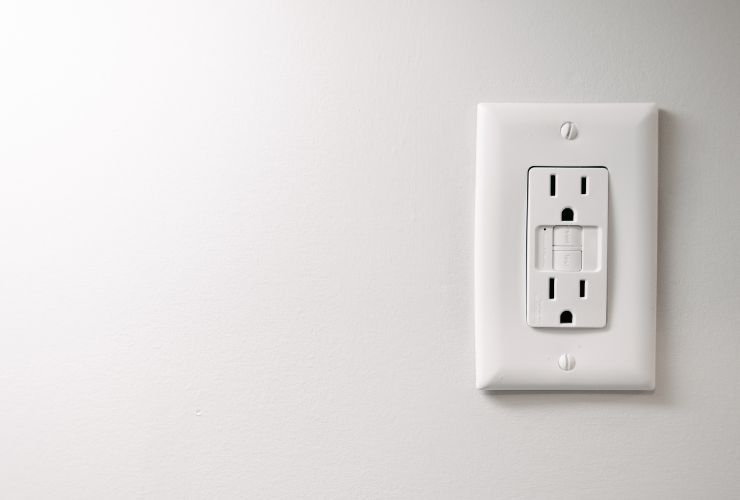
As the modern world becomes increasingly reliant on electricity, our homes and workplaces are filled with electrical devices and appliances that make life more convenient. While electricity undoubtedly improves our quality of life, it also poses inherent risks, such as electrical shocks and fires. To mitigate these dangers, electrical safety measures have evolved, and one of the unsung heroes in this realm is the Ground Fault Circuit Interrupter (GFCI) outlet. In this comprehensive guide, we will delve deep into the world of GFCI outlets, shining a spotlight on their significance and why they are indispensable for ensuring electrical safety.

Why Gfci Outlets Matter

The Invisible Protector: Why GFCI Outlets Matter

Electrical safety is a paramount concern that transcends the boundaries of our homes, workplaces, and public spaces. Accidental electrical shocks can result in severe injuries, while electrical fires can cause catastrophic damage to property and, more importantly, endanger lives. Amid these potential hazards, GFCI outlets emerge as silent yet vigilant guardians. Let’s delve into the primary reasons why GFCI outlets are essential:

1. Shock Prevention

GFCI outlets serve as a formidable line of defense against electrical shocks. Their primary function is to continuously monitor the flow of electricity through a circuit. If they detect even a minor imbalance in the current, as small as 4-6 milliamperes, they swiftly interrupt the circuit’s power supply. This rapid response can prevent fatal shocks, especially in wet or damp environments like bathrooms, kitchens, or outdoor areas.

2. Fire Avoidance

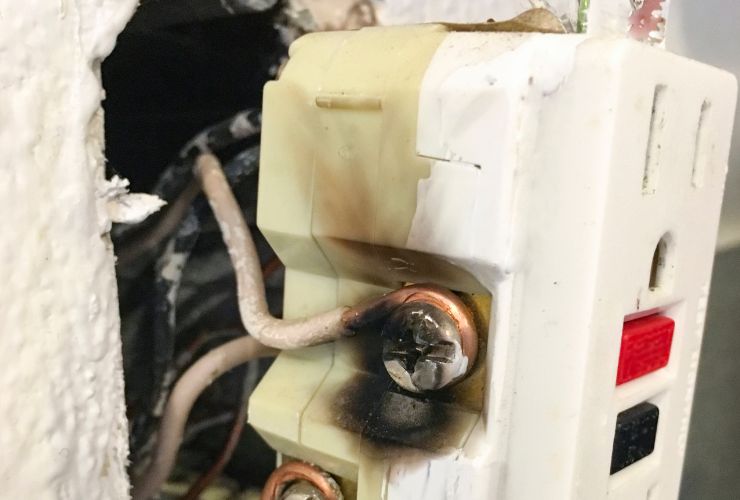
Beyond shock prevention, GFCI outlets contribute significantly to fire prevention. Electrical fires can result from damaged or faulty wiring, overloaded circuits, or short circuits. GFCI outlets help mitigate the risk of electrical fires by shutting off power when they detect abnormal electrical activity. This proactive measure can prevent overheating and potential ignition sources, thereby reducing the likelihood of fires.

3. Protection in Wet Locations

Wet environments are particularly susceptible to electrical accidents. Water is an excellent conductor of electricity, and even a minor fault in electrical devices can have disastrous consequences when combined with moisture. GFCI outlets are a lifesaver in areas prone to moisture, as they can quickly detect ground faults and cut off the power supply, reducing the risk of electrocution.

4. Compliance with Electrical Codes

Many building codes and regulations mandate the installation of GFCI outlets in specific locations within a building. Compliance with these codes is not just a legal requirement but also a common-sense approach to safeguarding occupants and property. Failure to install GFCI outlets where required can result in fines, failed inspections, and increased liability in case of accidents.

5. Versatile Application

One of the remarkable aspects of GFCI outlets is their versatility. They can be installed in various settings, making them suitable for both residential and commercial use. From kitchens and bathrooms to outdoor areas, garages, and industrial facilities, GFCI outlets offer flexible protection wherever electrical devices are used.

How Gfci Outlets Work

How GFCI Outlets Work

Understanding the inner workings of GFCI outlets is key to appreciating their significance in electrical safety. These outlets employ a straightforward yet highly effective mechanism to detect ground faults and cut off power. Here’s a detailed look at how they operate:

1. Current Monitoring: At the heart of every GFCI outlet lies a continuous monitoring system. It continuously tracks the electrical current flowing through it. To do this, the outlet splits the current into two paths: one through the hot wire and another through the neutral wire. Under normal circumstances, these currents should be equal, indicating that electricity is flowing smoothly.

2. Detecting Imbalance: When a ground fault occurs, such as a person coming into contact with an energized part of an appliance, an imbalance emerges in the current. In this scenario, some electricity flows through the hot wire but doesn’t return through the neutral wire. Instead, it finds an unintended path to the ground. This mismatch between the current in the hot and neutral wires, even if it’s a small amount, triggers the GFCI outlet.

3. Rapid Power Cutoff: As soon as the GFCI outlet detects this imbalance, it springs into action within milliseconds. It instantly cuts off the power supply to the circuit. This swift response prevents the possibility of electric shock or fire, as the faulty circuit is interrupted before it can cause harm.

4. Manual Reset: After a GFCI outlet trips due to a ground fault, it requires manual intervention to restore functionality. Users can accomplish this by pressing the reset button on the outlet. This crucial step ensures that the outlet can resume its protective function once the underlying issue is resolved.

FAQs About GFCI Outlets

Where should GFCI outlets be installed in a home?

GFCI outlets should be installed in areas where there is a higher risk of exposure to moisture. This includes bathrooms, kitchens, laundry rooms, outdoor outlets, garages, and crawl spaces. They are also recommended near swimming pools and hot tubs, as these locations are particularly susceptible to ground faults due to their wet environments.

Are GFCI outlets the same as AFCI outlets?

No, GFCI (Ground Fault Circuit Interrupter) outlets and AFCI (Arc Fault Circuit Interrupter) outlets serve different purposes. GFCI outlets are designed to protect against ground faults and electrical shocks, while AFCI outlets are designed to detect and prevent arc faults, which can cause electrical fires.

Can I replace a standard outlet with a GFCI outlet myself?

While replacing a standard outlet with a GFCI outlet is a straightforward task for those with electrical wiring experience, it’s important to exercise caution. If you’re unsure about your wiring skills or local electrical codes, it’s safer to hire a licensed electrician to perform the installation. This ensures that it’s done correctly and meets all safety requirements.

How often should I test my GFCI outlets?

It’s recommended to test your GFCI outlets at least once a month. You can do this by pressing the “test” button on the outlet, which should trip the outlet, and then pressing the “reset” button to restore power. Regular testing helps ensure that the GFCI outlets are functioning correctly and provides peace of mind regarding your electrical safety.

Are GFCI outlets required in older homes?

Building codes and regulations regarding GFCI outlets have evolved over the years. While older homes may not have had GFCI outlets when originally constructed, it’s often advisable and sometimes legally required to retrofit GFCI outlets in certain locations, especially those with increased moisture exposure. This retrofitting ensures that older homes are brought up to modern safety standards.

Protect Your Home & Your Family – Get Your GFCI Outlets Upgraded!

GFCI outlets stand as the silent guardians of electrical safety, diligently watching over our homes, workplaces, and public spaces. Their ability to swiftly detect and interrupt ground faults makes them indispensable in preventing electrical shocks and fires. Understanding their vital role and ensuring their proper installation in moisture-prone areas is essential for safeguarding lives and property. In the realm of electrical safety, GFCI outlets stand as a testament to the power of proactive protection, silently shielding us from unseen dangers.

Emergency Furnace Repair: What to Do When Your Heat Goes Out

As winter’s chill creeps in, your trusty furnace steps into the spotlight, silently working to keep your home warm and snug. Yet, what happens when this unsung hero unexpectedly falters, leaving you shivering in the cold? This is precisely when the significance of emergency furnace repair becomes apparent. In this in-depth guide, we will explore the crucial steps to take when your heating system fails unexpectedly, providing you with essential advice to ensure your warmth and safety during those frosty moments.

Cold Emergency Furnace Repairs

The Unwelcome Chill: Why Emergency Furnace Repair Matters

When the mercury plummets, and your furnace malfunctions, it swiftly transforms into an uncomfortable and potentially hazardous situation. Your furnace isn’t just a convenience; it’s a vital cog in your home’s heating apparatus, responsible for creating a comfortable and secure indoor environment. When it falters, you must have a plan in place to address the issue promptly. Here’s why emergency furnace repair is so vital:

1. Comfort and Well-Being

First and foremost, a functional furnace is paramount for your comfort and well-being, particularly during the unforgiving winter months. Without a reliable heating system, your home can swiftly become an unwelcoming icebox. Emergency furnace repair ensures that your dwelling remains a warm and inviting sanctuary for you and your loved ones.

2. Health and Safety

In addition to comfort, furnace malfunctions can jeopardize your health and safety. Cold indoor temperatures can lead to health concerns such as hypothermia, especially for vulnerable individuals like the elderly, young children, or those with pre-existing health conditions. Furthermore, certain alternative heating methods, such as using portable heaters or stoves, can be perilous if not handled correctly, increasing the risk of fires or carbon monoxide poisoning. Emergency furnace repair acts as a shield against these threats, keeping your home secure and toasty.

3. Preventing Further Damage

Turning a blind eye to furnace issues can result in more extensive and costly repairs down the line. What may start as a minor malfunction can rapidly escalate into a major problem, potentially necessitating a complete furnace replacement. Swift emergency repairs often nip the problem in the bud before it blossoms into a more substantial issue, saving you both time and money.

What To Do When Emergency Furnace Repair

What to Do When Your Furnace Stops Working

Now that we’ve underscored the importance of emergency furnace repair, let’s delve into the precise steps to take when your furnace unexpectedly calls it quits. Follow these guidelines to maintain your warmth and well-being:

1. Check the Thermostat

Commence with the fundamentals. Ensure that your thermostat is set to the desired temperature and in the “heat” mode. Sometimes, a minor adjustment can rectify the issue.

2. Inspect the Circuit Breaker

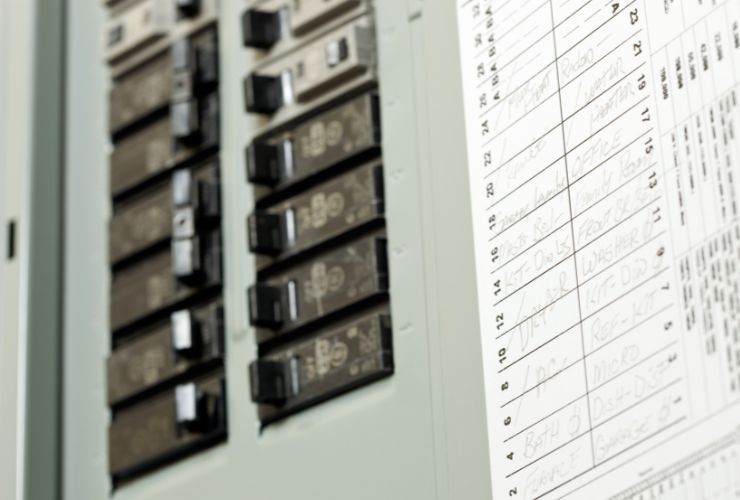
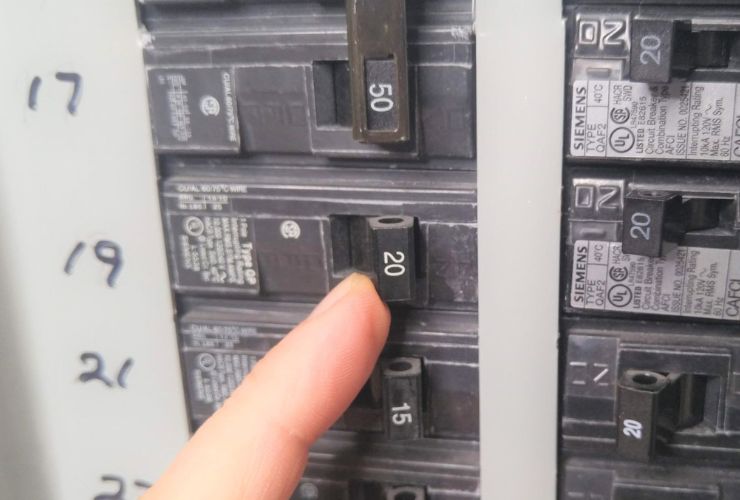
Your furnace might have tripped the circuit breaker. Examine your electrical panel and reset the breaker if it has tripped. Should it trip again, refrain from repetitive resetting and reach out to a professional technician.

3. Replace the Air Filter

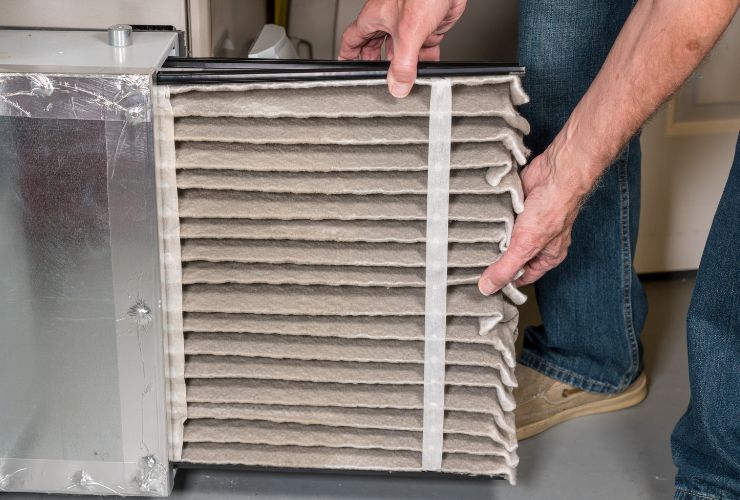
A clogged or filthy air filter can obstruct airflow, causing your furnace to malfunction. Inspect the filter, and if it’s soiled, replace it. Routinely changing your filter can thwart future issues.

4. Verify the Fuel Supply

For those with gas furnaces, ensure that the gas supply is active. If you have an oil furnace, confirm that you possess an ample reserve of heating oil. Depletion of fuel can cause your furnace to cease operation.

5. Inspect Vents and Registers

Obstructed or closed vents and registers can limit airflow, resulting in heating problems. Confirm that these openings remain unblocked and unobstructed to enable the free circulation of warm air.

6. Look for Error Codes

Modern furnaces often incorporate diagnostic features that display error codes when a problem surfaces. Refer to your furnace’s manual to decode these codes, which can offer valuable insights into the issue at hand.

7. Reset the Furnace

On occasion, resetting your furnace can resolve minor issues. Locate the reset button on your furnace’s control panel and adhere to the manufacturer’s guidelines for resetting.

8. Call for Professional Help

If none of the above measures rectify the issue, it’s time to summon the professionals. Attempting intricate repairs without the requisite expertise can be perilous and may even void your warranty. Professional technicians possess the training and tools to diagnose and remedy furnace problems securely.

Furnace Repair During The Winter

Questions & Answers About Emergency Furnace Repair

Can I attempt to repair my furnace myself during an emergency?

While minor tasks such as changing the air filter can be executed by homeowners, numerous furnace issues necessitate professional expertise. Endeavoring complex repairs without the requisite knowledge can be perilous and may nullify your warranty. Opting for professional technicians for emergency furnace repairs is the recommended course of action.

How long can my home safely go without heat in an emergency?

The duration a home can endure without heat safely hinges on various factors, including external temperatures, insulation, and the health and age of the occupants. In exceptionally frigid conditions, extended exposure to cold indoors can lead to health hazards, particularly for susceptible individuals. Hence, it’s imperative to swiftly address furnace issues or contemplate alternative heating sources to maintain a secure and comfy indoor environment.

What is the typical response time for emergency furnace repair services?

Response times are contingent on your location and the availability of the service provider. During severe weather events or peak seasons, scheduling emergency repairs may take longer. It’s prudent to contact a reputable service provider as soon as you detect furnace issues to secure a swift response.

Conclusion

Confronting an abrupt furnace malfunction can be an intimidating experience, particularly in the throes of winter. However, by comprehending the significance of emergency furnace repair and mastering the actions to undertake when your heat vanishes, you can ensure the comfort and safety of your family. Remember to embark on basic troubleshooting but refrain from hesitating to summon professional technicians for intricate problems. With the correct approach, you can promptly reinstate warmth to your abode and navigate the winter season with tranquility.

LED vs. Incandescent vs. CFL: Which Lighting Option Is Best for You?

TLDR: When it comes to choosing the right lighting for your home, LED bulbs shine as the top choice due to their outstanding energy efficiency, durability, and instant brightness. Incandescent bulbs, although emitting a warm and familiar light, are inefficient and have a short lifespan. CFL bulbs offer energy savings but have drawbacks like warm-up time and a shorter lifespan compared to LEDs. The choice between these lighting options depends on your priorities, but making the switch to LED technology is a step toward greater energy efficiency and sustainability.


Choosing the right lighting for your home can significantly impact energy efficiency, visual comfort, and even your monthly electricity bills. With the advancement of lighting technology, you now have various options to choose from, with three popular choices being LED, incandescent, and CFL (Compact Fluorescent Lamp) bulbs. In this comprehensive guide, we will compare these lighting options, highlighting their strengths and weaknesses, so you can make an informed decision on the best lighting for your needs.

Led Lighting

LED Lighting: Efficiency and Longevity

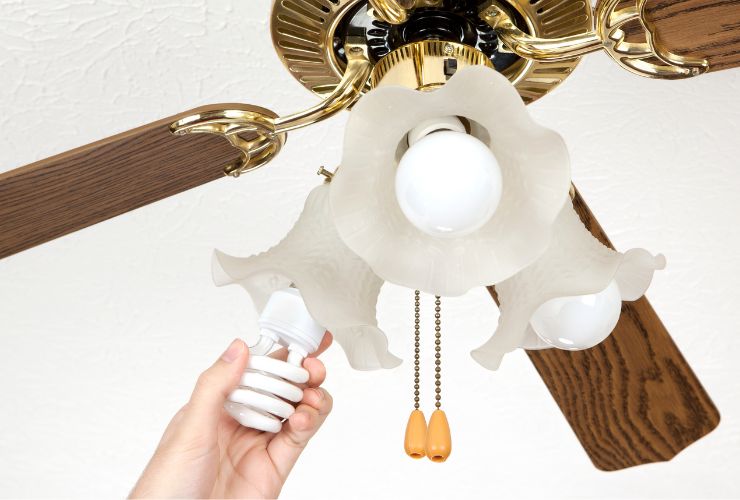
LED (Light Emitting Diode) lighting has gained immense popularity in recent years for several compelling reasons. LEDs are highly energy-efficient and have a remarkably long lifespan, making them an excellent choice for both residential and commercial settings.

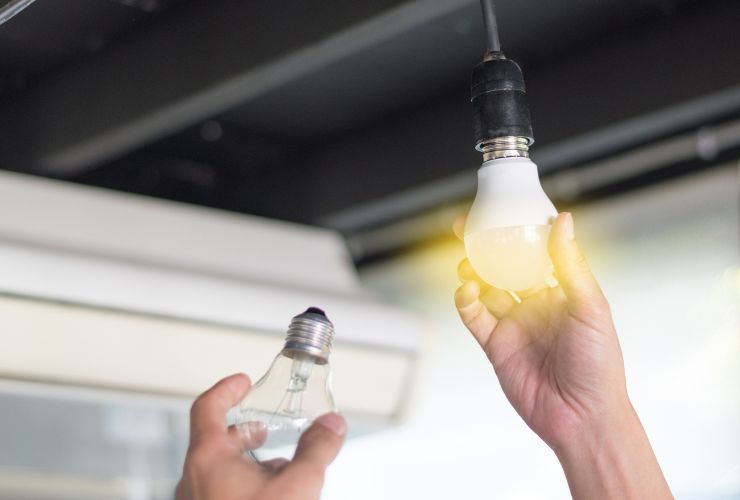
  1. Energy Efficiency: LEDs are known for their exceptional energy efficiency. They use significantly less electricity than incandescent and CFL bulbs to produce the same amount of light. This means lower energy bills and reduced environmental impact. LED bulbs are perfect for everyday lighting needs, such as task lighting in kitchens, reading lamps, or outdoor fixtures.
  2. Longevity: LED bulbs are built to last. They can provide illumination for up to 25,000 hours or more, which is substantially longer than incandescent or CFL bulbs. This extended lifespan reduces the frequency of bulb replacements, saving you money and reducing waste.
  3. Durability: LEDs are solid-state lighting devices, making them more robust and less prone to damage from shocks or vibrations. They are an ideal choice for areas where bulbs may be exposed to rough handling or environmental stressors.
  4. Instant Full Brightness: Unlike CFLs, LEDs reach full brightness instantly when turned on, without any warm-up time. This feature is particularly useful in spaces where immediate illumination is required.

Incandescent Lighting

Incandescent Lighting: Traditional but Inefficient

Incandescent bulbs are the traditional lighting choice, but their popularity has waned due to their inefficiency and relatively short lifespan.

  1. Warm and Familiar Light: Incandescent bulbs emit a warm, soft light that many find comfortable and familiar. They produce a color spectrum similar to natural sunlight, making them a preferred choice for certain applications, such as reading or decorative lighting.
  2. Affordability: Incandescent bulbs are typically less expensive upfront than LEDs. However, their lower energy efficiency means higher electricity bills over time, which may outweigh the initial cost savings.
  3. Short Lifespan: Incandescent bulbs have a relatively short lifespan compared to LEDs and CFLs, typically lasting around 1,000 hours. This means you’ll need to replace them more frequently, which can be inconvenient and less cost-effective in the long run.

Cfl Lighting

CFL Lighting: Energy Efficiency with Some Drawbacks

CFL bulbs were once considered a more energy-efficient alternative to incandescents, but they have some limitations that have led many consumers to switch to LEDs.

  1. Energy Efficiency: CFL bulbs are more energy-efficient than incandescents but slightly less so than LEDs. They use about 70-80% less energy than traditional bulbs, which can result in noticeable energy savings.
  2. Lifespan: CFLs have a longer lifespan compared to incandescents, typically lasting around 8,000-10,000 hours. While this is better than incandescents, it’s still significantly shorter than LED bulbs.
  3. Warm-Up Time: CFL bulbs may take a moment to reach full brightness after being turned on, which can be less convenient in situations where immediate illumination is needed.

FAQs About Lighting Options

Are LED bulbs more expensive than incandescents and CFLs?

LED bulbs typically have a higher upfront cost compared to incandescent bulbs but are more affordable than CFLs in the long run due to their energy efficiency and longer lifespan.

Can LED bulbs be used with dimmer switches?

Many LED bulbs are dimmable, but it’s essential to check the product label or description to ensure compatibility with your specific dimmer switch. Some older dimmer switches may not work well with LED bulbs.

Do CFL bulbs contain mercury, and are they recyclable?

CFL bulbs do contain a small amount of mercury, which is a concern for disposal. Many hardware stores and recycling centers accept CFL bulbs for proper disposal and recycling to prevent environmental contamination.

Can I use LED bulbs in outdoor fixtures?

Yes, LED bulbs are suitable for outdoor fixtures and are well-suited for cold temperatures, making them an excellent choice for outdoor lighting.

Which lighting option is the most environmentally friendly?

LED bulbs are the most environmentally friendly lighting option due to their energy efficiency, long lifespan, and minimal environmental impact.

Conclusion

Choosing the right lighting option for your home depends on your specific needs and preferences. LED bulbs stand out as a top choice for their exceptional energy efficiency, longevity, and instant brightness. While incandescent bulbs offer a warm and familiar light, their inefficiency makes them a less practical option. CFL bulbs provide energy savings but have drawbacks like warm-up time and a shorter lifespan compared to LEDs. Ultimately, the decision between LED, incandescent, or CFL lighting will depend on your priorities, but the move towards LED technology is a step towards greater energy efficiency and sustainability in your home.

Ready to upgrade your lighting and make your home more energy-efficient? Contact us today at Cummings Plumbing, Heating & Cooling to explore the best lighting solutions for your needs. Our experts are here to assist you in making the right choice and ensuring a brighter and more sustainable future for your home.

Preparing Your Furnace for Winter: Essential Maintenance Tips

TLDR: Maintaining your furnace is crucial for a warm and comfortable home during winter. Regular maintenance improves efficiency, enhances safety, and extends the furnace’s lifespan. An efficient furnace reduces heating costs, ensures safety, and offers long-term value. The top 10 maintenance tips include replacing or cleaning air filters, inspecting and cleaning vents and ducts, testing the thermostat, lubricating moving parts, checking the blower motor, inspecting the ignition system, cleaning the heat exchanger, and testing safety controls. Professional servicing is recommended annually to catch potential issues early and ensure optimal performance.


As the winter months approach, ensuring your furnace is in top condition becomes essential to maintain a warm and comfortable home. Regular furnace maintenance not only enhances its efficiency but also extends its lifespan. In this blog, we’ll explore the importance of preparing your furnace for winter and provide you with essential maintenance tips to help keep your heating system running smoothly. Read on to discover how to stay cozy and worry-free during the cold season.

The Importance of Furnace Maintenance

Your furnace is an indispensable component of your home’s heating system, playing a vital role in ensuring your comfort and well-being, especially when the winter chill sets in. Neglecting the maintenance of this essential appliance can have far-reaching consequences, including reduced efficiency, higher energy bills, and the unfortunate possibility of a breakdown just when you need heat the most. Let’s delve deeper into why furnace maintenance should never be underestimated:

Furnace Efficiency

One of the primary reasons to prioritize furnace maintenance is its direct impact on efficiency. Your furnace’s efficiency is a measure of how effectively it can convert fuel or electricity into heat while minimizing waste. Over time, dust, debris, and wear and tear can compromise your furnace’s efficiency, causing it to work harder and consume more energy to provide the same level of warmth. When your furnace operates at its peak efficiency, it heats your home effectively while using less energy. This not only keeps you comfortable but also lowers your heating costs, which can be particularly noticeable during the cold winter months. By investing in regular furnace maintenance, you ensure that your heating system is operating as efficiently as possible, saving you money and reducing your environmental footprint.

Furnace Safety

Beyond efficiency, safety is a paramount concern when it comes to furnace maintenance. Your furnace produces heat through combustion (for gas or oil furnaces) or electrical heating elements, making it essential to ensure that this process occurs safely and without risks to your home or family. A well-maintained furnace is less likely to develop safety issues. For instance, routine inspections can detect potential problems, such as a cracked heat exchanger in a gas furnace, which can lead to carbon monoxide leaks. Carbon monoxide is a colorless, odorless gas that can be deadly when inhaled in high concentrations. Additionally, regular maintenance checks can identify and address overheating issues, faulty safety controls, or malfunctioning components that could otherwise pose serious health and safety risks to your family. By maintaining your furnace properly, you minimize the chances of dangerous incidents, ensuring your home remains a safe haven throughout the heating season.

Furnace Lifespan

Furnaces represent a significant investment in your home’s infrastructure, and it’s in your best interest to make that investment last. Furnaces that receive proper maintenance tend to have longer lifespans. Over time, the wear and tear on a furnace can take a toll on its components, potentially leading to breakdowns and the need for costly repairs or replacements. Regular servicing, on the other hand, can extend the life of your furnace, delaying the day when you’ll face the expense of a new unit. When you consider that a well-maintained furnace can continue to deliver reliable heating for many years, the cost savings and peace of mind that come with proper maintenance become evident. By scheduling regular maintenance, you not only protect your investment but also ensure that your furnace continues to provide dependable warmth, season after season.

Top Furnace Maintenance Tips

Top 10 Essential Furnace Maintenance Tips

Your furnace plays a pivotal role in keeping your home warm and comfortable during the cold winter months. To ensure it operates efficiently and reliably, regular maintenance is key. In this guide, we present the top 10 essential furnace maintenance tips that will help you prepare your heating system for the winter season. From checking the air filter to testing safety controls, these tips will keep your furnace running smoothly and your home cozy.

Replace or Clean the Air Filter

A dirty or clogged air filter can significantly impact your furnace’s performance. It reduces airflow, forcing your furnace to work harder and potentially leading to damage. Make it a habit to inspect your air filter monthly and replace it when it’s dirty or follow the manufacturer’s recommendations. Proper filtration ensures optimal efficiency and indoor air quality.

Inspect and Clean Vents and Ducts

Ensuring unobstructed airflow is crucial for efficient heating. Check that vents and ducts are clear of obstacles, such as furniture or debris. Use a vacuum to remove dust and dirt around registers and inspect ductwork for leaks. Leaky ducts can result in heat loss, reducing the overall efficiency of your heating system.

Test the Thermostat

Your thermostat is the control center of your heating system. To ensure it’s working correctly, test it in both heating and cooling modes. Replace the batteries if necessary and consider upgrading to a programmable thermostat for improved energy savings and precise temperature control.

Lubricate Moving Parts

Furnace components with moving parts, such as motor and fan bearings, require proper lubrication to reduce friction and wear. Consult your furnace’s manual for guidance on lubrication intervals and the type of lubricant to use. Proper lubrication extends the life of these critical components.

Check the Blower Motor

The blower motor is a vital element of your furnace’s operation. It’s responsible for circulating heated air throughout your home. Regularly inspect it for dirt and debris, and clean it if necessary. Ensure that the blower belt is correctly tensioned, and replace it if it shows signs of wear. A well-maintained blower motor ensures efficient heat distribution.

Inspect the Ignition System

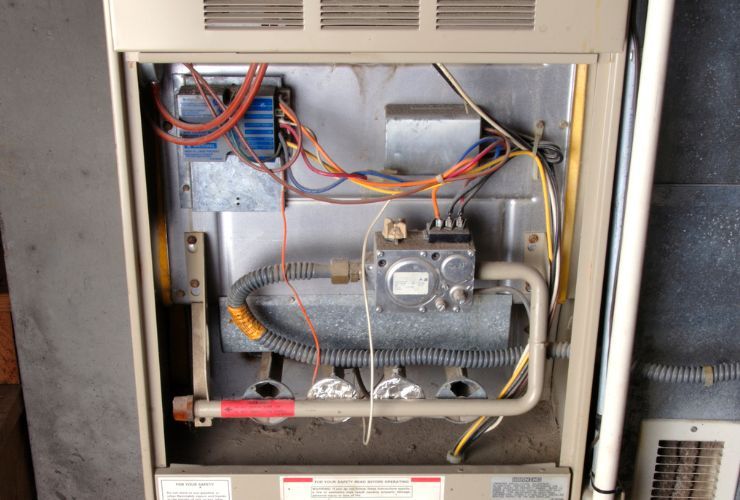
For gas furnaces, the ignition system is of paramount importance. A clean and functioning pilot light or flame sensor is essential for proper ignition. Regularly clean these components to ensure reliable performance. If you have an electronic ignition system, check for any issues with the control board and address them promptly to avoid ignition problems.

Inspect and Clean the Heat Exchanger

The heat exchanger is a critical furnace component responsible for transferring heat to the air that circulates through your home. Over time, it can develop cracks or corrosion, which can lead to carbon monoxide leaks—a potentially life-threatening issue. It’s highly advisable to schedule professional inspections for the heat exchanger, as repairing or replacing it requires specialized knowledge and tools.

Test Safety Controls

Safety controls, including limit switches and pressure switches, are in place to protect your furnace from overheating and other potential hazards. Ensure that these controls are functioning correctly by testing them periodically. Faulty safety controls can compromise your furnace’s safety and efficiency, so any issues should be addressed promptly.

Questions & Answers About Furnace Maintenance

How often should I schedule furnace maintenance?

It’s recommended to have your furnace professionally serviced annually before the start of the heating season. Regular maintenance can catch potential issues early and ensure optimal performance.

Can I perform furnace maintenance myself?

While some maintenance tasks, such as filter replacement and cleaning, can be done by homeowners, many aspects of furnace maintenance require professional expertise. Professional technicians have the training and tools to perform comprehensive inspections and repairs safely.

What are signs that my furnace needs professional attention?

If you notice any of the following signs, it’s time to call a professional technician:

  • Unusual noises like banging or screeching.
  • Inconsistent heating or frequent cycling.
  • Uneven heating throughout your home.
  • A sudden increase in energy bills.
  • The presence of unusual odors, especially a sulfur or rotten egg smell, which could indicate a gas leak.

Conclusion

Preparing your furnace for winter through regular maintenance is a proactive step toward ensuring your home remains warm, efficient, and safe throughout the cold season. By following these essential maintenance tips and scheduling annual professional servicing, you can enjoy reliable and worry-free heating, lower energy costs, and peace of mind knowing that your furnace is ready to face the challenges of winter. Don’t wait until the chill sets in; take action now to keep your home cozy and comfortable during the winter months.

Emergency Preparedness: How Backup Generators Can Safeguard Your Home

TLDR: Backup generators are crucial for emergency preparedness, ensuring safety, comfort, and essential power during outages caused by natural disasters or electrical grid failures. They power safety systems, maintain HVAC and food preservation, operate sump pumps, enable communication, and work automatically through an Automatic Transfer Switch (ATS). Backup generators use various fuel sources, such as natural gas, propane, diesel, or gasoline. When choosing between standby and portable generators, consider your specific needs and budget.


When it comes to safeguarding your home during unexpected power outages, backup generators play a pivotal role in ensuring your family’s safety and comfort. From extreme weather events to electrical grid failures, emergencies can strike at any time, leaving you without essential power. In this blog, we’ll explore the importance of emergency preparedness, how backup generators can be your reliable lifeline when the lights go out, and various aspects of these vital systems.

The Role of Backup Generators in Emergency Preparedness

Emergencies can come in various forms, ranging from natural disasters like hurricanes, earthquakes, and severe storms to man-made events such as electrical grid failures or accidents. During these challenging times, access to electricity can mean the difference between staying safe and comfortable or facing significant inconveniences and risks.

  1. Safety: Backup generators ensure that critical safety systems remain operational. They keep essential devices like smoke detectors, security systems, and medical equipment powered, reducing the risk of accidents and health-related issues during power outages.
  2. Comfort: Generators provide a consistent source of electricity to keep your HVAC system running, maintaining a comfortable temperature in your home. This is especially crucial in extreme weather conditions, whether it’s scorching summer heat or freezing winter cold.
  3. Food Preservation: A power outage can lead to the spoilage of perishable food items in your refrigerator and freezer. With a backup generator, you can keep your food fresh, preventing wastage and ensuring a continuous food supply for your family.
  4. Sump Pump Operation: If your home has a sump pump, it’s vital for preventing basement flooding. A backup generator ensures your sump pump continues to work even during prolonged outages, protecting your home from water damage.
  5. Communication: In today’s connected world, communication is key during emergencies. Backup generators keep your communication devices, such as phones, radios, and the internet, functional, allowing you to stay informed and connected to emergency services and loved ones.

How Backup Generators Work

How Backup Generators Work

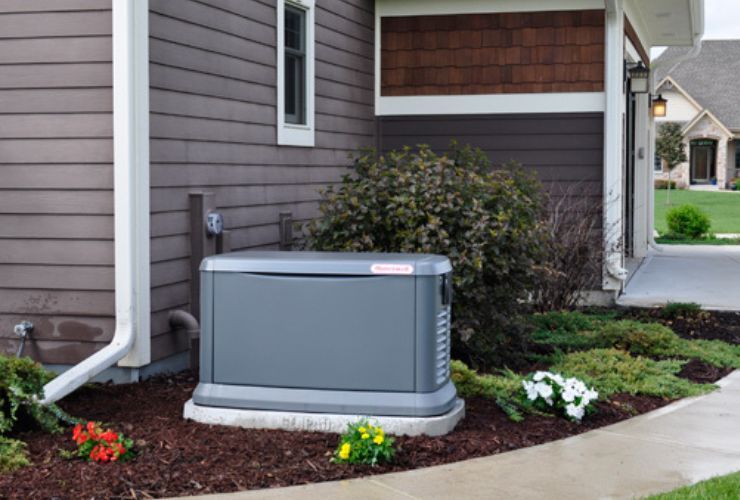
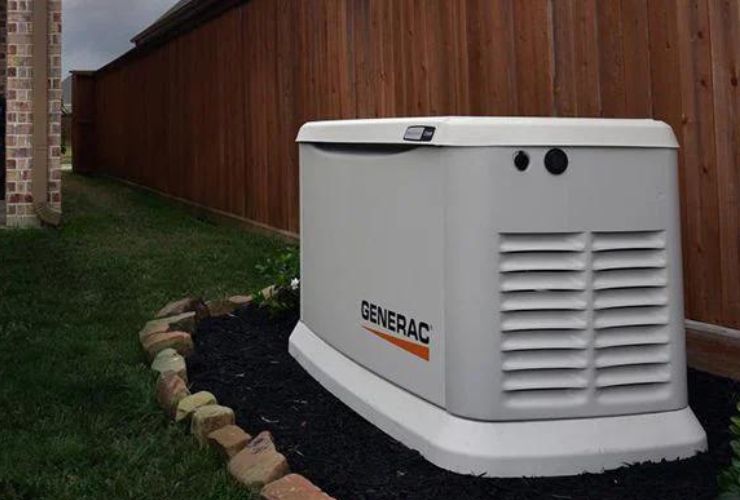
Backup generators operate automatically, sensing when there’s a power outage and activating within seconds to restore electricity to your home. They are typically fueled by propane, natural gas, or diesel, providing a reliable source of power. These generators are installed outside your home and are connected to your electrical system through an automatic transfer switch (ATS).

When the generator detects a power outage, the ATS disconnects your home from the utility grid and activates the generator. It then transfers the electrical load to the generator, providing power to your home’s circuits. When utility power is restored, the ATS switches back to the grid and shuts down the generator, ensuring a seamless transition.

Automatic Transfer Switch (ATS)

The Automatic Transfer Switch (ATS) is a crucial component of standby generator systems. It serves as the bridge between your home’s electrical system and the generator. When the ATS detects a power outage, it automatically switches your home’s electrical load from the utility grid to the generator. Once utility power is restored, it seamlessly transfers the load back to the grid and shuts down the generator.

The ATS ensures a smooth and safe transition between power sources, eliminating the need for manual intervention and preventing electrical backfeeding, which can be dangerous to utility workers.

Fuel Sources For Backup Generators

Fuel Sources for Backup Generators

Backup generators use various fuel sources to generate electricity:

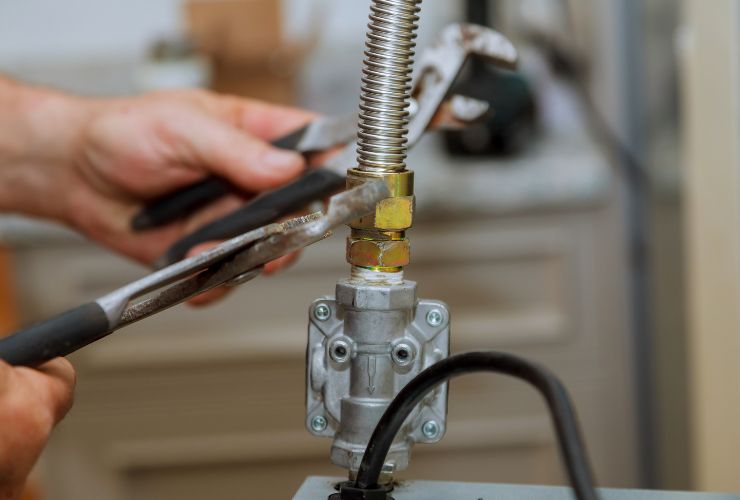
  • Natural Gas: Natural gas generators are connected to your home’s gas supply, providing a continuous and cost-effective source of fuel. They are convenient because there’s no need to refuel or store fuel on-site.
  • Propane: Propane generators use propane stored in a tank on your property. They offer reliable power and are suitable for areas where natural gas is unavailable.
  • Diesel: Diesel generators are known for their durability and are often used in commercial applications. They require a fuel storage tank and can provide substantial power.
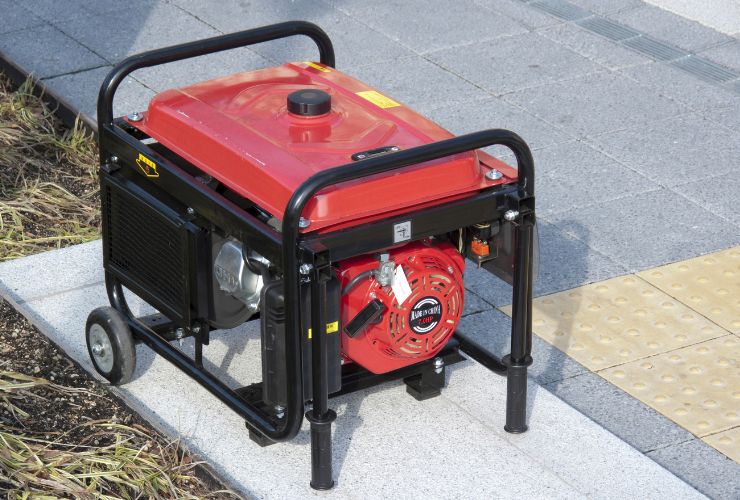
  • Gasoline: Portable generators commonly run on gasoline. While they are convenient for temporary use, they may not be the best choice for long-term backup power due to fuel storage and maintenance considerations.

Standby Vs Protable Generators

Standby vs. Portable Generators

Standby and portable generators serve different purposes:

  • Standby Generators: These are permanently installed outside your home and are connected to your electrical system. They operate automatically and provide seamless backup power during outages. Standby generators are suitable for whole-house backup and offer higher capacity.
  • Portable Generators: Portable generators are smaller, mobile units that you can move to different locations as needed. They require manual startup and connection to essential appliances using extension cords. While they are more affordable, they are typically designed for limited power needs.

When choosing between standby and portable generators, consider your specific requirements, budget, and the level of convenience and reliability you need during an outage.

Questions & Answers About Backup Generators

What size generator do I need for my home?

The size of the generator you need depends on your home’s power requirements. A professional electrician can perform a load analysis to determine the appropriate generator size based on your specific needs.

How often should I maintain my backup generator?

Regular maintenance is crucial to ensure your generator operates reliably during emergencies. It’s recommended to have your generator serviced annually by a qualified technician.

Can I power my entire home with a backup generator?

Backup generators come in various sizes, and their capacity varies. You can choose to power your entire home or select essential circuits. Your electrician can help you design a backup power system that suits your needs.

Are backup generators noisy?

Modern backup generators are designed to operate quietly. Their noise levels are comparable to typical outdoor HVAC units. Some generators also feature sound-dampening technology for minimal disruption.

Conclusion

Emergency preparedness is a responsibility we all share, and having a backup generator is a practical step toward ensuring your family’s safety and comfort during power outages. With their automatic operation and reliable performance, backup generators are a valuable addition to any home, providing peace of mind when you need it most. Don’t wait until the next outage occurs; contact a professional electrician today to discuss your backup generator options and take the first step toward a more secure and resilient home.

Common Signs That Your Electrical Panel Needs Replacement

TLDR: Your home’s electrical panel is crucial for distributing power efficiently, but it can wear out or become outdated over time. Signs like frequent circuit breaker trips, outdated panels, flickering lights, burning smells, a warm panel, or limited space for extra circuits indicate a need for replacement. Contact Cummings Plumbing, Heating, and Cooling for expert assistance in upgrading your electrical panel. It ensures safety, efficiency, and the capacity to meet modern electrical demands. Don’t compromise on your electrical safety—schedule an inspection today!


Your home’s electrical panel is like the heart of your electrical system. It distributes power throughout your home, ensuring that all your devices and appliances receive the electricity they need to function. Over time, electrical panels may wear out or become outdated, posing potential risks to your home’s safety and efficiency. In this blog, we will explore some common signs that indicate it may be time for an electrical panel replacement. If you notice any of these signs, don’t hesitate to reach out to Cummings Plumbing, Heating, and Cooling for expert assistance in upgrading your electrical panel.

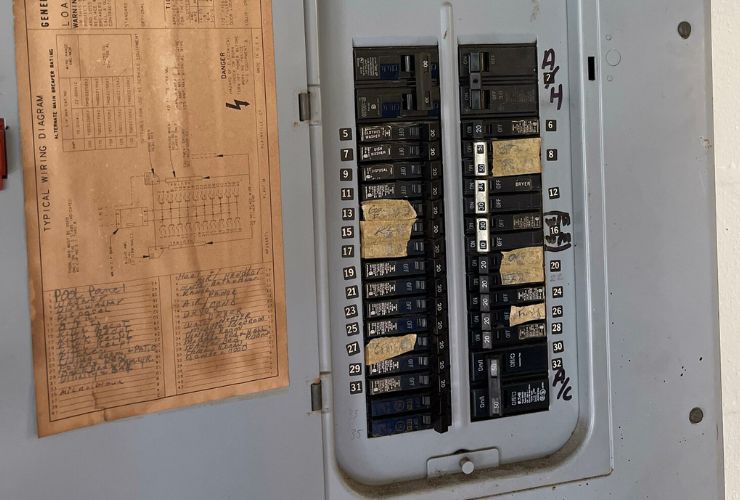
Frequent Circuit Breaker Tripping

Frequent Circuit Breaker Tripping

Frequent circuit breaker tripping can be a source of frustration and disruption in your daily life. When it occurs regularly, it’s a clear indication that your electrical panel may be struggling to manage the electrical load in your home. This issue can have several underlying causes, each of which should be addressed promptly to maintain the safety and functionality of your electrical system.

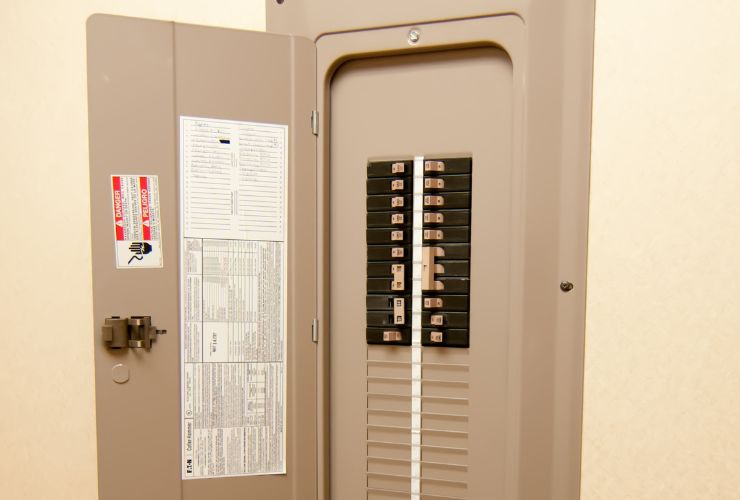
Overloading is a common cause of circuit breaker trips. It happens when you have too many high-power devices and appliances drawing electricity from the same circuit. When the electrical demand surpasses the circuit’s capacity, the circuit breaker trips to prevent overheating and potential electrical fires. Faulty wiring, such as loose connections or outdated wiring, can also lead to frequent tripping. Resistance generated by poor connections can cause the circuit breaker to trip as a safety measure.

Additionally, the capacity of your electrical panel plays a crucial role in how well it can handle your home’s electrical needs. If your panel is outdated or too small for your requirements, it may trip more frequently as it struggles to distribute power effectively. In any case of frequent circuit breaker tripping, it’s essential to consult a professional electrician. They can assess the situation, identify the root causes, and recommend necessary repairs or an upgrade to a more robust electrical panel.

Outdated Electrical Panels

Outdated Electrical Panel

Homes with older electrical panels may find themselves grappling with electrical systems ill-equipped to meet the demands of modern living. These older panels often lack the capacity and features necessary to handle the increasing number of electronic devices and appliances found in today’s households. If your electrical panel has been in service for several decades, it’s advisable to consider an upgrade.

Signs of an outdated electrical panel include the continued use of fuses rather than circuit breakers, limited amperage capacity, and a lack of compatibility with newer safety features and technologies. Upgrading to a modern electrical panel can significantly enhance the safety and efficiency of your electrical system. It not only reduces the risk of electrical fires but also ensures that your home can accommodate your power requirements as you add more devices and appliances over time.

An electrician can evaluate your current panel, discuss your household’s electrical needs, and recommend the most suitable replacement panel. This proactive approach to upgrading your electrical panel can provide peace of mind and improve the overall safety and functionality of your home.

Flickering Or Dimming Lights From Breaker Panel

Flickering or Dimming Lights

Flickering or dimming lights can be a bothersome and perplexing issue for homeowners. Beyond the annoyance, these fluctuations in lighting can signal an underlying problem with your electrical panel’s ability to provide a consistent and reliable supply of electricity. Understanding the common causes can help you address the issue effectively.

Voltage drops are a frequent cause of flickering or dimming lights. This occurs when the electrical circuits in your home are overloaded, leading to temporary drops in voltage. When voltage levels dip below what’s required for proper lighting, your lights may flicker or dim. Another common culprit is loose connections within your electrical system. These can disrupt the flow of electricity, resulting in inconsistent power supply to your lights.

While flickering or dimming lights may seem relatively harmless, they should not be ignored. These issues can lead to appliance damage and, in some cases, pose electrical hazards. To resolve the problem, it’s best to consult a professional electrician. They can perform a thorough inspection of your electrical system, identify the root cause of the lighting issues, and implement the necessary repairs to ensure consistent and reliable power.

Burning Scorched Electrical Panels

Burning Smell or Scorch Marks

Discovering a burning smell or scorch marks around your electrical panel is a cause for immediate concern. These signs are clear indicators that something is amiss within your electrical system, and addressing them promptly is crucial to prevent potential electrical fires and damage to your home.

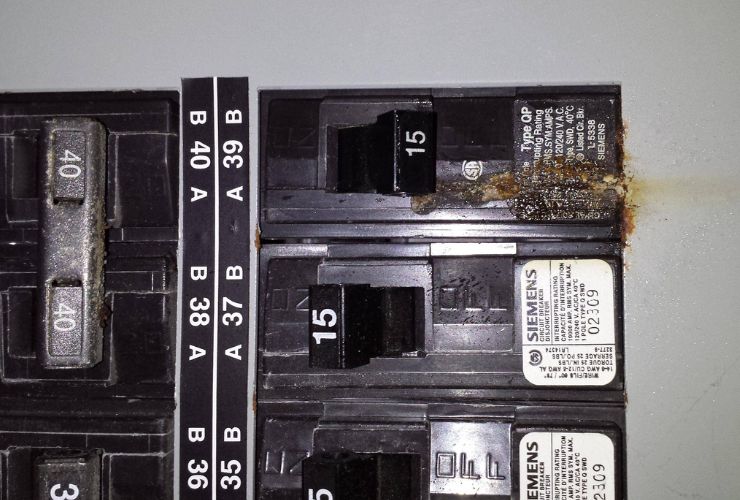
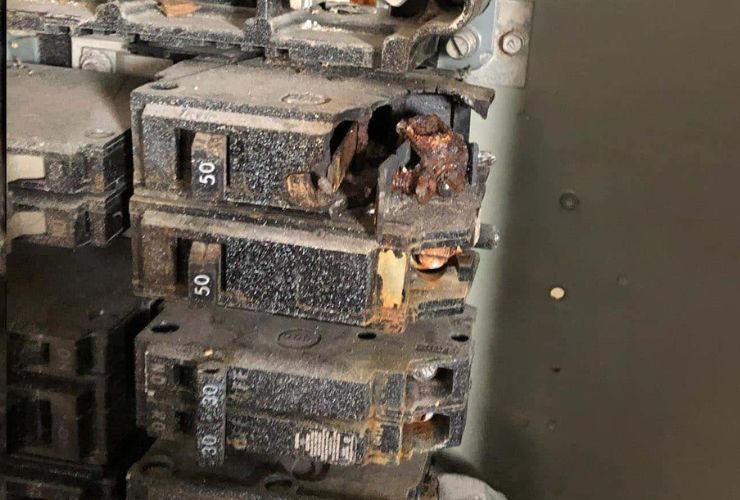
A burning odor can emanate from overheated components or damaged wiring within your electrical panel. This smell is a warning sign that the electrical system is operating under conditions that could lead to a dangerous situation. Scorch marks or discoloration around the panel may be visible signs of overheating or arcing. Ignoring these warning signs can have serious consequences, including the risk of fire and electrical damage.

If you detect a burning smell or notice scorch marks near your electrical panel, immediate action is necessary. First, turn off the power to the affected area to minimize the risk. Next, contact a professional electrician to investigate the issue. They will be able to identify the source of the problem, make the necessary repairs, and ensure the safety of your electrical system.

Warm Electrical Panels

Electrical Panel Warm to the Touch

Your electrical panel should always remain cool to the touch under normal conditions. If you notice that it feels warm or, worse, hot, this is a cause for immediate concern. An electrical panel that becomes warm to the touch can indicate overheating, which is a significant safety hazard.

The warmth or heat sensation on the panel’s surface may be due to excessive electrical resistance within the panel, wiring, or connections. Overheating poses a risk of electrical fires and can lead to severe electrical problems if not addressed promptly. It’s crucial to treat an electrical panel that feels warm as a serious issue that requires immediate attention.

If you encounter a warm electrical panel, take precautionary measures by turning off the power to that area. Following this, contact a professional electrician as soon as possible. They will thoroughly inspect the panel, identify the cause of the overheating, and implement the necessary repairs or replacements to ensure the safety and functionality of your electrical system.

Electrical Panel With No Additional Circuits

Limited Space for Additional Circuits

As households evolve and incorporate new appliances or undergo renovations, the need for additional electrical circuits often arises. If your electrical panel lacks available space for these extra circuits, it’s a clear indication that an upgrade to a larger panel is necessary to accommodate your growing electrical requirements.

Signs of limited space within your electrical panel include all available slots being occupied and the use of double taps, where multiple wires are connected to a single circuit breaker. Overcrowding your panel with too many connections can lead to overheating, increased fire risk, and inconvenience. Additionally, it may prevent you from adequately powering your home’s electrical needs.

To address this issue and ensure that your electrical system can meet your evolving requirements, it’s advisable to consult a professional electrician. They can assess your current panel’s capacity, discuss your household’s electrical needs, and recommend an appropriate solution, which may involve upgrading to a larger panel. This proactive approach can enhance the safety, efficiency, and convenience of your home’s electrical system.

Conclusion

Your electrical panel plays a crucial role in maintaining the safety and functionality of your home’s electrical system. If you’ve noticed any of these common signs indicating that your electrical panel needs replacement, don’t hesitate to contact Cummings Plumbing, Heating, and Cooling. Our experienced technicians can assess your electrical panel’s condition, provide expert recommendations, and perform a safe and efficient replacement if necessary. Don’t compromise on your home’s electrical safety—give us a call today to schedule an inspection and ensure your electrical panel is up to the task of powering your home safely and reliably. Your peace of mind is our priority!

Questions & Answers About Electrical Panel Upgrades

Why would I need to upgrade my electrical panel?

Electrical panel upgrades are necessary for several reasons. If your home is equipped with an outdated or undersized panel, it may not be capable of handling the electrical demands of modern appliances and devices. Upgrades also ensure your electrical system complies with current safety standards and regulations. Additionally, if you’re planning home renovations or adding new appliances, a larger panel may be required to accommodate the increased electrical load.

How can I tell if my electrical panel needs an upgrade?

There are several signs that may indicate the need for an electrical panel upgrade. These signs include frequent circuit breaker tripping, flickering or dimming lights when using appliances, a burning smell or scorch marks near the panel, or if your panel is outdated, still using fuses, or lacks available space for additional circuits. If you notice any of these signs, it’s advisable to have a professional electrician assess your panel.

What are the benefits of upgrading my electrical panel?

Upgrading your electrical panel offers several benefits. It improves the safety of your home by reducing the risk of electrical fires and hazards. It also enhances the efficiency and reliability of your electrical system, reducing the likelihood of power interruptions and disruptions. Additionally, an upgraded panel allows you to meet the power requirements of modern appliances and electronics, making your home more convenient and accommodating for your needs.

How long does an electrical panel upgrade typically take?

The duration of an electrical panel upgrade can vary depending on several factors, including the complexity of the job, the size of the panel, and any additional electrical work required. In most cases, a standard panel upgrade can be completed in a single day, while more complex projects may take longer. Your electrician will provide you with a more accurate timeline based on your specific circumstances.

Is it possible to upgrade my electrical panel myself, or should I hire a professional?

Electrical panel upgrades are complex and potentially hazardous tasks that should be handled by a licensed and experienced electrician. Attempting a DIY panel upgrade can lead to serious safety risks, code violations, and electrical problems. Professionals have the expertise to ensure the work is done safely, up to code, and in compliance with local regulations. Hiring a qualified electrician is the best way to guarantee a successful and safe electrical panel upgrade.


The Hidden Dangers of Leaky Faucets: More Than Just a Drip

Having a faucet leak is not just an inconvenience, it can cause serious problems for homeowners. It’s easy to dismiss a leaky faucet as just another benign household annoyance, but the reality is that a steady trickle can cascade into a torrent of problems that extend far beyond the boundaries of your kitchen or bathroom sink.

Hidden beneath the surface of this seemingly small issue are dangers that pose significant threats to our environment, our health, and even our finances. The implications of neglected drips are anything but minor. In this blog, we will explore the risks associated with leaky faucets.

From the startling environmental impact of wasted water to the silent creep of structural damage, and from the subtle swell in utility bills to the potential for mold and mildew proliferation, it’s time to talk about the real cost of that “just a drip” and why it deserves your attention – and prompt action. After all, understanding the hidden dangers is the first step toward safeguarding your home, your health, and the planet.

The Environmental Impact Of A Leaky Faucet

One of the biggest impacts a leaky faucet can have is on the environment. Each drip from a faucet may seem insignificant, but when you add up those drops over days, weeks, and months, the volume of wasted water can be staggering. A single faucet leaking at the rate of one drip per second can waste upwards of 3,000 gallons of water in a year—that’s the equivalent of over 180 showers! Not only will it cost you, it will cost the environment by wasting water.

By simply fixing a leaky faucet, homeowners can take a meaningful step toward water conservation and help to alleviate the silent strain that household leaks impose on the environment.

Financial Implications Of A Dripping Faucet

At first glance, a leaky faucet might not seem like it could make a dent in your bank account. It’s just a few drops, right? Unfortunately, those drops add up, and so does the expense. A small drip can become a financial sinkhole quickly.

As the wasted water accumulates, so does your water bill. Leaky faucets force your water meter to keep running, driving up your costs, even when you’re not actively using water. This is not just a drip in the bucket; it’s a continuous flow of money trickling straight out of your household budget. In areas with higher water rates, the financial sting is even sharper, turning what could have been a small repair bill into a constant financial drain.

The immediate cost of a leaky faucet is clear on your water bill, but the potential for long-term damage can lead to even more significant expenses. A constant flow of water can wear away at fixtures, leading to rust and degradation. If the leak is not confined to the sink area, it can seep into countertops and cabinetry, leading to costly repairs or replacements. In severe cases, a persistent leak can lead to water damage in floors and walls, not to mention the possible growth of mold, which can be a health hazard and expensive to remediate.

The cost of fixing a leak is often minuscule in comparison to high utility bills or having to restore your property from water damage. This is why addressing a leaky faucet as soon as it’s noticed is not just a matter of conservation but also a sound economic decision.

Health And Safety Concerns

The incessant drip of a leaky faucet does more than just waste water; it creates an ideal environment for mold and mildew to grow and quickly spread, posing significant health risks to the inhabitants of the home. The constant presence of moisture from a leak facilitates the growth of these fungi, which can lead to respiratory issues, allergies, and other health concerns, particularly for those with weakened immune systems or asthma.

Mold is not always conspicuous; it can flourish out of sight, under sinks, behind walls, or around cabinetry, making it a silent hazard that can go undetected until symptoms or musty odors emerge. The health implications of this are severe enough that what begins as a simple plumbing issue can quickly transform into a matter of protecting your family’s health.

Beyond the biological threats, there’s the matter of structural safety. Water from a leaky faucet can seep into the crevices and cracks of a home, compromising wooden structures like beams and flooring over time. This can lead to softening or rotting of the material, which not only undermines the integrity of the home but can also become a hidden peril.

Floors can weaken, and the stability of counters and fixtures can be jeopardized, all of which pose significant injury risks. The safety of your home environment depends on a proactive approach to leaky faucets, preventing potential accidents and maintaining a healthy, secure living space.

The Underlying Problems Indicated By A Leaky Faucet

While a leaky faucet may present itself as a simple mechanical annoyance, it often signals deeper, more systemic plumbing issues that can quickly escalate if not addressed. It’s like the tip of the iceberg; what you see on the surface often belies a more complex problem lurking beneath. Corrosion within pipes, faulty valves, or high water pressure are just a few underlying issues that can manifest as a leak.

Ignoring these warning signs can lead to more severe plumbing catastrophes, including burst pipes or significant water damage. A leaky faucet, then, can serve as an early detection tool, hinting at the health of your entire plumbing system and providing an opportunity to address problems before they spiral out of control.

Furthermore, the persistent drip of a leaky faucet can also be a red flag for potential water quality issues. As components in faucets wear down, they may release unwanted materials into your water supply, posing a risk to health and well-being. Metals from corroded pipes, for example, can leach into the water you drink and use daily.

Therefore, a leak isn’t just a physical malfunction; it can be symptomatic of chemical degradation within your plumbing system. By viewing a leaky faucet as a harbinger for both mechanical and water quality issues, homeowners can shift from a reactive stance to a preventative one, ensuring that their water supply remains safe and their plumbing infrastructure sound.

The Importance Of Prevention And Early Detection

The best way to mitigate the risks associated with leaky faucets is through vigilant prevention and early detection. Regular maintenance checks around your home can be the key to catching a leak before it evolves into a more significant issue.

Homeowners should become familiar with the signs of a failing faucet, such as rust, mineral deposits, or irregular water pressure. Taking the time to inspect faucets, under-sink pipes, and surrounding areas for moisture or small drips can save considerable trouble down the line.

Additionally, knowing how to turn off the water supply can prevent a minor leak from causing major damage if it suddenly worsens. By creating a routine of thorough inspections, you can ensure the longevity of your plumbing fixtures and nip potential problems in the bud. Moreover, installing water leak detection devices can provide real-time alerts to any moisture issues, allowing you to act swiftly and address leaks before they cause damage or become a health concern.

Professional Plumber For Faucet Repair Services Near You

While you may think a small drip is minor, it’s always best for your wallet and the environment to quickly repair your plumbing system to keep it working for years to come. If you’re dealing with a leaky faucet in Tucson, Cummings Plumbing is here to help!

With a team of experienced technicians, we promise swift, reliable, and cost-effective solutions to any leak, big or small. We use the latest tools and techniques to not only fix the immediate problem but also diagnose and rectify any underlying issues that could cause future problems.

Frequently Asked Questions About Leaking Faucets

What are the most common causes of a leaky faucet?

Leaky faucets are commonly caused by worn-out washers, deteriorating valve seats, o-ring issues, corroded valve parts, or if it’s an old fixture. In some cases, improper faucet installation or high water pressure can also lead to leaks.

How can I prevent my faucets from leaking?

Regular maintenance, such as cleaning, inspecting for signs of wear, and replacing components like washers and seals before they fail, can prevent leaks. Also, installing water pressure regulators can protect against the high pressure that can cause wear and tear on your plumbing fixtures.

How much does it cost to get a leaking faucet repaired?

The cost of repairing a leaky faucet can vary widely depending on several factors, including the type of faucet, the nature of the issue, and whether there are underlying problems that also need to be addressed. Simple repairs like replacing a washer or o-ring may be on the lower end of the cost spectrum, while more complex issues requiring the replacement of significant parts, or the entire faucet, will be more.

Everything You Need To Know About Installing A Home Charging Station For Your Electric Car

If you’ve just purchased an electric car and need to install an EV Charing Station or are considering upgrading your at-home EV Charging Station, having the help of a professional electrician is essential to ensure the job gets done correctly!

As a homeowner or business owner that wants to install an EV Charger, you might be asking yourself how much does installation cost? How much power do you need? What’s the best home EV Charger?  We’ll help you understand the basics of EV (Electric Vehicle) Chargers from the basics of EV Charging to safety precautions to help you on your journey of a more sustainable and convenient driving future!

The Basics Of Electric Vehicle Charging

To get the most out of your electric vehicle, it’s important to choose the right charger for your specific needs and understand the fundamentals of EV charging. This foundational knowledge ensures that you can enjoy the many benefits of EV ownership with confidence and ease. Unlike filling up a traditional gasoline-powered car, charging an EV might seem like venturing into uncharted territory for many. However, once you grasp the basics, it’s fairly straightforward.

At its core, charging an electric car involves replenishing the vehicle’s onboard battery. This battery powers the electric motor, which in turn moves the vehicle. The electricity for the battery comes from the grid (or potentially solar panels), and it’s stored in the battery until it’s used by the motor.

When it comes to EV chargers, they’re not all created equal. Chargers are typically categorized into different “levels” based on their power output and charging speed, such as Level 1 Chargers (L1), Level 2 Chargers (L2), and DC Fast Charing (DCFC).

When considering a charger for home installation, most homeowners opt for Level 2 chargers due to their balance between charging speed and installation cost. However, the best choice depends on individual needs, vehicle specifications, and budget.

The Benefits Of Installing An EV Home Charing Station

Having an EV (Electric Vehicle) home charging station offers several advantages that significantly enhance the overall ownership experience of an electric car. Here are the primary reasons why it’s important:

  1. Convenience: Much like having a gas station in your driveway, a home charging station ensures that your vehicle is always ready to go when you are. You can simply plug in your vehicle overnight and wake up to a fully charged car.
  2. Cost Savings: Charging at home, especially during off-peak electricity hours, can be more cost-effective than using public charging stations. Many utilities offer reduced rates for nighttime charging, which can lead to significant savings over time.
  3. Enhanced Safety: Charging at home eliminates the need to visit public charging stations, which can be especially beneficial during situations like a pandemic. It also means less handling of shared equipment.
  4. Time Efficiency: Rather than waiting at a public station, especially if it’s occupied, charging at home can be done while you’re doing other tasks, like sleeping, working, or relaxing.
  5. Better Control: Home chargers allow you to select the most optimal time for charging. For instance, if you have solar panels, you can charge your car when the sun is shining. Or, if your utility employs time-of-use billing, you can charge during off-peak times.
  6. Increased Property Value: As the popularity of electric vehicles continues to rise, homes equipped with EV charging infrastructure can command higher resale values, making them more attractive to potential buyers.
  7. Reliability: While public charging stations have increased in number, there can still be issues of availability or malfunctioning equipment. With a home station, you have a reliable and consistent source of power.
  8. Environmental Benefits: By pairing your EV with renewable energy sources at home (like solar panels), you can further reduce your carbon footprint, ensuring your electric vehicle use is even greener.
  9. Flexibility in Charger Choice: Home installations allow you to choose the type and brand of charger you prefer, ensuring compatibility and specific features you desire.
  10. State and Federal Incentives: Many governments encourage the installation of home EV charging stations by offering tax incentives, rebates, or grants, which can help offset the installation costs.

While public charging stations play a crucial role in supporting EVs, especially for long-distance travel, having a home charging station brings unparalleled convenience and benefits that amplify the advantages of electric vehicle ownership.

Assessing Your Home’s Electrical System For An EV Charger

Evaluating and understanding your existing electrical infrastructure is essential before installing an EV charging station at home. Not all homes are immediately ready to handle the demands of an EV charger, especially if you’re considering a more powerful Level 2 charger.

It’s always best to consult with a professional Electrician that has the expertise to install EV Chargers. hey’ll be able to identify whether your current system can handle the added load of an EV charger and recommend any necessary upgrades.

Every home has an electrical service capacity, often determined by the main service panel, which could range from 100 to 200 amps in most residential setups. Before adding an EV charger, you need to assess how much of this capacity is already in use by your household’s appliances, lighting, and other electrical needs.

If your existing electrical system isn’t equipped to handle the added demand, you might need an upgrade such as upgrading the main panel, having a dedicated circuit installation, or trenching to run electrical lines underground if your preferred charging location is away from the main house.

Different regions have varying safety regulations and permit requirements for installing EV charging infrastructure. Your electrician should always be familiar with these and guide you through the necessary steps through the process of installing a home EV Charging Station.

The Installation Process Of An EV Charger

After determining the readiness of your home’s electrical system and picking the right system for your property, the next step is the actual installation of the EV Charging Station! Precision and attention-to-detail are paramount, so always have the help of an Electrician that specializes in EV Charger Installation. Electrical work is complex, technical, and can potentially be dangerous, so make sure to have the help of a professional.

Many municipalities require permits for the installation of EV charging stations. This is to ensure safety standards are met. Your electrician will often be aware of, and may even handle, the required permitting processes in your area. : After installation, an inspection might be necessary to confirm that the charger is installed correctly and safely. This is another layer of assurance for homeowners and a standard step in many regions.

The steps of an EV Chager installation goes as follows:

  • Site Assessment: Determine the best location for the charger based on proximity to the electrical panel and where you park your vehicle.
  • Preparation: Ensure all necessary materials are on hand, from the charging unit itself to the required wiring and conduit.
  • Electrical Upgrades: If identified during the home’s electrical system assessment, upgrades like a panel upgrade or dedicated circuit installation would occur now.
  • Mounting the Charger: The EV charger is mounted to a wall, post, or a standalone pedestal, depending on your preference and space.
  • Wiring the Charger: This involves connecting the charger to your home’s electrical system. If the charger is hardwired (rather than plugged into an outlet), it’s particularly essential to ensure connections are secure and safe.
  • Final Testing: Once everything is in place, the electrician will test the charger to make sure it’s working correctly and efficiently.
  • Walkthrough: A good electrician will walk you through the basics of using and maintaining your new charging station, ensuring you’re comfortable with its operation.

After the charger is installed, make note of any maintenance recommendations. While most home chargers require minimal upkeep, understanding potential warning signs of issues ensures longevity and safe use.

The Road Ahead With EV Charging

The transition to electric vehicles is more than just a shift in transportation; it’s a move towards a more sustainable and eco-friendly future. With the growing prevalence of EVs, the need for reliable and convenient charging solutions has never been more evident. Installing a home charging station not only supercharges the EV ownership experience by providing unparalleled convenience but also fosters peace of mind, knowing that you’re always just a plug away from the next adventure.

By understanding the intricacies of EV charging, assessing your home’s electrical capabilities, and navigating the installation process, you’re investing in an infrastructure that supports the green revolution. It’s an investment in the future – both yours and the planet’s.

Cummings Plumbing, Heating, Cooling, and Electrical is your trusted partner in ensuring your home is ready for the journey with an efficient, safe, and reliable EV Charger at home. When it comes to electric vehicle charger installation for homes and businesses in Tucson, we prioritize safety above all else. We pledge to provide you with highly skilled service technicians for every task carried out in your home, including the installation of EV Chargers.

Frequently Asked Questions About EV Chargers

What is the difference between Level 1 and Level 2 home charging stations?

Level 1 chargers utilize a standard 120-volt AC outlet and typically provide 2 to 5 miles of range per hour of charging. They’re best suited for plug-in hybrids or as a backup for all-electric vehicles. Level 2 chargers require a 240-volt AC circuit and can deliver 10 to 60 miles of range per hour, depending on the vehicle and charger’s specifications. They’re ideal for the daily charging needs of all-electric vehicles and plug-in hybrids.

How long does it take to install a home EV charging station?

The duration of the installation can vary based on your home’s electrical system, any required upgrades, and the type of charger being installed. On average, a professional installation for a Level 2 charger might take 3-5 hours, but this can extend if complex electrical work is needed.

How much will my electricity bill increase with a home EV charger?

The increase in your electricity bill will depend on your vehicle’s battery capacity, the cost of electricity in your region, and how often you charge. However, charging during off-peak hours or utilizing renewable energy sources can help manage and reduce costs. Your EV’s user manual will provide information on its battery capacity, which can help you estimate the cost of a full charge based on local electricity rates.

Everything You Need to Know about Hydro Jetting

Many homeowners know house ownership is a never-ending saga of exciting interior and exterior changes, upgrades, and fix-ups. House owners try to make their place feel like a home by adding a personal touch in every little nook and cranny or constantly updating items.

Regarding updates, there are some aspects of the house we don’t notice daily, so we omit the task of regularly upgrading them. These include the heating and cooling systems, sewage lines, and plumbing, all requiring regular inspection and professional help. Homeowners are often hesitant about calling a professional service because they are unsure what services they need or want to reduce the costs and take the DIY route.

In this article, we introduce you to hydro jetting – a professional technique that keeps your sewage lines spotless and ready to use. We will discuss the benefits of hydro jetting, when it’s time to call for professional help, and hydro jet drain cleaning cost.

What Is Hydro Jetting?

Hydro jetting drain cleaning is a technique that plumbers use to clean out slow-moving or clogged sewage lines. It uses water under high pressure to remove heavy build-up collected in sewage pipes and break up clogs. The sewage lines can be blocked by specific minerals and disposed of materials, such as food residues and wipes.

Hydro jetting is a highly effective plumbing technique that removes dirt to keep your pipeline working properly. Neglected pipes can lead to clogged drains, plumbing or sewer system blockages, and potentially a contaminated water supply.

Often, when homeowners notice a clogged drain or suspect a blocked pipe, they first reach out for unclogging chemicals, drain liquids, or DIY baking soda solutions that help unclog a drain. Although this might prove effective, it’s not a long-term solution, as it requires constant repetition and a visit from the plumber eventually.

Besides being of sanitary help, hydro jet drain cleaning can help extend the life of house pipelines, preventing expensive pipe changes and professional fix-ups. Aside from breaking the clogs, this method completely removes the clog particles all the way to the main sewage line. This is extremely important because you can be sure that no particles are left to cause further damage like creating cracks in your pipes.

It is advised to hire a team of professional plumbers to perform a hydro jet drain cleaning once a year to keep the pipes and sewage line in top form. Although very helpful, you should be aware that hydro jetting might not work on all types of pipes because of the high water pressure. Checking for cracks or damaged pipes before scheduling professional hydro jetting is recommended. 

Hydro Jet Drain Cleaning: The Process Explained

Once you have contacted a plumbing service and scheduled a hydro jet drain cleaning, professional plumbers will come to your house to begin the procedure. The process requires monitoring the pipeline system before taking action. 

The plumbers will inspect the pipes, determine whether they can handle the pressure of hydro jetting, locate any major blockages and assess where it’s best to insert a high-pressure hose. If the pipes are not fit for hydro jetting drain cleaning, they will use a less intensive method called snaking the pipes or provide advice for updating and replacing them.

If the pipes are fit for hydro jetting, plumbers will insert hoses in the access points and activate a hydro jetting machine. Usually, the pressure is adjusted to fit your plumbing system the best. All removed debris and clogs move down and are safely flushed in the sewers.

Benefits Of Hydro Jet Drain Cleaning

Aside from keeping the pipes clean, hydro jetting can also help prevent costly pipe and faucet repairs and replacements. Being a cutting-edge method in the plumbing industry, it offers many benefits regarding the upkeep of your house and maintaining it in perfect shape. Following is a list of additional benefits of hydro jetting drain cleaning and hydro jetting sewer line.

  • Versatile Method: This technique is used for a variety of problems when it comes to fixing residential plumbing issues. Since this method is safe to use on all types of pipes, it can effectively fix plumbing issues, remove clogs, and dissolve build-ups.
  • Eco-friendly technique: Hydro jetting is very easy on the environment as it uses only water. Without any harsh chemicals or enzymes, it minimizes the risk of hazardous chemicals leaking into groundwater or the soil.
  • Safety: As a non-invasive method it safely operates around all infrastructure already installed. Since it doesn’t incorporate any chemicals in the process, it’s safe for plumbing professionals, residents, and neighbors.
  • Thorough & Effective: Thanks to the high water pressure, the hydro jetting drain cleaning can remove any type of blockage. Covering the entire surface of the pipe, hydro jetting leaves no residue behind.
  • Lasting Effect: Although hydro jetting is a significant investment compared to unclogging drain liquids and solutions, this method ensures lasting clean pipes. Keeping the pipes spotless makes it harder for grime and debris to build up, ultimately keeping your piping system working without issues.

What Can You Remove With Hydro Jetting

This procedure has a major significance in keeping your pipes and drains clean, and maintaining a properly working and effective sewer system. The main goal of hydro jetting is to remove debris and clogs from various materials from the pipes.

It can also help remove any enzyme residue created by water, cleaning products, or produce. Besides clogs formed from wipes and toilet paper, it can also remove hair clogs, usually found in the shower drain. In addition to the occasional food deposit, it effectively removes grease and fat residues.

On a deeper level, hydro jetting effectively removes silt found in pipes, sand from underground water, and, in some cases, even tree roots that have found their way into the plumbing system.

Hydro Jet Drain Cleaning Cost

Hydro jet drain cleaning is a procedure that has to be done by a professional. A team of professional plumbers arrive at your house and assess the situation before planning the best way to clean your pipes and estimating a hydro jet drain cleaning cost. They can also assess drains and faucets, giving useful advice about replacing pipes, faucets, or other elements in the house.

When choosing the right plumbing service, check if your chosen company is reliable and experienced in hydro jetting drain cleaning. Ensuring the plumbing professionals are familiar with the process and have the right tools is essential to prevent pipe damage and costly pipe repairs.

The price for this process can drastically vary due to different factors. Depending on the complexity of the sewer system, the size, and the type of clogs, the price can range from $300 to $600. If there is a tough case of clogs and sewerage complexity, the cost can go up to $1000.

If you’re wondering if there is an effective hydro jet drain cleaning near me, don’t fret! Professionals like Cummings Plumbing offer a variety of plumbing services, including drain cleaning, leak detections, and burst pipe repairs and replacements.

Final Remarks on Hydro Jet Cleaning

It is important to remember that hydro jetting drain cleaning and hydro jetting sewer line is not a DIY household task. Professional help is available and can provide useful advice about your pipelines and a great cleaning experience. In case you’re unsure what type of services you need, Cummings Plumbing can provide in-depth information and advice on the right course of action.

Hydro jetting drain cleaning can help maintain clean and long-lasting pipes and sewage lines, cleaning them from various debris and residue that can potentially damage the pipes. It’s an effective procedure with lasting results that needs to be done once a year, ideally, or once every couple of years to keep your sewer system in perfect condition.

Depending on the clogs and complexity of the sewer system, this process might seem like a large investment, but it’s definitely worth it. Hydro jetting is a beneficial method that can help solve a number of plumbing issues and save you a lot of money in the long run.

FAQ

How long does hydro jetting last?

Depending on the severity of the clogging, the hydro jetting process can last from a few minutes to several hours. However, once the pipes are clean, they will stay clog-free for several years if you are careful about what goes down the drain.

Is hydro jetting better than snaking?

Snaking is used on older pipes where hydro jetting poses a threat of damaging a pipe. Snaking works efficiently only on shallow clogs and will not solve the problem as efficiently as hydro jetting because residue might remain in the pipes.

How do you prepare for hydro jetting?

When expert help is called, they will examine the pipes, decide whether they can withstand hydro jetting, find any significant blockages, and decide where to place a high-pressure hose.

How often should you hydro jet your pipes?

According to professionals, hydro jetting once every few years is enough to keep the pipes working effectively and debris-free.


Replacing a Bathroom Faucet: DIY Guide

One of the most common upgrades of your bathroom is the faucet change. Whether it is old, leaking, or you just want to give your bathroom a new look, replacing bathroom faucet will give your space a fresh new perspective. You can opt for DIY methods if you have the know-how and the tools required, or you can call a professional plumber to do it for you. 

Whatever you decide, we will get you through the whole process from the start to the last part of how to replace bathroom faucet. 

When Is The Right Time to Replace Bathroom Faucet

The condition, performance, and appearance all play a role in deciding when to replace bathroom faucet. In general, it may be time for a replacement if your faucet shows evidence of wear and tear, such as frequent leaks, corroded surfaces, or loose handles that can’t be fixed. Pay attention to the sounds it makes because they indicate a blockage or a crack in the pipeline.

Age should also be taken into account; if your faucet is over fifteen years old and beginning to deteriorate, you should definitely replace it. A more contemporary, water-efficient one will improve your bathroom’s aesthetic and performance while conserving water and lowering utility costs. 

Ultimately, changing your bathroom faucet at the appropriate time guarantees a reviving update to your bathroom area and averts any damage or difficulty brought on by a failing fixture. This gives you a great opportunity to change to a new faucet that better suits your taste if the design no longer matches the aesthetics of your home or if you’re remodeling the bathroom. 

Let’s move on to the detailed instructions on how to replace bathroom faucet!

How to Replace Bathroom Faucet: A Step-By-Step Guide

For some, it may be a cakewalk, but if you are doing it for the first time, this is your step-by-step guide on how to replace a bathroom faucet correctly. Follow us as we guide you in your journey to becoming your own plumber in the following steps:

Gather The Equipment Needed

As a first step, you should gather everything you need in terms of tools and materials. You’ll need a  screwdriver, an adjustable wrench, a basin wrench, plumber’s tape, silicone caulk, and a new bathroom faucet kit that matches the mounting holes and style of your sink.

If you don’t have the equipment or necessary knowledge, don’t worry; you can always call an expert to help you replace the bathroom faucet.

Stop the Water Supply

The water supply to your bathroom sink should be turned off. Look under the sink to find the shut-off valves and close them. They often get jammed because of corrosion or other types of residue and can be challenging to close fully. In that case, you should stop the main water supply, but make sure you prepare the whole family for that. 

Clear The Surface Of The Sink

Next, you should clear your workspace before installing the new faucet. You can use a mild detergent to clean the sink and ensure there are no obstacles to properly mounting the faucet. 


After removing the old faucet, you should also deep-clean the sink surface to get rid of any leftover material and old caulking. A clean sink will make it easier for you to replace bathroom faucet.

Unplug The Faucet

To remove the old faucet safely, take away anything from the area surrounding the sink. Remove the mounting bolts and supply lines from the faucet using a screwdriver and an adjustable wrench. Lift the faucet with caution after loosening the nuts and disconnecting the supply lines. Put some towels or a bucket under the sink to prevent any leakage when doing the removal.

Attach the New Faucet

For installation, adhere to the manufacturer’s instructions that came with your new faucet set, and make sure you have all the necessary bathroom faucet replacement parts. The faucet tails are typically inserted into the mounting holes from the top of the sink after the rubber gasket or seal has been placed over them. Utilizing the supplied mounting bolts, fix the faucet in place from below.

Connect the Hot and Cold Supply Lines

Connect the hot and cold water shut-off valves under the sink to the new supply lines. To properly tighten the connections, use the adjustable wrench without overtightening them to avoid damaging the supply lines.

Plumber’s Tape Application

Before attaching the faucet handles and spout, seal all threaded areas with a plumber’s tape to ensure a watertight fit. This way, you will avoid leakage at the connectors.

Fix The Handles And Spout

Follow the manufacturer’s directions when attaching the faucet handles and spout securely to the faucet base. Any difficult-to-reach bolts can be tightened with a basin wrench.

Check For Potential Leaks

Once everything is in place, restore the water supply and see if there are any leaks. If you discover any, you can stop them by slightly tightening the connectors. If the leakage persists and you’re unsure why, you should look for a plumbing service to inspect the faucet.

Put Silicone Caulk in Place

Finally, use a little bead of silicone caulk to seal up the area where the faucet base meets the sink. This will give your new faucet a polished appearance and create another waterproof seal.

You’ve done it! Your bathroom looks clean and modern now that you’ve successfully replaced the faucet. Remember, don’t hesitate to contact a qualified plumber to ask for faucet installation advice and inspection or run into problems replacing bathroom faucets. Your new faucet will be a useful and fashionable focal point in your bathroom for years to come.

Cost to Replace Bathroom Faucet

The cost to replace bathroom faucet is determined by whether you are hiring a professional or replacing it yourself. Certain brands or faucet features can cost between $50 and $300, which may prompt you to call a pro. Additional costs include $20 to $50 on plumber’s tape, caulk, and other supplies you don’t already have or may not even need in the future. 


However, you won’t need any of that when calling a professional plumber since everything is included in the service. Whether an easy replacement or a more demanding one, professional installation can cost anywhere from $150 to $400.

Even though doing faucet replacement yourself might reduce labor costs, it still takes time, effort, and a certain amount of knowledge. By hiring a pro, you can be confident that replacing the bathroom faucet will be done smoothly and correctly, and the company will cover any subsequent issues. In any case, a well-designed and aesthetically pleasing bathroom faucet will improve the usefulness and beauty of your bathroom whether you decide to DIY or hire a pro. 

Concluding Remarks on Replacing Bathroom Faucets

Whether you desire to modernize an old look, stop leaks, or add a touch of a fresh,  contemporary look to your bathroom, replacing the bathroom faucet can make a significant difference. While doing it yourself may save you money, it also requires a lot of time and specific skills that might present a problem. A professional team such as Cummings Plumbing can ensure that a faucet installation is seamless and done correctly. 

Whatever you decide, keep in mind your unique requirements and preferences to make long-term enjoyment in your bathroom, and don’t hesitate to call a professional to do it for you properly. 


FAQ

What is the lifespan of a bathroom faucet?

The average time of functionality of a bathroom faucet can vary based on its quality, usage, and upkeep. If it’s well maintained, it can last between ten and twenty years. However, cheaper or cheaply manufactured faucets can’t last as long and might need to be replaced more frequently.

Is it better to repair or replace a faucet?

The degree of the damage and the faucet’s general condition determine whether to repair or replace it. Simple fixes like changing washers or cartridges can frequently solve minor problems like a dripping or leaking faucet, and some bathroom faucet replacement parts can cost you less than buying a new one. However, replacing the faucet is typically more cost-effective and practical if it is considerably rusted, obsolete, or damaged.

What is the average cost to replace a bathroom faucet?

It all depends on the design, manufacturer, and method of installation. The cost to replace bathroom faucet depends on whether you’re doing it yourself or a pro. Prices range from $50 to $300 if you are the one to replace it, while hiring a professional plumber can cost anywhere between $150 and $400.

Do new faucets come with drains?

It depends on the faucet supplier and the model. A matching drain assembly is included in a complete set alongside the new faucets by some brands. The drain may, however, be sold separately from some faucets, giving you the option to select a drain style that matches the design of your bathroom. It is crucial to determine whether a new faucet comes with a drain or if you have to buy the drain separately.