Author: Cummings Plumbing

How To Prepare Your AC System For Spring In Tucson

TL;DR: Prepare your AC system for spring in Tucson by cleaning the outdoor unit, replacing air filters, and scheduling a professional HVAC check. Ensure optimal performance and efficiency to beat the heat. Simple DIY tips complement professional maintenance for a worry-free summer.

Warm temperatures in the desert are headed our way and steadily climbing, which means it’s time to think about your Spring Maintenance and Repairs for your HVAC System to ensure your home stays cool and comfortable throughout spring and summer. . Preparing your AC for the spring isn’t just about ensuring comfort during the scorching summer months; it’s about optimizing system efficiency, reducing energy costs, and preventing mid-summer breakdowns.

In this guide, we’ll walk you through the essential steps to get your cooling system ready for the heat, blending DIY advice with tips on when to call in the professionals. Whether you’re a seasoned Tucsonan or new to the area, these insights will help you stay cool and comfortable, all while safeguarding your investment in your home’s HVAC system.

Why Spring Maintenance is Crucial for Your AC System in Tucson

In Tucson, where the sun’s warmth rapidly intensifies as spring progresses, preparing your air conditioning system for the season is crucial, not just for ensuring indoor comfort but also for maintaining system efficiency and reliability. The dormant months can leave your AC less than ready to tackle the desert heat, with accumulated dust and debris potentially straining its operation. This not only hikes up energy bills due to reduced efficiency but also increases the risk of system failure just when you need cooling the most. Spring maintenance serves as a preemptive strike, identifying issues such as refrigerant leaks or electrical malfunctions early on to avoid unexpected breakdowns during the peak summer months.

Moreover, the role of your AC system extends beyond merely cooling your space; it significantly influences the indoor air quality. Dust, allergens, and other particulates that have settled in your system over the cooler months can compromise the air you breathe as soon as you switch the AC on. Addressing these issues through thorough spring cleaning not only ensures the air in your home remains healthy but also extends the lifespan of your AC system. In a city like Tucson, where the transition from mild spring to scorching summer can occur swiftly, taking proactive steps to ensure your AC is in top shape is essential for maintaining comfort, health, and overall system longevity.

DIY Maintenance Tips to Prepare Your AC System for Spring

While professional servicing is essential for comprehensive maintenance, there are several DIY tasks that Tucson homeowners can undertake to ensure their AC system remains in optimal condition. Performing these tasks regularly can help maintain your system’s efficiency, prolong its lifespan, and even prevent costly repairs down the line. Here’s a list of manageable maintenance tasks that you can do yourself:

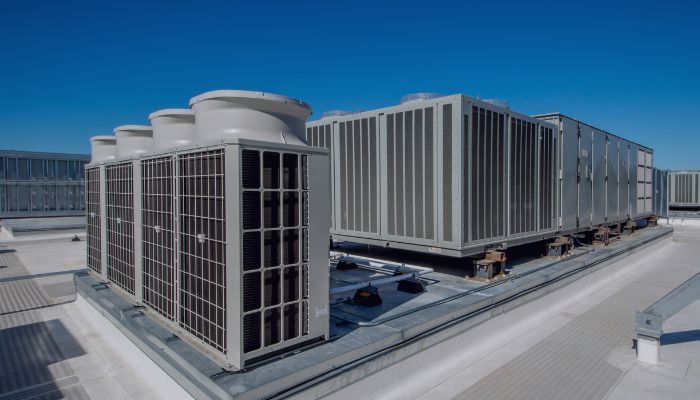
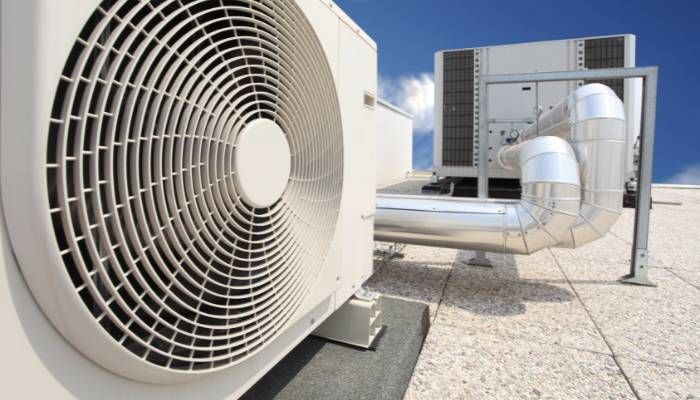
Keep the Area Around the Outdoor Unit Clear: Ensure that the outdoor component of your AC system is free from debris, such as leaves, branches, and dirt. Maintain at least a 2-foot clearance around the unit to facilitate proper airflow and prevent overheating. This simple task can significantly impact the efficiency and longevity of your system.

Clean the AC Unit’s Fins: The fins on the outdoor unit can become clogged with dust and debris, reducing airflow and impairing the system’s ability to cool your home. Gently brush off the debris with a soft brush, and use a garden hose to rinse the fins from the inside out. Be careful not to use a pressure washer, as high pressure can damage the fins.

Check and Secure Electrical Connections: Loose electrical connections can cause your system to run inefficiently or even pose a safety hazard. Ensure that all electrical connections are tight and secure. If you’re not comfortable working with electricity, this is a task best left to professionals.

Monitor Thermostat Performance: Regularly check your thermostat to ensure it’s working correctly. If you notice discrepancies between the set temperature and the actual temperature in your home, it may be time to replace the batteries or consider upgrading to a more efficient model.

Listen for Unusual Noises: Pay attention to the sounds your AC system makes. Banging, rattling, or hissing sounds can indicate a problem, such as loose parts, a refrigerant leak, or a malfunctioning compressor. Identifying these issues early can prevent more significant problems later.

Inspect and Clean Air Vents: Ensure that all air vents in your home are open and free from obstruction. Use a vacuum to remove dust and debris from the vents to improve air flow and enhance your system’s efficiency. This not only helps your AC but also improves indoor air quality.

By incorporating these DIY maintenance tasks into your routine, you can contribute significantly to the health and efficiency of your AC system. Remember, though, that these tasks complement, rather than replace, professional maintenance. Together, they ensure that your system is ready to keep you cool through the hot Tucson spring and summer.

The Importance of Professional HVAC Maintenance

As spring approaches in Tucson, with its promise of rising temperatures, the importance of having your air conditioning system professionally serviced cannot be overstated. While DIY maintenance tasks are beneficial, a professional HVAC technician brings a level of expertise and thoroughness that goes beyond what most homeowners can achieve on their own. Here’s why hiring a professional HVAC company for spring maintenance is crucial for your system’s efficiency, longevity, and reliability.

Comprehensive System Inspection and Service: Professional technicians perform a detailed inspection of your entire system, including areas not typically accessible to homeowners. They check for issues like refrigerant leaks, efficient thermostat operation, electrical system integrity, and proper airflow. This comprehensive approach ensures that every component of your AC system is optimized for peak performance.

Expert Identification and Resolution of Potential Issues: HVAC professionals have the training and experience to identify subtle signs of wear and tear or impending failure that the untrained eye might miss. Early detection and repair of such issues can prevent costly breakdowns during the hottest parts of the year, ensuring your comfort and safety.

Enhanced Efficiency and Energy Savings: A well-maintained AC system operates more efficiently, which translates into energy savings and reduced utility bills. Professional maintenance includes tuning up the system to ensure it runs as efficiently as possible. Technicians also provide advice on any upgrades or adjustments that could further improve efficiency and save money in the long run.

Prolonged System Lifespan: Regular professional maintenance extends the life of your AC system by preventing excessive wear and tear on its components. This not only saves you money on premature replacement costs but also ensures that your system remains reliable for years to come.

Safety: HVAC systems involve complex electrical components and potentially hazardous materials like refrigerants. Professional technicians are trained to handle these elements safely, reducing the risk of injury or property damage that could occur with DIY attempts.

Warranty Compliance: Many AC systems come with warranties that require regular professional maintenance to remain valid. By hiring a professional HVAC company for spring maintenance, you help ensure that your system’s warranty stays intact, providing added protection for your investment.

In summary, while performing basic maintenance tasks yourself is beneficial, the expertise and comprehensive service offered by professional HVAC technicians are indispensable. Their ability to thoroughly inspect, maintain, and repair your system ensures that your AC runs smoothly, efficiently, and safely throughout the scorching Tucson spring and summer. Investing in professional spring maintenance is an investment in your comfort, peace of mind, and the long-term health of your air conditioning system.

Preparing for the Heat: Upgrades and Replacements

Preparing for the heat, especially in regions where summer temperatures soar, necessitates strategic upgrades and replacements within your home to ensure comfort, efficiency, and safety. One critical area of focus should be your cooling system. Aging air conditioners or inefficient fans not only struggle to keep up with the demands of a hot day but also consume excessive energy, leading to inflated electricity bills.

Considering an upgrade to a more energy-efficient air conditioning system, or investing in smart fans that automatically adjust speeds based on the room temperature, can make a significant difference. Additionally, replacing old, leaky windows with double-glazed or tinted glass options can help keep the heat out and the cool air in, further enhancing your home’s ability to maintain a comfortable temperature without over-relying on artificial cooling.

Professional HVAC Services Near Your

In conclusion, preparing your AC system for spring in Tucson is an essential step towards ensuring a comfortable, efficient, and hassle-free summer. By engaging in regular maintenance, cleaning, and timely upgrades or repairs, homeowners can significantly enhance the performance and longevity of their cooling systems. With Tucson’s unique climate challenges, taking proactive measures not only safeguards against unexpected breakdowns but also optimizes energy use, ultimately leading to lower utility bills and a reduced environmental footprint. A little preparation goes a long way in ensuring that your home remains a cool sanctuary throughout the scorching months ahead.

As you embark on preparing your AC system for the spring in Tucson, there’s no better partner for your maintenance and upgrade needs than Cummings Plumbing, Heating, Cooling, and Electrical. With years of experience navigating the unique challenges of the Tucson climate, Cummings offers a comprehensive range of services tailored to ensure your cooling system operates at peak efficiency when you need it most.

From routine maintenance checks and professional cleanings to the latest in energy-efficient upgrades and repairs, their team of certified professionals is dedicated to providing top-notch service and expert advice. Trust Cummings to keep your home comfortable, your energy bills low, and your AC system running smoothly throughout the spring and beyond!

Frequently Asked Questions About HVAC Services

How often should I change the air filters in my AC system?

In the Tucson area, given the high dust levels and usage patterns, it’s recommended to check your air filters monthly and replace them at least every 60-90 days. During periods of high use or if you have pets, more frequent changes may be necessary to ensure optimal air quality and system efficiency.

Is it really necessary to have a professional HVAC service check my AC system?

Yes, professional servicing is crucial for maintaining the efficiency, safety, and longevity of your AC system. A professional can detect issues that aren’t visible to the untrained eye, such as refrigerant leaks or electrical issues, and can ensure your system is prepared to handle the Tucson heat. It’s recommended to schedule this service annually, ideally in the spring.

Can I perform any part of the AC system maintenance myself?

Yes, there are several maintenance tasks you can do yourself, such as cleaning or replacing the air filters, clearing debris from around the outdoor unit, and making sure all your vents are open and unobstructed. However, for more technical aspects like refrigerant levels, electrical components, and ductwork inspection, you should rely on a professional.

Why is it important to check the insulation on refrigerant lines?

Insulation on refrigerant lines helps maintain the efficiency of the heat transfer between your indoor and outdoor units. Over time, insulation can degrade due to weather or pest activity, leading to energy loss and reduced cooling efficiency. Checking and replacing damaged insulation is a simple step that can have a significant impact on your AC system’s performance.

The Safety Benefits of Upgrading Your Electrical Panel

TL;DR: Upgrading your electrical panel not only significantly reduces the risk of electrical fires and enhances overall safety by integrating modern circuit breakers designed to handle today’s electrical demands, but it also ensures your home is up-to-date with current electrical codes, improving system reliability.

Your electrical panel is one of the most critical component of your home’s electrical system that often goes unnoticed until an issue arises. The electrical panel, often referred to as the breaker box, is the heart of your home’s electrical system, distributing power throughout the house.

Upgrading your electrical panel is not just about keeping the lights on; it’s a vital safety measure that protects your home from potential electrical fires, prevents damage to appliances, and can significantly enhance your property value. This guide will walk you through the signs that indicate a need for an upgrade, the safety benefits of doing so, and answer frequently asked questions about the process. Whether you’re a long-time homeowner or have recently moved into an older property, understanding the critical role of your electrical panel in ensuring a safe and efficient power supply is essential.

Understanding Your Electrical Panel

Your home’s electrical panel, often known as the breaker box, is the central hub where electricity from the grid enters your home and is distributed to the various circuits that power different rooms and appliances. It’s equipped with safety devices like circuit breakers, which are designed to protect your home by automatically shutting off power to a circuit if it detects an overload or short circuit, preventing potential electrical fires.

Understanding your electrical panel is crucial, especially when considering an upgrade. Older homes, in particular, may have panels that are not equipped to handle the electrical demands of modern life, with its plethora of devices and appliances. Panels in older homes might still use fuses, which need to be replaced when they blow, unlike circuit breakers which simply need to be reset.

Furthermore, older panels may not offer the level of protection against electrical fires that newer models with arc fault circuit interrupters (AFCIs) and ground fault circuit interrupters (GFCIs) provide. Recognizing the limitations of your current electrical panel is the first step towards making an informed decision about an upgrade, ensuring your home’s electrical system can safely meet your current and future needs.

Safety Benefits of Upgrading Your Electrical Panel

The decision to upgrade your electrical panel is not just a matter of enhancing your home’s power capacity; it’s a critical investment in the safety and security of your living environment. Upgrading brings with it a host of safety benefits that mitigate risks associated with outdated electrical systems. Here’s how a modern electrical panel can make your home safer:

  • Enhanced Protection Against Electrical Fires: Modern electrical panels include safety innovations like arc fault circuit interrupters (AFCIs) that significantly reduce the risk of electrical fires by detecting and interrupting dangerous electrical arcs.
  • Prevention of Overloading and Short Circuits: Upgraded panels are designed to manage electricity distribution more efficiently, preventing the risks associated with overloading and short circuits. This is achieved through adequate circuit distribution that matches your home’s electrical demand and improved wiring and breaker technology that handles higher loads safely.
  • Compliance with Current Electrical Codes: An upgrade brings your electrical system up to date with the latest safety standards including mandatory inclusion of ground fault circuit interrupters (GFCIs) in wet areas of the home to prevent electric shock and ensuring that your electrical system meets current safety regulations.
  • Integration of Modern Safety Features: New panels come equipped with features that older systems lack, such as AFCIs to protect against fires caused by electrical arcs, a common hazard in older systems.
  • Future-Proofing Your Home: By upgrading, you’re not only addressing current safety concerns but also preparing your home for future electrical demands. This includes the ability to add more circuits for renovations or new appliances and adapting to technological advances with a system capable of supporting the latest in home automation and energy management.

How to Know When It’s Time for an Upgrade

Determining the right time to upgrade your electrical panel is crucial for ensuring the safety, functionality, and efficiency of your home’s electrical system. Ignoring the signs that your panel is outdated or inadequate can lead to serious safety risks, including electrical fires. Here are the key indicators that signal it’s time to consider an upgrade:

  • Frequent Tripping of Circuit Breakers: Regular tripping indicates that your panel cannot handle your home’s electrical load, posing a risk of overheating and potential fires.
  • Use of Extension Cords as Permanent Solutions: Over-reliance on extension cords and power strips signifies a lack of sufficient outlets, hinting at an outdated electrical system that needs an upgrade.
  • Dimming or Flickering Lights: If your lights dim or flicker when appliances are used, it suggests that your panel is unable to adequately distribute power across your home.
  • Outdated Panel Technology: Homes with fuse boxes or panels that haven’t been updated in over 25 years are likely not equipped to meet current electrical demands, making an upgrade essential.
  • Planning Major Renovations or Adding Appliances: Any significant addition or change in your home’s electrical needs, such as adding high-powered appliances or undertaking major renovations, often requires an upgraded panel to support the increased load.
  • Visible Signs of Panel Deterioration: Physical indications of panel wear, like rust, corrosion, or burn marks, signal a compromised system that could fail at any time.
  • Absence of GFCIs in Necessary Areas: Modern electrical safety standards mandate GFCI outlets in moisture-prone areas. If your panel cannot support GFCIs, it’s a sign that an upgrade is overdue.
  • Expansion of Living Space: Adding more rooms or significant electrical installations, such as home theaters, hot tubs, or EV charging stations, typically necessitates a more robust electrical panel.
  • Insurance and Code Compliance Issues: An outdated electrical system can affect your home insurance policies, premiums, and compliance with current electrical codes, impacting both safety and resale value.

Acknowledging these signs and acting promptly by consulting a licensed electrician can help you avoid the risks associated with an outdated or inadequate electrical panel. An upgrade not only ensures your home meets current safety standards but also prepares it for future electrical demands, enhancing both your home’s value and your peace of mind.

The Importance of Professional Electrical Panel Services When Upgrading

When it comes to upgrading your home’s electrical panel, the importance of enlisting professional electrical panel services cannot be overstated. This is not merely a recommendation; it’s a necessity for ensuring the safety, compliance, and efficiency of the upgrade process.

Electrical work, particularly something as complex and critical as an electrical panel upgrade, involves specific technical knowledge, experience, and adherence to stringent safety codes and standards. Licensed electricians are equipped with the expertise to assess your home’s electrical needs accurately, recommend the appropriate panel capacity, and ensure that the installation is performed correctly and safely. They understand the intricacies of local building codes and can navigate the permitting process, ensuring that your upgrade meets all legal and safety requirements.

Furthermore, professional electricians bring a level of precision and accountability to the project that DIY efforts cannot match. They can identify potential issues that may not be apparent to the untrained eye, such as outdated wiring or additional upgrades that might be necessary to support the new panel. This proactive approach helps prevent future problems, ensuring that your electrical system is not only up to current standards but also prepared to handle future demands.

Additionally, many professional services offer warranties on their work, providing homeowners with peace of mind knowing that their investment is protected. In essence, hiring professional electrical panel services guarantees that the upgrade process is conducted efficiently, effectively, and safely, minimizing risks and maximizing the performance of your home’s electrical system.

Professional Electrician Near You For Electrical Panel Services

In conclusion, upgrading your electrical panel is a crucial step toward ensuring the safety, efficiency, and future readiness of your home’s electrical system. It’s not just about meeting current needs but also about anticipating future demands and safeguarding against potential hazards. Recognizing the signs that it’s time for an upgrade and understanding the importance of professional electrical services are pivotal in navigating this process. By investing in a modern electrical panel, you’re not only enhancing the safety and functionality of your home but also increasing its value and compliance with electrical codes.

Looking for a trusted and professional electrical service in Tucson, AZ? Look no further than Cummings Plumbing, Heating, Cooling, and Electrical. With years of experience and a reputation for excellence, Cummings offers comprehensive electrical panel upgrades and services tailored to meet the unique needs of your home.

Our team of licensed electricians is equipped with the latest tools and knowledge to ensure your project is completed safely, efficiently, and in compliance with local codes. Whether you’re looking to upgrade your outdated electrical panel, enhance your home’s safety, or prepare for future electrical demands, Cummings Plumbing, Heating, Cooling, and Electrical is your go-to solution in Tucson, AZ.

Frequently Asked Questions About Electrical Panels

Can an electrical panel upgrade really increase my home’s value?

Yes, upgrading your electrical panel can increase your home’s value. A modern, up-to-code electrical system is a significant selling point for potential buyers. It indicates that the home is safe, can accommodate modern electrical demands, and reduces the likelihood of future electrical problems, making your home more attractive and potentially increasing its market value.

How do I know if my electrical panel needs to be upgraded to a higher amperage?

ou might need an upgrade to a higher amperage if your current panel cannot support the electrical demand of your household appliances and devices, if you’re adding new appliances, or planning a home renovation that includes additional electrical fixtures. Signs include your circuit breakers tripping frequently or if you’re using a lot of power strips and extension cords because you don’t have enough outlets. Consulting with a licensed electrician can help determine if an amperage upgrade is necessary for your home.

How long does it take to upgrade an electrical panel?

The duration of an electrical panel upgrade can vary widely depending on several factors, including the complexity of the upgrade, the condition of the existing electrical system, and whether new wiring or additional circuits are required. Typically, a straightforward panel upgrade, where the new panel is of the same type and capacity as the old one, can be completed within 4 to 8 hours. However, if the upgrade involves increasing the panel’s capacity, adding new circuits, or extensive rewiring, it could take a full day or possibly longer. It’s best to consult with a licensed electrician who can assess the specific needs of your home.

How To Know If Your HVAC Is Leaking Carbon Monoxide

TL;DR: Carbon monoxide (CO) is a dangerous gas released by faulty heating systems, posing serious health risks. Symptoms include headaches, nausea, confusion, and even death. Signs of leaks include a yellow pilot light, soot, lack of chimney updraft, stale air, and condensation on windows. Protect yourself with carbon monoxide detectors, regular HVAC maintenance, and professional inspections. Considerations before repairs include pre-season check-ups, optimizing thermostat settings, tightening electrical connections, lubricating parts, cleaning filters and coils, checking refrigerant levels, inspecting gas connections, and hiring professional help when needed. Cummings Plumbing in Tucson offers HVAC repair and installation services with experienced technicians.


Carbon monoxide (CO) is a gas that doesn’t have odor, color, or taste. But if humans or animals come across it in high concentrations, it can have toxic effects on them. That means it is essential to ensure you are not releasing any into the air through your heating system, a topic we’ll discuss in today’s article. 

Carbon monoxide from a heating unit, such as a furnace, is released due to deficient ignition of carbon-containing fuels. Some home furnaces can release CO in the air, both outside your residence and inside. This is less likely to happen with some of the newer and modern HVAC systems, but it’s still wise to know the signs that you have high levels of CO inside your home. 

Average carbon monoxide levels in indoor and home settings vary from 0.5 to 5 parts ppm and may reach 30 ppm or higher. If the levels are on the higher end of the scale, you could be dealing with carbon monoxide leaks. But how to know if your HVAC is leaking carbon monoxide? Stick around for the rest of this article to learn more!

Understanding the Risks of Carbon Monoxide Leaks

Even if you don’t know exactly how to tell whether you have a carbon monoxide leak in your home, you might get some hints from the symptoms you experience. Upon exposure to this gas, you may get migraines, shakiness, sickness, and confusion, while exposure to the gas in high concentrations can be lethal. 

Extensive exposure to low levels of carbon monoxide can also lead to serious health issues. For this reason, frequent maintenance and careful observation are vital to avoid leaks and guarantee the safety of your HVAC system, especially if you use a gas furnace or burner regularly.

Signs of Potential Carbon Monoxide Leaks

Carbon monoxide may be hard to notice, but it’s not impossible to tell whether it is present in the air in your home. Any home can be affected by a carbon monoxide leak since HVAC systems and other devices can release it. You can protect your household by learning the signs of carbon monoxide leaks and how to recognize them. 

  • Yellow or Flickering Pilot Light: A flickering pilot light with a yellow hue on your gas furnace could indicate carbon monoxide production. A properly functioning furnace should have a blue flame, so any divergence from this could be a concerning sign of potential gas leaks.
  • Soot or Rust: Seeing soot or rust around the furnace or vents may indicate a carbon monoxide leak. This could be a hint of incomplete combustion and the discharge of carbon monoxide into your living space.
  • Lack of an Updraft in Your Chimney: If your chimney does not produce an updraft during the operation of the furnace, it could signal a blockage or improper ventilation. This may lead to carbon monoxide accumulation and leakage.
  • Stale or Stuffy Air: Does the air condition in your home seem dry and heavy? This may be due to improper ventilation caused by a carbon monoxide leak. This can occur together with a lack of fresh air and a feeling of discomfort.
  • Excessive Condensation on Windows: Abnormally high condensation levels on windows could indicate foul air in your home. These may be caused by a carbon monoxide leak, hinting at a malfunction in the HVAC system.

Taking Action to Address Potential Leaks

Carbon monoxide’s unscented, flavorless, and uncolored characteristics may cause unexpected leaks from faulty heating systems. Every year, over 400 people get poisoned and pass away from unexpected carbon monoxide poisoning in America. 

Thus, taking immediate action to eliminate potential carbon monoxide leaks is essential. Let’s explore the most effective ways to protect yourself and your family members from this silent threat.

  • Place Carbon Monoxide Detectors: If you fear there are carbon monoxide leaks in your property, place carbon monoxide detectors.. These appliances can signal the presence of carbon monoxide, allowing you to take prompt action to freshen the area and turn off the HVAC system if mandatory.
  • Schedule Regular HVAC Maintenance: Orderly upkeep of your HVAC system is essential for preventing carbon monoxide leaks. Professional HVAC technicians can inspect the system, clean the components, and ensure that all vents and pipes are clear of gas interferences.
  • Check Vents and Flues: Frequently inspect your HVAC system’s vents and pipes to ensure they are free from obstructions or dirt accumulation. Blockages can cause improper ventilation and potential carbon monoxide residue.
  • Seek Professional Assistance: If you notice any potential signs that signal a future developing carbon monoxide leak, it is very important to seek professional assistance as soon as possible. HVAC professionals can perform a detailed inspection of your system to detect and fix any issues.

Considerations Before Scheduling a HVAC System Repair 

Organizing professional repair for your HVAC system is crucial to ensure it operates effectively and to prevent potential issues. Regular maintenance can make your system more durable, improve energy efficiency, and help avoid expensive repairs. Here is what you need to consider before scheduling an appointment with a professional service:

  • Annual Pre-Season Check-Ups: Plan to have your cooling system checked in the spring and the heating system in the fall to ensure peak performance before the peak seasons when you will use the system more regularly.
  • Check Thermoregulator Condition: Ensure the thermoregulator’s settings are optimized for comfort and energy savings.
  • Tighten Electrical Connections: Regularly tighten all electrical connections and calculate voltage levels and motor currents to avoid dangerous operation and reduce the risk of major component failure.
  • Lubricate Operating Parts: Correctly lubricate all operating parts to reduce motor resistance and minimize electricity usage.
  • Examine and Clean or Replace Air Filters: Regularly go through, clean, or replace air filters in your central air conditioner, furnace, and/or heat pump to maintain efficient operation and avoid equipment deterioration.
  • Clean Evaporator and Condenser Coils: Ensure that the evaporator and condenser air conditioning coils are clean to maintain the system’s cooling efficiency and reduce energy costs.
  • Check Refrigerant Levels: Verify and adjust the refrigerant level to optimize system efficiency and lifespan.
  • Clean and Adjust Blower Components: Regularly maintain the cleanliness and modify blower components to secure accurate system airflow and enhance comfort levels.
  • Inspect Gas Connections and Pressure: Examine all gas connections, pressure, burner ignition, and heat intercharger for safety and efficiency.

Hire Professional HVAC Help in Tucson, Arizona

That’s the basic information on how to know if your HVAC is leaking carbon monoxide. Remember that all indications of a carbon monoxide leak should be taken seriously, meaning immediate freshening up of your indoor areas and contacting local HVAC specialists who can check and fix your HVAC system. 

At Cummings Plumbing, we specialize in repairing your home systems to offer the most worry-free experience. We also provide installation services performed by the most experienced and skillful technicians. As a company that has been on the market since the 1980s, you can rest assured that we can help with any HVAC problems quickly and efficiently. 

So, don’t hesitate to call us today and get your in-house free estimate!


FAQ

How can I tell if my HVAC system is leaking carbon monoxide?

Look out for signs such as a yellow or flickering pilot light, soot or rust around the furnace or vents, lack of an updraft in your chimney during furnace operation, stale or stuffy air, and excessive condensation on windows. If you notice any of these signs, contact Cummings Plumbing for a professional inspection.

What should I do if I suspect a carbon monoxide leak in my home?

If you suspect a carbon monoxide leak, immediately ventilate the area by opening windows and doors, evacuate the premises, and call Cummings Plumbing for assistance. They specialize in HVAC repair and can quickly address any issues to ensure your safety.

How often should I schedule maintenance for my HVAC system to prevent carbon monoxide leaks?

It’s recommended to schedule annual maintenance for your HVAC system, ideally before the start of each peak season. Cummings Plumbing offers regular maintenance services to keep your system running efficiently and to detect any potential carbon monoxide leaks early on.

Why should I choose Cummings Plumbing for HVAC repair and maintenance?

Cummings Plumbing has been serving the Tucson area since the 1980s, providing reliable HVAC repair and installation services. Their experienced technicians specialize in identifying and fixing issues with heating systems, including carbon monoxide leaks, to ensure the safety and comfort of your home. Contact them today for a free estimate and peace of mind.

How Does a Water Softener Work?

Have you noticed that your soap doesn’t lather well, or your clothes come out of the laundry feeling stiff and scratchy? If yes, you might be dealing with hard water, a common issue in many households, especially in Arizona. The US has a problem with hard water, but our state ranks at the top of the water hardness scale.

We say that water is “hard” when it has high levels of magnesium and calcium. These minerals can clog pipes, make your appliances less efficient, and leave behind white residue on dishes and shower doors. So, how does a water softener work to tackle these problems? It’s a device that turns your water “soft” by removing the excess minerals.

This process keeps your appliances in top shape and makes daily chores easier. Let’s see how to use a water-softening system to improve water quality.

Hard Water: What Is It And Why It’s An Issue?

Hard water is just regular water that contains a higher concentration of minerals, mainly calcium and magnesium. These minerals do not negatively impact your health but can damage your plumbing and appliances. When water with these minerals heats up, it leads to the development of limescale.

This residue can clog your pipes and reduce the efficiency of appliances like your dishwasher, washing machine, and water heater. When you see a white, chalky film on your faucets or shower heads, that’s the scale from hard water. It can also make your soap less effective, leaving your skin dry and your clothes feeling hard after washing.

Hard water is a common issue across the US, but it’s one that you can manage with the right approach, such as installing a water softener system in your home. This device exchanges the minerals in hard water with sodium, which makes the water softer and helps your plumbing and appliances last longer.

Problems Caused by Hard Water

While hard water isn’t bad for your health, it causes issues you don’t want to ignore. The most frequent ones you’ll face in your day-to-day life include:

  • Scale buildup in pipes and appliances: This buildup makes your appliances work harder, increasing your energy bills, but it can also cause them to break down faster.
  • Soap and detergents aren’t as effective: They don’t lather well, meaning you use more products to achieve less cleanliness. That affects washing your clothes and dishes, often leaving them looking dull and grimy.
  • Skin and hair issues: The excess minerals in hard water strip away natural oils, leaving your skin and hair dry and dull.

How Water Softeners Solve Hard Water Issues

Typically, soft water contains 0–75 parts per million (PPM) of calcium carbonate. This low level of minerals is what you’re aiming for when you’re trying to combat the effects of hard water. So, how does a water softener achieve this? The magic happens through ion exchange. This system replaces the minerals that make water hard with either sodium or potassium.

Parts of A Water Softener

Now, let’s break down the different components of a water softener to give you a clearer picture of how each part contributes to solving your problems with hard water. 

  • Resin tank: The tank contains resin beads charged with sodium or potassium ions. When hard water flows through this tank, the resin beads grab the calcium and magnesium ions. They exchange them with sodium or potassium ions, which softens the water.
  • Mineral tank: After the water is softened, it moves to this tank for storage until you need to use it.
  • Control valve: This part manages the water flow through the water softener, ensuring that the system regenerates based on water usage. That keeps the unit running efficiently without manual intervention.
  • Brine tank: This is the regeneration station for the resin beads. It holds a highly concentrated salt (or potassium) water solution, which recharges the resin beads during the regeneration cycle.
  • Bypass valve: A handy feature that allows water to bypass the water softener altogether. That can be particularly useful during maintenance or when softened water isn’t necessary, like when you’re watering the lawn.
  • Flow meter: A feature that measures the amount of water used. This measurement helps the control valve determine when the regeneration process needs to start. Without this component, the system would either regenerate too often, wasting water and salt, or not often enough, leading to ineffective water softening.

Types of Water Softeners

When considering a water softener for your home, know that your household might need a particular water-softening system. There are a few different types, each best suited for specific needs and water conditions.

  • Salt-based ion exchange softeners: These systems are the go-to for seriously hard water. A salt-based system might be your best bet if you’re dealing with scale buildup on your appliances or stiff, dingy laundry. However, keep in mind that these require a bit of upkeep, including regular salt refills.
  • Salt-free water conditioners: These don’t exactly soften water in the traditional sense by removing hard minerals. Instead, they prevent minerals from forming scale buildup. This type is ideal if you want to avoid the added sodium in your water or if you don’t have extremely hard water in your home. They’re also a fantastic choice if you’re aiming for a more environmentally friendly option since they don’t produce wastewater or require electricity.
  • Dual-tank water softeners: They have a continuous supply of softened water, which is why they are perfect for large families or households that use a lot of water. While using one tank, the other regenerates, ensuring you’re never without treated water. They’re convenient if you have a fluctuating schedule or don’t want to time your water use around a softener’s regeneration cycle. However, they take up more space and might be overkill for smaller households or those with modest water needs.

Professional Installation vs. DIY

If you want to install a water softener in your home, you might consider rolling up your sleeves and doing it yourself. That’s a good move if you’re handy and know a little about basic plumbing. If the installation looks straightforward and you have the time to research the proper steps, DIY could save you some cash.

However, a professional installation comes with benefits you shouldn’t overlook. Pros know exactly how to handle different types of water softeners and can spot potential issues before they become big problems. They ensure everything is up to code, even things you might not be fully aware of if you’re not in the trade. 

If something goes wrong during the installation, you’re not left scrambling to fix it – you’ve got an expert on speed dial. So, while DIY might seem appealing, consider whether it’s worth the potential headaches and risks before you decide.

Get A Water Softener In Tucson, AZ

Dealing with hard water is a common issue across the US, which is why water softeners are so popular. If anyone asks you, “How does a water softener work,” tell them that this device turns hard minerals into something your plumbing system can handle without side effects like buildup and inefficiency.

If you’re noticing signs of hard water in your home and want a water softener installed in your Tucson home, call Cummings Plumbing. We have six generations worth of experience in the industry and can help you choose, install, and maintain a water-softening system. To get the best quality water in Tucson, get in touch today and get your free estimate!

How to know if your HVAC is leaking carbon monoxide?

TL;DR: Carbon monoxide (CO) leaks from your HVAC system can be dangerous and go unnoticed without proper attention. Signs of CO leakage include flu-like symptoms, yellow or flickering pilot lights, soot buildup, and strange odors. Key indicators include cracks in the heat exchanger, blocked vents, old equipment, and inadequate ventilation. Don’t ignore red flags like staining, increased bills, condensation, headaches, or faulty CO detectors. Evacuate if detectors sound, get annual inspections, ensure ventilation, and be proactive in maintenance to keep your home safe.

Your HVAC system is a crucial component of your home, providing comfort and regulating temperature year-round. However, it’s essential to be aware of potential hazards associated with HVAC systems, particularly the risk of carbon monoxide (CO) leaks. Carbon monoxide is a colorless, odorless gas that can be deadly if inhaled in high concentrations. In this blog, we’ll explore how to recognize the signs of carbon monoxide leakage from your HVAC system, ensuring the safety of your home and family.

Understanding the Signs: Is Your HVAC System Leaking Carbon Monoxide?

Carbon monoxide (CO) is a silent threat that can permeate your home without warning, posing serious health risks to you and your loved ones. Understanding the signs of a potential carbon monoxide leak from your HVAC system is crucial for maintaining a safe living environment. Here’s a closer look at how to identify these signs:

  • Flu-like Symptoms: One of the most common indicators of carbon monoxide exposure is experiencing flu-like symptoms such as headaches, nausea, dizziness, and fatigue. These symptoms may occur suddenly and persistently, especially when spending extended periods indoors. It’s essential to pay attention to whether these symptoms improve when you leave the house and return when you come back.
  • Yellow or Flickering Pilot Light: When inspecting your furnace, pay close attention to the pilot light. A healthy pilot light should burn a steady blue flame. However, if you notice that the flame is yellow or flickering, it could indicate incomplete combustion, a potential sign of carbon monoxide production.
  • Soot Buildup: Keep an eye out for any visible signs of soot or dark staining around your furnace, vents, or chimney. Soot buildup can occur when combustion isn’t efficient, leading to the release of carbon monoxide into your home. If you notice these deposits, it’s crucial to address the issue promptly to prevent further CO exposure.
  • Strange Odors: While carbon monoxide itself is odorless, other combustion byproducts may emit unusual smells. If you detect a faint odor of gas or burning within your home, it could be a warning sign of a potential carbon monoxide leak. Never ignore strange odors, as they could indicate a serious safety hazard.
  • Physical Symptoms in Pets: Animals are often more sensitive to carbon monoxide than humans, and they may exhibit symptoms such as lethargy, vomiting, or difficulty breathing. If your pets show signs of illness that seem to correlate with time spent indoors, it’s essential to consider the possibility of a carbon monoxide leak and take appropriate action.

Recognizing these signs is the first step in safeguarding your home against the dangers of carbon monoxide. If you notice any of these indicators or suspect a CO leak, it’s crucial to act swiftly to protect yourself and your family. Evacuate the premises, seek fresh air outdoors, and contact emergency services and a qualified HVAC technician, such as Cummings Plumbing Company, to investigate and resolve the issue promptly. Remember, prioritizing safety and taking proactive measures can help ensure a healthy living environment for everyone in your household.


Key Indicators of Carbon Monoxide Leakage from Your HVAC System

Carbon monoxide (CO) leaks from HVAC systems can pose significant risks to the safety and well-being of your household. Recognizing the key indicators of carbon monoxide leakage is essential for identifying and addressing potential hazards associated with your heating, ventilation, and air conditioning (HVAC) system. Here are some critical signs to watch for:

  • Cracks or Damage in Heat Exchanger: The heat exchanger in your furnace plays a crucial role in heating your home by transferring heat from the combustion chamber to the air circulating through your HVAC system. However, over time, the heat exchanger can develop cracks or other damage, allowing carbon monoxide to escape into your home’s air supply. Regular inspections by qualified HVAC technicians, such as those provided by Cummings Plumbing Company, are essential for detecting and addressing such issues before they escalate into safety hazards.
  • Blocked or Dirty Vents: Obstructed vents or ductwork can hinder the proper flow of air through your HVAC system, leading to inefficient combustion and an increased risk of carbon monoxide production. Dust, debris, or other blockages can accumulate in vents over time, especially if regular maintenance is neglected. Cleaning and clearing vents and ductwork regularly can help prevent these issues and ensure the safe operation of your HVAC system.
  • Old or Improperly Installed Equipment: Aging HVAC systems or equipment that is improperly installed may be more prone to carbon monoxide leaks. Older furnaces or boilers may develop wear and tear over time, increasing the likelihood of cracks or other defects in critical components such as the heat exchanger. Similarly, HVAC systems that were not installed correctly may not function optimally, leading to safety concerns. It’s crucial to have your HVAC system inspected regularly by qualified professionals, like those at Cummings Plumbing Company, to identify any potential risks and address them promptly.
  • Inadequate Ventilation: Proper ventilation is essential for ensuring the safe operation of your HVAC system and minimizing the risk of carbon monoxide buildup. Inadequate ventilation can result from factors such as blocked vents, closed or obstructed flues, or a lack of fresh air intake. Without sufficient airflow, combustion gases, including carbon monoxide, may accumulate within your home, posing a serious health hazard. Ensuring that your HVAC system is properly ventilated and that vents and flues are clear and unobstructed is essential for mitigating this risk.
  • Malfunctioning Carbon Monoxide Detectors: Carbon monoxide detectors are critical safety devices that can provide early warnings of CO buildup in your home. However, if these detectors are malfunctioning or not properly maintained, they may fail to detect a carbon monoxide leak when it occurs. Regularly testing and replacing batteries in carbon monoxide detectors and replacing outdated units are essential for ensuring their effectiveness in protecting your household.


Don’t Ignore These Red Flags: Detecting Carbon Monoxide Leaks in Your HVAC

When it comes to the safety of your home and family, it’s essential not to overlook any potential signs of carbon monoxide (CO) leaks from your HVAC system. Ignoring these red flags can put you at risk of exposure to this silent but deadly gas. Here are several crucial indicators to watch for when detecting carbon monoxide leaks in your HVAC:

  • Visible Staining or Rust: Take a close look at your HVAC unit, particularly around joints, connections, and seams. If you notice any signs of staining, rust, or corrosion, it could indicate a potential leak. These visual cues may suggest that gases, including carbon monoxide, are escaping from the system and need immediate attention.
  • Unusual Noises or Vibrations: Pay attention to any strange noises or vibrations coming from your HVAC system. While some amount of noise is normal during operation, excessive rattling, banging, or hissing could signal underlying issues, such as leaks or malfunctions in the combustion process. If you notice any unusual sounds or vibrations, it’s essential to have your HVAC system inspected by professionals like Cummings Plumbing Company promptly.
  • Increased Utility Bills: A sudden spike in your energy bills without a corresponding increase in usage could indicate inefficiencies in your HVAC system, including potential carbon monoxide leaks. When combustion isn’t efficient, your system may consume more fuel to maintain desired temperatures, leading to higher energy costs. Monitoring your utility bills closely can help you detect abnormalities and address them before they escalate into safety hazards.
  • Condensation or Moisture Buildup: Excessive condensation or moisture accumulation around your HVAC system may indicate issues with combustion or ventilation. Moisture buildup can create favorable conditions for corrosion and mold growth, exacerbating existing problems and posing health risks to your household. If you notice unusual levels of condensation or moisture, it’s crucial to investigate the underlying cause and address it promptly.
  • Frequent Headaches or Nausea: Carbon monoxide exposure can cause symptoms such as headaches, nausea, dizziness, and fatigue. If you or your family members experience these symptoms regularly, especially when indoors, it could be a sign of CO leakage from your HVAC system. It’s essential not to dismiss these symptoms as unrelated or minor, as they may indicate a serious safety concern that requires immediate attention.
  • Faulty or Inoperable Carbon Monoxide Detectors: Carbon monoxide detectors are your first line of defense against CO leaks in your home. However, if these devices are faulty, outdated, or have dead batteries, they may not provide adequate protection. Regularly test your carbon monoxide detectors and replace batteries as needed to ensure they are functioning correctly. If a detector consistently malfunctions or fails to respond to CO levels, replace it promptly to maintain your home’s safety.


Final Thoughts

Maintaining a safe and healthy home environment involves being vigilant about potential hazards like carbon monoxide leaks from HVAC systems. By understanding the signs, indicators, and red flags of CO leakage, you can take proactive steps to protect your family and ensure the proper functioning of your HVAC system. Remember, regular maintenance and inspections by trusted professionals like Cummings Plumbing Company in Tucson are essential for the safety and efficiency of your heating and cooling systems. Stay informed, stay safe, and prioritize the well-being of your loved ones.


FAQ

What should I do if my carbon monoxide detector goes off?

If your carbon monoxide detector alarm sounds, evacuate your home immediately and move to fresh air outdoors. Do not re-enter the premises until emergency services have cleared the area and a qualified HVAC technician has inspected your HVAC system for leaks or malfunctions.

How often should I have my HVAC system inspected for carbon monoxide leaks?

It’s recommended to have your HVAC system inspected annually by a licensed professional, such as those at Cummings Plumbing Company. Regular maintenance can help detect and address potential issues before they escalate into safety hazards, including carbon monoxide leaks.

What are some preventive measures I can take to reduce the risk of carbon monoxide leaks from my HVAC system?

Ensure proper ventilation by keeping vents and flues clear and unobstructed. Schedule regular maintenance and inspections for your HVAC system, including checks on the heat exchanger, vents, and combustion process. Install carbon monoxide detectors on every level of your home and near sleeping areas, and test them regularly to ensure they are functioning correctly.

Are there any warning signs that my HVAC system may be at higher risk for carbon monoxide leaks?

Older HVAC systems, improperly installed equipment, or systems that have not been regularly maintained may be at higher risk for carbon monoxide leaks. Signs such as rust, corrosion, or unusual noises from your HVAC unit should prompt immediate inspection and maintenance by qualified professionals to mitigate potential risks.

Is a gas or electric furnace better

TLDR: Choosing between a gas or electric furnace depends on various factors. Gas furnaces are more efficient and suitable for colder climates but involve higher installation costs. Electric furnaces have lower upfront expenses and are better for milder regions but may have slightly higher operational costs. Safety is crucial for gas furnaces, and regular maintenance is essential for both types. Consider factors like energy prices, geographic location, and heating needs to make an informed decision. Cummings Plumbing can provide expert guidance and installation services to ensure your furnace choice aligns with your requirements.


Choosing the right furnace for your home is a significant decision. It’s not only about staying warm during the chilly months but also about energy efficiency, installation costs, and environmental impact. In this blog post, we’ll explore the key differences between gas and electric furnaces to help you make an informed choice. Whether you’re considering an upgrade or a new installation, Cummings Plumbing is here to provide insights and expertise to assist you in making the right decision for your heating needs.

Gas vs. Electric Furnaces: An Overview

Before delving into the intricacies of gas and electric furnaces, it’s essential to establish a foundational understanding of these two prevalent heating systems. Each type has its own set of characteristics, advantages, and drawbacks, making them suitable for different situations.

Gas Furnaces:

Gas furnaces are renowned for their capacity to efficiently and swiftly heat homes, making them a favored choice for regions with frigid winters. Here’s a closer look at the key aspects of gas furnaces:

1. Fuel Source: Gas furnaces operate on natural gas or propane, drawing upon these resources to generate the heat needed to warm your home. The combustion of gas in a controlled environment produces hot air, which is then distributed throughout your living spaces.

2. Rapid Heating: Gas furnaces are prized for their rapid heating capabilities. They can swiftly raise the indoor temperature to your desired level, making them particularly appealing during the coldest months of the year. This quick heating response ensures that your home becomes comfortable in a matter of minutes.

3. Efficiency: Gas furnaces are generally recognized for their energy efficiency. They are equipped with AFUE (Annual Fuel Utilization Efficiency) ratings that often range from 78% to 98%. This means that a substantial portion of the energy generated from the combustion of gas is converted into usable heat, reducing energy wastage and lowering utility bills.

4. Venting Requirements: Due to the combustion process involved, gas furnaces necessitate proper venting systems to expel exhaust gases safely. Venting can either be through a chimney or a specialized venting system designed for high-efficiency furnaces.

5. Initial Costs: While gas furnaces boast impressive heating capabilities, they do tend to come with higher upfront costs. The installation of gas lines and proper venting systems can require a substantial investment. However, the potential for long-term energy savings can make this initial expenditure worthwhile.

Electric Furnaces:

Electric furnaces, in contrast, offer a distinct set of characteristics that make them appealing for specific scenarios. Here’s an overview of electric furnaces:

1. Fuel Source: Electric furnaces rely exclusively on electricity to generate heat. They utilize heating elements, similar to those found in electric stovetops, to produce warm air that is distributed throughout your home.

2. Affordability: Electric furnaces are often recognized for their more budget-friendly initial installation costs. They do not require the installation of gas lines or complex venting systems, simplifying the setup process.

3. Simplicity and Versatility: Electric furnaces are praised for their simplicity and versatility. They are relatively easy to install and maintain, making them a practical choice for various housing situations.

4. Efficiency: Electric furnaces have made strides in improving their efficiency over the years. While they may have lower AFUE ratings compared to gas furnaces, advancements in technology have resulted in more energy-efficient electric heating systems.

5. Geographical Considerations: Electric furnaces are often preferred in regions with milder climates where heating demands are less extreme. They are a suitable choice for areas where winters are less severe, and rapid heating is not as critical.

Energy Efficiency: Comparing Gas and Electric Furnaces

Energy efficiency is a pivotal factor when it comes to selecting the most suitable furnace for your home. It impacts not only your comfort but also your monthly utility bills and overall environmental footprint. Let’s delve deeper into the energy efficiency of both gas and electric furnaces to help you make an informed decision:

Gas Furnaces:

Gas furnaces have long been lauded for their commendable energy efficiency. Here’s why they are recognized as an efficient heating solution:

1. AFUE Ratings: Gas furnaces are equipped with AFUE (Annual Fuel Utilization Efficiency) ratings, which are used to measure their energy efficiency. AFUE ratings typically range from 78% to 98% for gas furnaces. This means that a substantial percentage of the energy derived from the combustion of natural gas or propane is effectively converted into usable heat for your home.

2. Quick and Efficient Heating: Gas furnaces excel at rapidly increasing the indoor temperature to your desired level. When you adjust the thermostat, they respond swiftly and efficiently. This rapid heating response not only ensures that your home becomes comfortably warm in a short time but also minimizes energy wastage.

3. Lower Energy Bills: Due to their high AFUE ratings and efficient heating performance, gas furnaces tend to result in lower monthly energy bills when compared to other heating options. This is particularly advantageous in colder climates, where a reliable and energy-efficient heating system is crucial.

4. Reduced Environmental Impact: Gas furnaces are also favored for their reduced environmental impact when compared to older, less efficient heating systems. Burning natural gas or propane in a controlled environment produces fewer emissions, contributing to a more eco-friendly heating solution.

Electric Furnaces:

Electric furnaces, while known for their simplicity and versatility, have traditionally lagged behind gas furnaces in terms of energy efficiency. However, advancements in technology have improved their efficiency over time:

1. AFUE Ratings: Electric furnaces typically have AFUE ratings ranging from 95% to 100%. While these ratings may appear higher than those of gas furnaces, it’s essential to understand that they operate differently. Electric furnaces convert nearly all the electricity they use into heat, but the cost of electricity can be higher than natural gas or propane.

2. Efficiency Improvements: Manufacturers have made efforts to enhance the efficiency of electric furnaces. Modern electric furnaces are designed to distribute heat more evenly and effectively, reducing energy wastage.

3. Geographic Considerations: Electric furnaces are often favored in regions with milder climates, where the efficiency difference between gas and electric furnaces may not be as noticeable. In areas with lower heating demands, the cost savings from lower installation expenses can offset the slightly higher operational costs.

4. Environmental Considerations: Electric furnaces produce no emissions at the point of use, which can be seen as an environmental advantage. However, the environmental impact may vary depending on the source of your electricity. If your electricity is generated from renewable sources, your electric furnace can be a more eco-friendly choice.

Installation Costs and Considerations

When contemplating the installation of a new furnace, one of the critical factors to weigh is the associated costs. These costs encompass not only the upfront expenses but also the considerations unique to each type of furnace. Here’s a closer examination of the installation costs and key considerations for both gas and electric furnaces:

Gas Furnaces:

Gas furnace installations are generally associated with distinct factors that influence their overall cost:

1. Fuel Source: The first consideration when installing a gas furnace is the availability of natural gas or propane in your area. If you already have a gas line in your home, the installation process may be more straightforward and cost-effective. However, if gas lines need to be extended to reach your furnace, this can incur additional expenses.

2. Venting Requirements: Gas furnaces require proper venting systems to expel combustion byproducts safely. The type of venting system needed—either a traditional chimney or specialized high-efficiency venting—can impact installation costs. High-efficiency furnaces often require new venting systems, which can be more expensive to install.

3. Installation Complexity: Gas furnace installations can be more complex due to the need for gas lines, venting systems, and safety considerations. This complexity may lead to higher labor costs and an extended installation timeline.

4. Upfront Investment: While gas furnaces can deliver long-term energy savings and operational efficiency, they typically involve higher upfront costs compared to electric furnaces. The costs associated with gas line extension, venting, and installation labor contribute to this initial investment.

Electric Furnaces:

Electric furnace installations present a different set of considerations that can impact overall costs:

1. Fuel Source: Electric furnaces rely solely on electricity, eliminating the need for gas lines or extensive venting systems. This can simplify the installation process and reduce associated costs.

2. Simplicity and Versatility: Electric furnaces are known for their simplicity and versatility. They are generally easier to install and require less complex equipment than gas furnaces. This can translate into lower labor costs and a shorter installation timeline.

3. Initial Investment: One of the primary advantages of electric furnaces is their affordability when it comes to installation costs. The absence of gas lines and complex venting systems typically makes electric furnaces a cost-effective choice for homeowners with budget constraints.

4. Monthly Operating Costs: While electric furnaces may offer lower upfront installation expenses, it’s important to consider potential higher monthly energy bills. Electricity costs can vary significantly by region, and this can impact the long-term operational costs of an electric furnace.

5. Geographic Considerations: Electric furnaces are often favored in regions with milder climates where heating demands are less extreme. In such areas, the lower installation costs can offset the slightly higher operational expenses.

Final Thoughts

When it comes to choosing between a gas or electric furnace, there is no one-size-fits-all answer. Your decision should be based on your specific needs, budget, and geographic location. Gas furnaces offer superior energy efficiency and heating performance, making them a top choice for colder regions. On the other hand, electric furnaces can be a cost-effective solution for milder climates with lower heating demands.

Cummings Plumbing, with its expertise in heating systems, can provide personalized advice and professional installation services to ensure that your home remains warm and comfortable. Whether you opt for a gas or electric furnace, proper installation and regular maintenance are key to maximizing efficiency and longevity. Contact Cummings Plumbing today to discuss your heating needs and make the best choice for your home.

FAQ

Is it more cost-effective to install a gas or electric furnace?

The cost-effectiveness of a gas or electric furnace depends on various factors, including your geographic location, energy prices, and heating needs. Gas furnaces often have higher upfront installation costs but can result in lower long-term operational expenses due to their energy efficiency. Electric furnaces typically have lower installation costs but may have slightly higher monthly energy bills. The choice between the two should consider your specific circumstances.

Are there any safety concerns associated with gas furnaces?

Gas furnaces are generally safe when installed and maintained correctly. However, there is a potential risk of gas leaks, carbon monoxide emissions, or combustion-related issues if the furnace is not properly vented or maintained. Regular professional inspections and carbon monoxide detectors are essential safety measures to ensure your gas furnace operates safely.

How often should I replace or upgrade my furnace?

The lifespan of a furnace varies depending on its type, brand, and maintenance. On average, gas furnaces can last around 15-20 years, while electric furnaces may have a slightly longer lifespan. If your furnace is approaching or exceeding its expected lifespan, experiencing frequent breakdowns, or your energy bills are increasing, it may be time to consider replacement or an upgrade for improved efficiency and reliability.

Can I switch from a gas to an electric furnace or vice versa?

Switching from a gas to an electric furnace or vice versa can be possible but may involve significant changes to your home’s infrastructure and potentially higher costs. For example, switching from electric to gas may require the installation of gas lines and proper venting, which can be expensive. It’s essential to consult with a professional HVAC technician to assess the feasibility and cost-effectiveness of such a conversion based on your specific situation.

Does a New Furnace Need to Be Inspected?

TLDR: Maintaining a well-functioning furnace is crucial for home comfort and energy efficiency. Whether your furnace is new or old, regular inspections are vital. They ensure safety, optimize efficiency, prolong the system’s lifespan, and provide peace of mind. Inspecting a new furnace is especially important, preserving warranties and enhancing performance. New furnaces can still experience calibration issues, manufacturing defects, and airflow problems. Professional inspections catch these issues early, ensuring your furnace operates at its best. Cummings Plumbing offers trusted furnace inspection services to keep your heating system safe and efficient. Don’t wait for problems to arise; schedule an inspection today for a warm, safe, and cost-effective home.


When it comes to home comfort and energy efficiency, a well-functioning furnace is paramount. Whether you’ve just had a brand-new furnace installed or you’re considering it, you might be wondering if a furnace inspection is necessary. In this blog post, we’ll explore the importance of furnace inspections, the benefits of inspecting a new furnace, common issues found in new furnaces, and why you should consider making Cummings Plumbing your go-to choice for furnace inspections.

The Importance of Furnace Inspections

Furnace inspections are not just a routine maintenance task; they are a critical aspect of responsible homeownership, ensuring that your home stays warm, safe, and cost-effective throughout the winter months. Here, we delve deeper into the significance of regular furnace inspections:

Safety Assurance: Perhaps the most paramount reason for furnace inspections is safety. Your furnace is a complex piece of equipment that involves the combustion of fuel (usually natural gas or oil) to generate heat. This process can produce carbon monoxide, a colorless, odorless gas that is highly toxic. A malfunctioning furnace can lead to gas leaks or incomplete combustion, both of which pose serious health risks to you and your family. During an inspection, a trained technician will check for any signs of gas leaks, carbon monoxide leaks, or other potential safety hazards. Identifying and addressing these issues promptly can prevent accidents and even save lives.

Efficiency Optimization: A furnace that is not functioning at its peak efficiency can result in higher energy bills. Even small issues, such as clogged air filters, can force your furnace to work harder to maintain the desired temperature. Over time, this increased workload not only drives up your energy costs but also wears down the system faster, potentially leading to costly repairs or replacements. Regular furnace inspections help identify and rectify these efficiency-draining problems. By maintaining your furnace in top condition, you’ll enjoy a warm and cozy home without breaking the bank.

Prolonged Lifespan: Your furnace represents a significant investment in your home, and you want it to last as long as possible. Neglecting regular maintenance and inspections can lead to premature wear and tear, reducing the lifespan of your heating system. An inspection can catch small issues before they escalate into major problems, helping you avoid the expense of a premature furnace replacement. In the long run, this can save you a substantial amount of money.

Peace of Mind: Knowing that your furnace has been thoroughly inspected and is operating safely and efficiently provides peace of mind. You won’t have to worry about sudden breakdowns in the middle of a cold winter night or unexpected safety hazards. With regular inspections, you can rest assured that your heating system is in good hands, and your home will remain warm and comfortable throughout the heating season.

Benefits of Inspecting a New Furnace

Inspecting a new furnace might not be the first thing that comes to mind when you’ve just invested in a state-of-the-art heating system. However, it’s a step that should not be overlooked, as it offers numerous benefits that can enhance your overall heating experience and protect your investment. Here’s a closer look at why inspecting a new furnace is a wise decision:

Preservation of Warranty: One of the primary benefits of inspecting a new furnace is the preservation of your manufacturer’s warranty. Most furnace manufacturers require regular professional inspections to maintain warranty coverage. Skipping these inspections may void your warranty, leaving you responsible for any future repairs or replacements, which can be financially burdensome. By adhering to the manufacturer’s requirements and scheduling regular inspections, you safeguard your investment and ensure that any covered issues are addressed at no additional cost.

Performance Optimization: While new furnaces are designed for efficiency and reliability, they are not immune to installation errors, calibration issues, or manufacturing defects. These imperfections can hinder the furnace’s ability to perform at its best. A professional inspection, conducted by a skilled technician, can identify and rectify these problems early on. By fine-tuning your new furnace’s settings and addressing any potential issues, you ensure that it operates at peak performance from the moment it’s installed. This optimization translates to better heating capacity, faster warm-up times, and lower energy bills.

Energy Efficiency: Inspecting a new furnace can make it even more energy-efficient. A highly efficient furnace not only reduces your carbon footprint but also saves you money on heating costs. During an inspection, the technician can assess the system’s energy consumption and make necessary adjustments to improve efficiency. This means you’ll enjoy a comfortable home while using less energy, which is not only environmentally responsible but also economically advantageous.

Early Problem Detection: New furnaces, like any complex equipment, can develop issues over time. These issues may not be immediately apparent, but they can worsen over time and result in costly repairs or system failures. Regular inspections are an opportunity to catch these problems in their infancy. Whether it’s a small manufacturing defect or an installation error, early detection allows for prompt intervention, preventing minor concerns from escalating into major headaches.

Common Issues Found in New Furnaces

You might assume that a brand-new furnace, fresh from the factory or installed by professionals, is flawless and immune to problems. While modern furnaces are designed with precision and undergo rigorous quality control, they are not entirely exempt from issues. It’s essential to be aware of potential problems that can arise in new furnaces, as early detection and resolution are key to maintaining the efficiency and longevity of your heating system. Here are some common issues to watch out for in new furnaces:

Calibration Issues: Furnaces require precise calibration to function efficiently. If the settings are not calibrated correctly during installation or if they drift out of alignment over time, your furnace may struggle to maintain the desired temperature. This can result in uneven heating, higher energy bills, and increased wear and tear on the system. During an inspection, a technician can fine-tune the calibration settings to optimize your furnace’s performance, ensuring even and consistent heating throughout your home.

Manufacturing Defects: While furnace manufacturers strive for perfection, there can still be instances of manufacturing defects. These defects may not become evident immediately, but they can surface over time and lead to operational problems. Common defects include issues with heat exchangers, ignition systems, or control boards. Regular inspections can detect these defects early, allowing for warranty-covered replacements or repairs.

Ventilation and Airflow Problems: Proper airflow is crucial for efficient furnace operation. New furnaces can experience airflow issues if the ductwork is not correctly sized or if there are obstructions in the system. Restricted airflow can strain the furnace, causing it to work harder and less efficiently. During an inspection, the technician will assess the ductwork and ventilation to ensure that air is flowing freely and evenly throughout your home.

Thermostat Calibration: Sometimes, the issue may not lie with the furnace itself but with the thermostat. A misconfigured or malfunctioning thermostat can lead to temperature inconsistencies, frequent cycling, or an inability to reach the desired temperature. A professional inspection can include a check of the thermostat to ensure it communicates effectively with the furnace and accurately controls the heating cycle.

Filter and Maintenance Neglect: New furnace owners may underestimate the importance of regular maintenance, including filter changes. Neglecting these routine tasks can lead to clogged filters, reduced airflow, and strain on the furnace. During an inspection, the technician can educate you on proper maintenance practices and ensure that your furnace’s filters and components are clean and functioning optimally.

Final Thoughts

Whether your furnace is old or brand new, regular inspections are essential to ensure safety, efficiency, and longevity. Cummings Plumbing is your trusted partner in furnace inspections, providing top-notch services to keep your heating system in excellent condition. Don’t wait until a problem arises; schedule your furnace inspection today and enjoy peace of mind knowing your home is warm and safe. Your comfort and safety are worth the investment in a professional furnace inspection.

FAQ

Do I really need to inspect my new furnace?

Yes, inspecting a new furnace is essential. Even though new furnaces are designed for efficiency and reliability, they can still have installation errors, calibration issues, or manufacturing defects that may not be immediately apparent. Regular inspections help catch these problems early, optimize performance, and maintain your warranty.

How often should I schedule a furnace inspection?

It’s recommended to schedule a professional furnace inspection at least once a year, ideally before the heating season begins. Regular annual inspections help ensure your furnace operates safely and efficiently. If you have an older furnace, it may benefit from more frequent inspections.

What happens during a furnace inspection?

During a furnace inspection, a trained technician will thoroughly examine your heating system. This includes checking for gas leaks, carbon monoxide emissions, calibration issues, ventilation problems, and the condition of components. They will also clean or replace filters, lubricate moving parts, and make necessary adjustments to optimize the furnace’s performance.

Can I perform a furnace inspection myself?

While there are some basic maintenance tasks you can perform, such as regularly changing filters, a comprehensive furnace inspection should be conducted by a qualified professional. Certified technicians have the knowledge, experience, and equipment to detect hidden issues and ensure the safety and efficiency of your furnace. DIY inspections may miss critical problems and can potentially be unsafe.

GFCI Outlets Explained: Why They’re Essential for Safety

TLDR: Electricity makes life more convenient but poses risks like shocks and fires. Ground Fault Circuit Interrupter (GFCI) outlets are essential for safety. They prevent shocks, fires, and work well in wet areas. Compliance with codes and their versatility in applications make them crucial. GFCI outlets monitor and cut off power during imbalances. Testing them monthly is advisable, and older homes may need retrofitting. GFCI outlets are silent protectors ensuring electrical safety.


As the modern world becomes increasingly reliant on electricity, our homes and workplaces are filled with electrical devices and appliances that make life more convenient. While electricity undoubtedly improves our quality of life, it also poses inherent risks, such as electrical shocks and fires. To mitigate these dangers, electrical safety measures have evolved, and one of the unsung heroes in this realm is the Ground Fault Circuit Interrupter (GFCI) outlet. In this comprehensive guide, we will delve deep into the world of GFCI outlets, shining a spotlight on their significance and why they are indispensable for ensuring electrical safety.

Why Gfci Outlets Matter

The Invisible Protector: Why GFCI Outlets Matter

Electrical safety is a paramount concern that transcends the boundaries of our homes, workplaces, and public spaces. Accidental electrical shocks can result in severe injuries, while electrical fires can cause catastrophic damage to property and, more importantly, endanger lives. Amid these potential hazards, GFCI outlets emerge as silent yet vigilant guardians. Let’s delve into the primary reasons why GFCI outlets are essential:

1. Shock Prevention

GFCI outlets serve as a formidable line of defense against electrical shocks. Their primary function is to continuously monitor the flow of electricity through a circuit. If they detect even a minor imbalance in the current, as small as 4-6 milliamperes, they swiftly interrupt the circuit’s power supply. This rapid response can prevent fatal shocks, especially in wet or damp environments like bathrooms, kitchens, or outdoor areas.

2. Fire Avoidance

Beyond shock prevention, GFCI outlets contribute significantly to fire prevention. Electrical fires can result from damaged or faulty wiring, overloaded circuits, or short circuits. GFCI outlets help mitigate the risk of electrical fires by shutting off power when they detect abnormal electrical activity. This proactive measure can prevent overheating and potential ignition sources, thereby reducing the likelihood of fires.

3. Protection in Wet Locations

Wet environments are particularly susceptible to electrical accidents. Water is an excellent conductor of electricity, and even a minor fault in electrical devices can have disastrous consequences when combined with moisture. GFCI outlets are a lifesaver in areas prone to moisture, as they can quickly detect ground faults and cut off the power supply, reducing the risk of electrocution.

4. Compliance with Electrical Codes

Many building codes and regulations mandate the installation of GFCI outlets in specific locations within a building. Compliance with these codes is not just a legal requirement but also a common-sense approach to safeguarding occupants and property. Failure to install GFCI outlets where required can result in fines, failed inspections, and increased liability in case of accidents.

5. Versatile Application

One of the remarkable aspects of GFCI outlets is their versatility. They can be installed in various settings, making them suitable for both residential and commercial use. From kitchens and bathrooms to outdoor areas, garages, and industrial facilities, GFCI outlets offer flexible protection wherever electrical devices are used.

How Gfci Outlets Work

How GFCI Outlets Work

Understanding the inner workings of GFCI outlets is key to appreciating their significance in electrical safety. These outlets employ a straightforward yet highly effective mechanism to detect ground faults and cut off power. Here’s a detailed look at how they operate:

1. Current Monitoring: At the heart of every GFCI outlet lies a continuous monitoring system. It continuously tracks the electrical current flowing through it. To do this, the outlet splits the current into two paths: one through the hot wire and another through the neutral wire. Under normal circumstances, these currents should be equal, indicating that electricity is flowing smoothly.

2. Detecting Imbalance: When a ground fault occurs, such as a person coming into contact with an energized part of an appliance, an imbalance emerges in the current. In this scenario, some electricity flows through the hot wire but doesn’t return through the neutral wire. Instead, it finds an unintended path to the ground. This mismatch between the current in the hot and neutral wires, even if it’s a small amount, triggers the GFCI outlet.

3. Rapid Power Cutoff: As soon as the GFCI outlet detects this imbalance, it springs into action within milliseconds. It instantly cuts off the power supply to the circuit. This swift response prevents the possibility of electric shock or fire, as the faulty circuit is interrupted before it can cause harm.

4. Manual Reset: After a GFCI outlet trips due to a ground fault, it requires manual intervention to restore functionality. Users can accomplish this by pressing the reset button on the outlet. This crucial step ensures that the outlet can resume its protective function once the underlying issue is resolved.

FAQs About GFCI Outlets

Where should GFCI outlets be installed in a home?

GFCI outlets should be installed in areas where there is a higher risk of exposure to moisture. This includes bathrooms, kitchens, laundry rooms, outdoor outlets, garages, and crawl spaces. They are also recommended near swimming pools and hot tubs, as these locations are particularly susceptible to ground faults due to their wet environments.

Are GFCI outlets the same as AFCI outlets?

No, GFCI (Ground Fault Circuit Interrupter) outlets and AFCI (Arc Fault Circuit Interrupter) outlets serve different purposes. GFCI outlets are designed to protect against ground faults and electrical shocks, while AFCI outlets are designed to detect and prevent arc faults, which can cause electrical fires.

Can I replace a standard outlet with a GFCI outlet myself?

While replacing a standard outlet with a GFCI outlet is a straightforward task for those with electrical wiring experience, it’s important to exercise caution. If you’re unsure about your wiring skills or local electrical codes, it’s safer to hire a licensed electrician to perform the installation. This ensures that it’s done correctly and meets all safety requirements.

How often should I test my GFCI outlets?

It’s recommended to test your GFCI outlets at least once a month. You can do this by pressing the “test” button on the outlet, which should trip the outlet, and then pressing the “reset” button to restore power. Regular testing helps ensure that the GFCI outlets are functioning correctly and provides peace of mind regarding your electrical safety.

Are GFCI outlets required in older homes?

Building codes and regulations regarding GFCI outlets have evolved over the years. While older homes may not have had GFCI outlets when originally constructed, it’s often advisable and sometimes legally required to retrofit GFCI outlets in certain locations, especially those with increased moisture exposure. This retrofitting ensures that older homes are brought up to modern safety standards.

Protect Your Home & Your Family – Get Your GFCI Outlets Upgraded!

GFCI outlets stand as the silent guardians of electrical safety, diligently watching over our homes, workplaces, and public spaces. Their ability to swiftly detect and interrupt ground faults makes them indispensable in preventing electrical shocks and fires. Understanding their vital role and ensuring their proper installation in moisture-prone areas is essential for safeguarding lives and property. In the realm of electrical safety, GFCI outlets stand as a testament to the power of proactive protection, silently shielding us from unseen dangers.

Emergency Furnace Repair: What to Do When Your Heat Goes Out

As winter’s chill creeps in, your trusty furnace steps into the spotlight, silently working to keep your home warm and snug. Yet, what happens when this unsung hero unexpectedly falters, leaving you shivering in the cold? This is precisely when the significance of emergency furnace repair becomes apparent. In this in-depth guide, we will explore the crucial steps to take when your heating system fails unexpectedly, providing you with essential advice to ensure your warmth and safety during those frosty moments.

Cold Emergency Furnace Repairs

The Unwelcome Chill: Why Emergency Furnace Repair Matters

When the mercury plummets, and your furnace malfunctions, it swiftly transforms into an uncomfortable and potentially hazardous situation. Your furnace isn’t just a convenience; it’s a vital cog in your home’s heating apparatus, responsible for creating a comfortable and secure indoor environment. When it falters, you must have a plan in place to address the issue promptly. Here’s why emergency furnace repair is so vital:

1. Comfort and Well-Being

First and foremost, a functional furnace is paramount for your comfort and well-being, particularly during the unforgiving winter months. Without a reliable heating system, your home can swiftly become an unwelcoming icebox. Emergency furnace repair ensures that your dwelling remains a warm and inviting sanctuary for you and your loved ones.

2. Health and Safety

In addition to comfort, furnace malfunctions can jeopardize your health and safety. Cold indoor temperatures can lead to health concerns such as hypothermia, especially for vulnerable individuals like the elderly, young children, or those with pre-existing health conditions. Furthermore, certain alternative heating methods, such as using portable heaters or stoves, can be perilous if not handled correctly, increasing the risk of fires or carbon monoxide poisoning. Emergency furnace repair acts as a shield against these threats, keeping your home secure and toasty.

3. Preventing Further Damage

Turning a blind eye to furnace issues can result in more extensive and costly repairs down the line. What may start as a minor malfunction can rapidly escalate into a major problem, potentially necessitating a complete furnace replacement. Swift emergency repairs often nip the problem in the bud before it blossoms into a more substantial issue, saving you both time and money.

What To Do When Emergency Furnace Repair

What to Do When Your Furnace Stops Working

Now that we’ve underscored the importance of emergency furnace repair, let’s delve into the precise steps to take when your furnace unexpectedly calls it quits. Follow these guidelines to maintain your warmth and well-being:

1. Check the Thermostat

Commence with the fundamentals. Ensure that your thermostat is set to the desired temperature and in the “heat” mode. Sometimes, a minor adjustment can rectify the issue.

2. Inspect the Circuit Breaker

Your furnace might have tripped the circuit breaker. Examine your electrical panel and reset the breaker if it has tripped. Should it trip again, refrain from repetitive resetting and reach out to a professional technician.

3. Replace the Air Filter

A clogged or filthy air filter can obstruct airflow, causing your furnace to malfunction. Inspect the filter, and if it’s soiled, replace it. Routinely changing your filter can thwart future issues.

4. Verify the Fuel Supply

For those with gas furnaces, ensure that the gas supply is active. If you have an oil furnace, confirm that you possess an ample reserve of heating oil. Depletion of fuel can cause your furnace to cease operation.

5. Inspect Vents and Registers

Obstructed or closed vents and registers can limit airflow, resulting in heating problems. Confirm that these openings remain unblocked and unobstructed to enable the free circulation of warm air.

6. Look for Error Codes

Modern furnaces often incorporate diagnostic features that display error codes when a problem surfaces. Refer to your furnace’s manual to decode these codes, which can offer valuable insights into the issue at hand.

7. Reset the Furnace

On occasion, resetting your furnace can resolve minor issues. Locate the reset button on your furnace’s control panel and adhere to the manufacturer’s guidelines for resetting.

8. Call for Professional Help

If none of the above measures rectify the issue, it’s time to summon the professionals. Attempting intricate repairs without the requisite expertise can be perilous and may even void your warranty. Professional technicians possess the training and tools to diagnose and remedy furnace problems securely.

Furnace Repair During The Winter

Questions & Answers About Emergency Furnace Repair

Can I attempt to repair my furnace myself during an emergency?

While minor tasks such as changing the air filter can be executed by homeowners, numerous furnace issues necessitate professional expertise. Endeavoring complex repairs without the requisite knowledge can be perilous and may nullify your warranty. Opting for professional technicians for emergency furnace repairs is the recommended course of action.

How long can my home safely go without heat in an emergency?

The duration a home can endure without heat safely hinges on various factors, including external temperatures, insulation, and the health and age of the occupants. In exceptionally frigid conditions, extended exposure to cold indoors can lead to health hazards, particularly for susceptible individuals. Hence, it’s imperative to swiftly address furnace issues or contemplate alternative heating sources to maintain a secure and comfy indoor environment.

What is the typical response time for emergency furnace repair services?

Response times are contingent on your location and the availability of the service provider. During severe weather events or peak seasons, scheduling emergency repairs may take longer. It’s prudent to contact a reputable service provider as soon as you detect furnace issues to secure a swift response.

Conclusion

Confronting an abrupt furnace malfunction can be an intimidating experience, particularly in the throes of winter. However, by comprehending the significance of emergency furnace repair and mastering the actions to undertake when your heat vanishes, you can ensure the comfort and safety of your family. Remember to embark on basic troubleshooting but refrain from hesitating to summon professional technicians for intricate problems. With the correct approach, you can promptly reinstate warmth to your abode and navigate the winter season with tranquility.

LED vs. Incandescent vs. CFL: Which Lighting Option Is Best for You?

TLDR: When it comes to choosing the right lighting for your home, LED bulbs shine as the top choice due to their outstanding energy efficiency, durability, and instant brightness. Incandescent bulbs, although emitting a warm and familiar light, are inefficient and have a short lifespan. CFL bulbs offer energy savings but have drawbacks like warm-up time and a shorter lifespan compared to LEDs. The choice between these lighting options depends on your priorities, but making the switch to LED technology is a step toward greater energy efficiency and sustainability.


Choosing the right lighting for your home can significantly impact energy efficiency, visual comfort, and even your monthly electricity bills. With the advancement of lighting technology, you now have various options to choose from, with three popular choices being LED, incandescent, and CFL (Compact Fluorescent Lamp) bulbs. In this comprehensive guide, we will compare these lighting options, highlighting their strengths and weaknesses, so you can make an informed decision on the best lighting for your needs.

Led Lighting

LED Lighting: Efficiency and Longevity

LED (Light Emitting Diode) lighting has gained immense popularity in recent years for several compelling reasons. LEDs are highly energy-efficient and have a remarkably long lifespan, making them an excellent choice for both residential and commercial settings.

  1. Energy Efficiency: LEDs are known for their exceptional energy efficiency. They use significantly less electricity than incandescent and CFL bulbs to produce the same amount of light. This means lower energy bills and reduced environmental impact. LED bulbs are perfect for everyday lighting needs, such as task lighting in kitchens, reading lamps, or outdoor fixtures.
  2. Longevity: LED bulbs are built to last. They can provide illumination for up to 25,000 hours or more, which is substantially longer than incandescent or CFL bulbs. This extended lifespan reduces the frequency of bulb replacements, saving you money and reducing waste.
  3. Durability: LEDs are solid-state lighting devices, making them more robust and less prone to damage from shocks or vibrations. They are an ideal choice for areas where bulbs may be exposed to rough handling or environmental stressors.
  4. Instant Full Brightness: Unlike CFLs, LEDs reach full brightness instantly when turned on, without any warm-up time. This feature is particularly useful in spaces where immediate illumination is required.

Incandescent Lighting

Incandescent Lighting: Traditional but Inefficient

Incandescent bulbs are the traditional lighting choice, but their popularity has waned due to their inefficiency and relatively short lifespan.

  1. Warm and Familiar Light: Incandescent bulbs emit a warm, soft light that many find comfortable and familiar. They produce a color spectrum similar to natural sunlight, making them a preferred choice for certain applications, such as reading or decorative lighting.
  2. Affordability: Incandescent bulbs are typically less expensive upfront than LEDs. However, their lower energy efficiency means higher electricity bills over time, which may outweigh the initial cost savings.
  3. Short Lifespan: Incandescent bulbs have a relatively short lifespan compared to LEDs and CFLs, typically lasting around 1,000 hours. This means you’ll need to replace them more frequently, which can be inconvenient and less cost-effective in the long run.

Cfl Lighting

CFL Lighting: Energy Efficiency with Some Drawbacks

CFL bulbs were once considered a more energy-efficient alternative to incandescents, but they have some limitations that have led many consumers to switch to LEDs.

  1. Energy Efficiency: CFL bulbs are more energy-efficient than incandescents but slightly less so than LEDs. They use about 70-80% less energy than traditional bulbs, which can result in noticeable energy savings.
  2. Lifespan: CFLs have a longer lifespan compared to incandescents, typically lasting around 8,000-10,000 hours. While this is better than incandescents, it’s still significantly shorter than LED bulbs.
  3. Warm-Up Time: CFL bulbs may take a moment to reach full brightness after being turned on, which can be less convenient in situations where immediate illumination is needed.

FAQs About Lighting Options

Are LED bulbs more expensive than incandescents and CFLs?

LED bulbs typically have a higher upfront cost compared to incandescent bulbs but are more affordable than CFLs in the long run due to their energy efficiency and longer lifespan.

Can LED bulbs be used with dimmer switches?

Many LED bulbs are dimmable, but it’s essential to check the product label or description to ensure compatibility with your specific dimmer switch. Some older dimmer switches may not work well with LED bulbs.

Do CFL bulbs contain mercury, and are they recyclable?

CFL bulbs do contain a small amount of mercury, which is a concern for disposal. Many hardware stores and recycling centers accept CFL bulbs for proper disposal and recycling to prevent environmental contamination.

Can I use LED bulbs in outdoor fixtures?

Yes, LED bulbs are suitable for outdoor fixtures and are well-suited for cold temperatures, making them an excellent choice for outdoor lighting.

Which lighting option is the most environmentally friendly?

LED bulbs are the most environmentally friendly lighting option due to their energy efficiency, long lifespan, and minimal environmental impact.

Conclusion

Choosing the right lighting option for your home depends on your specific needs and preferences. LED bulbs stand out as a top choice for their exceptional energy efficiency, longevity, and instant brightness. While incandescent bulbs offer a warm and familiar light, their inefficiency makes them a less practical option. CFL bulbs provide energy savings but have drawbacks like warm-up time and a shorter lifespan compared to LEDs. Ultimately, the decision between LED, incandescent, or CFL lighting will depend on your priorities, but the move towards LED technology is a step towards greater energy efficiency and sustainability in your home.

Ready to upgrade your lighting and make your home more energy-efficient? Contact us today at Cummings Plumbing, Heating & Cooling to explore the best lighting solutions for your needs. Our experts are here to assist you in making the right choice and ensuring a brighter and more sustainable future for your home.